

Every so often, you’ll trade dispatcher duties for something more hands-on: hacking. Instead of sending a hero out into the field, you take direct control, guiding a small avatar through a grid-like maze to breach a system before time runs out. It’s a fun change of pace from the rest of Dispatch, but it’s also one of the game’s trickiest mechanics, and it only gets harder as the story goes on.
This Dispatch Hacking guide covers everything you need to know about hacking in Dispatch: how the core mechanic works, the tricks that make each new twist manageable, and a full breakdown of every hacking puzzle by episode.
In This Guide You’ll Find:
H4ck3d by R0b3rt Trophy
This is a trophy given to player who pass all the Hackings without failing a single one. There are to hackings that are optional and you don’t have to do. Remember that if you pass those, you will not get the trophy. However in later episodes where you have to chose between two Hacking puzzles, the one that you don’t do is not considered a failure and doesn’t affect your path to getting the trophy.
Episode-by-Episode Solutions
Hacking puzzles show up throughout every episode of Dispatch, and they get progressively more difficult: from simple tutorial mazes to multi-stage puzzles with inverted controls and electrical hazards. Use the links below to jump straight to a full walkthrough for the episode you’re stuck on:
- Hacking Solution for Episode 1
- Hacking Solution for Episode 2
- Hacking Solution for Episode 3
- Hacking Solution for Episode 4
- Hacking Solution for Episode 5
- Hacking Solution for Episode 6
- Hacking Solution for Episode 7
- Hacking Solution for Episode 8
How Hacking Works
You may encounter a Hacking Puzzle mostly during the shift or sometimes during the story scenes. But either way the process is the same. You have to guide an avatar through a maze-like grid to reach the end point, before you run out of time. An orange bar tells you how much time you have left. On your way there are gaps to cross, and early on that’s simple; as you go forward you’ll have to do more difficult things like finding a password down a side branch.
Gaps and Hammer Icons
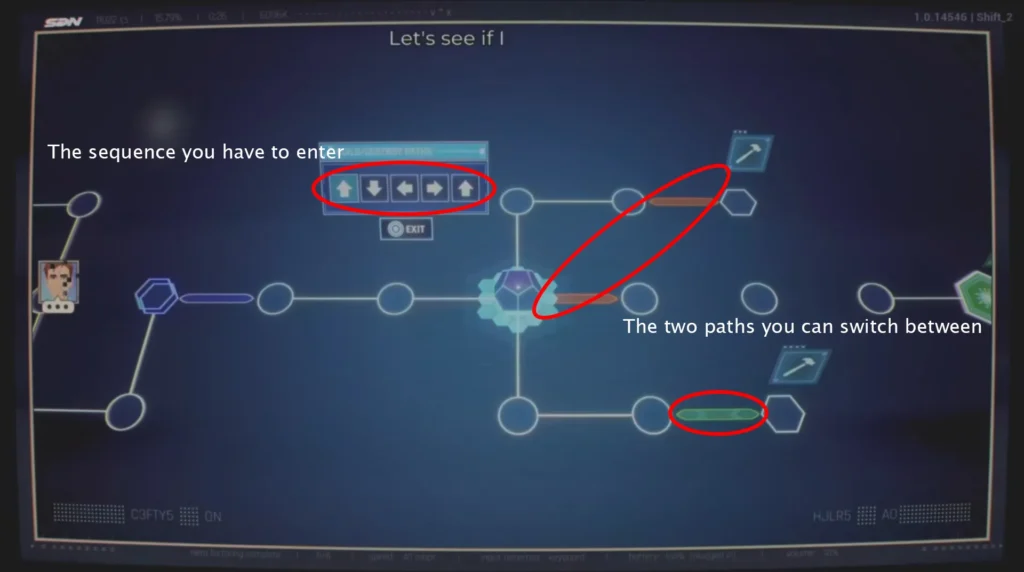
If you reach a gap and you see a hammer icon there, you can build a bridge across the gap by activating the node. In order to activate the node, you have to enter an arrow sequence. Sometimes there are two hammers on the icon and by reactivating these the path you built disappears, and an alternative appears. By reactivating the hammer icon you can switch between these two paths.
Passwords and Codes
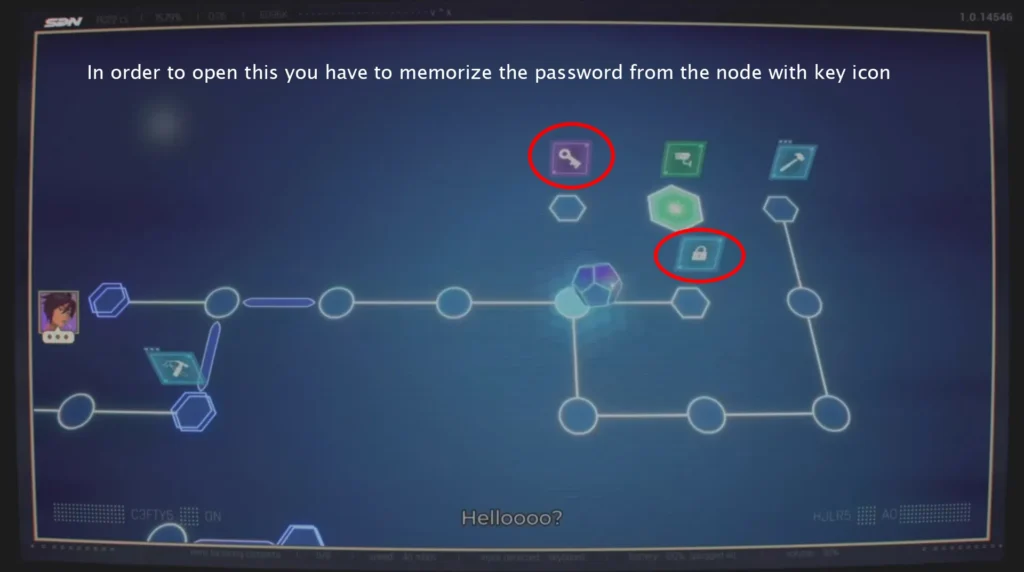
As I said in order to activate a node with a hammer icon you have to enter a sequence of arrows that you can see right there. But sometimes these specific arrows are not given to you and you have to find them. These nodes are marked with a padlock icon. Head to the key node, memorize the code, then return to the padlock and enter the password there. As you progress through the game, the passwords get longer and they might even be split across two nodes.
Anti-Viruses
This is another thing you’ll see in more advanced levels. When you enter an antivirus’s patrol area, a red avatar will chase you and if it gets to you, then you have to start over. Running away from them and baiting them into the controlled loop is the best approach when encountering an antivirus. In more advanced levels you’ll be able to destroy them using an electric charge.
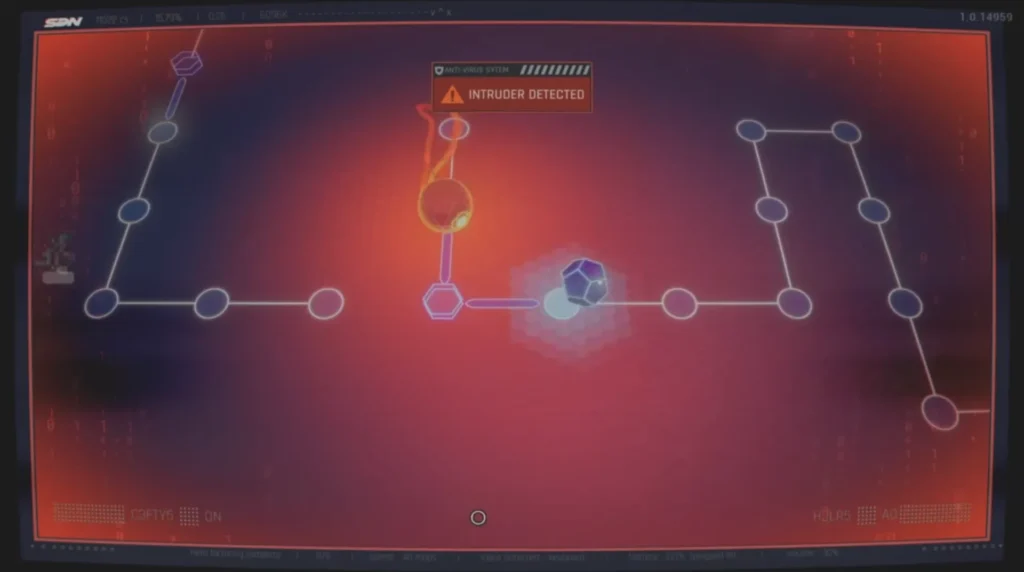
Electrical Charges
This is another mechanic that was introduced in the later episodes. You have to collect charges to open and close certain paths. Also you can destroy antiviruses using electrical charge.
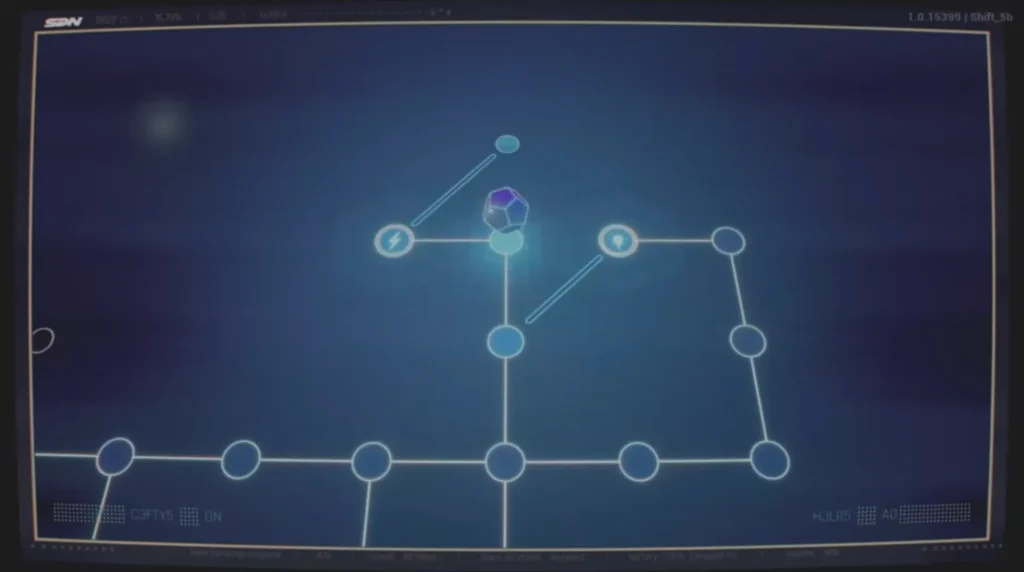
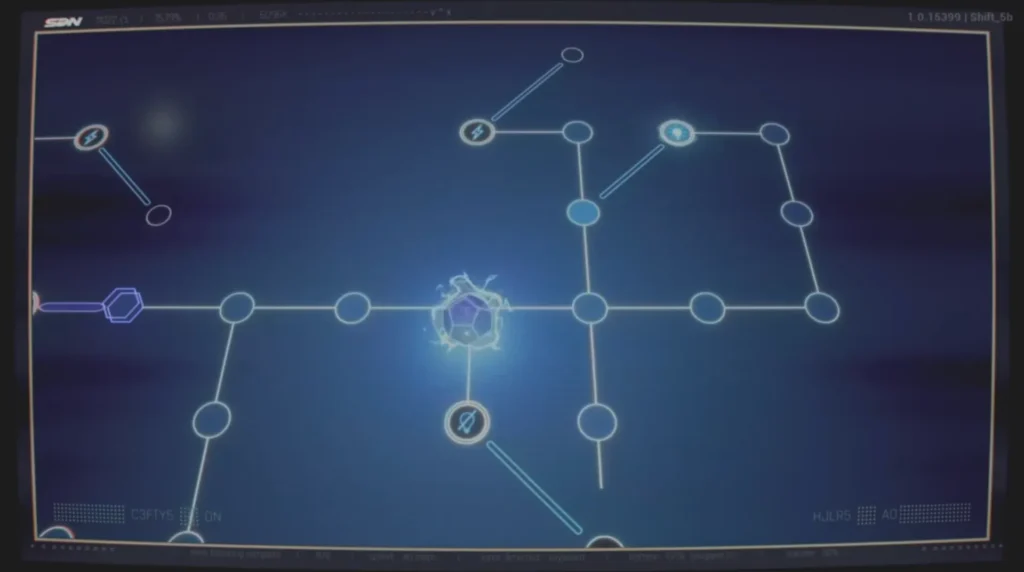
If a sequence is still ruining an otherwise great episode, there’s no shame in flipping on unlimited hacking attempts in the settings — the story is the point, and it’s waiting on the other side of the maze. Stuck on a specific one? Jump into our episode-by-episode breakdowns above for the exact route, code, and antivirus timing for every hack in the game.