

You just got dumped into the Delta Quadrant with a messy ship and a miserable crew. This is Star Trek Voyager: Across the Unknown. Think of it as a mix between a choose-your-own-adventure novel and an RPG where the dice decides your fate. Your goal is simple. Take the Voyager (your ship) across twelve sectors of the Delta Quadrant back to Earth. But your journey is far from simple or easy. Can you manage?
In this Voyager Across the Unknown guide, we’ll dive deep into everything you need to know about this game, from resource management to battle strategies. Read it entirely before launching the game.
What You’ll Read:
Pick the Right Difficulty
This game is unforgiving. You have three difficulty options. Pick the easiest one for your first run.
- Adventure: Start here. You still face serious threats but you’ll have enough resource drops to learn the mechanics.
- Survival: Enemies hit harder and planets have fewer resources. Save this for your second playthrough.
- Years of Hell: Combat is lethal. Away missions require perfectly synergized hero traits. One bad dice roll can end your campaign.
Star Trek Voyager Across the Unknown Guide for Survival
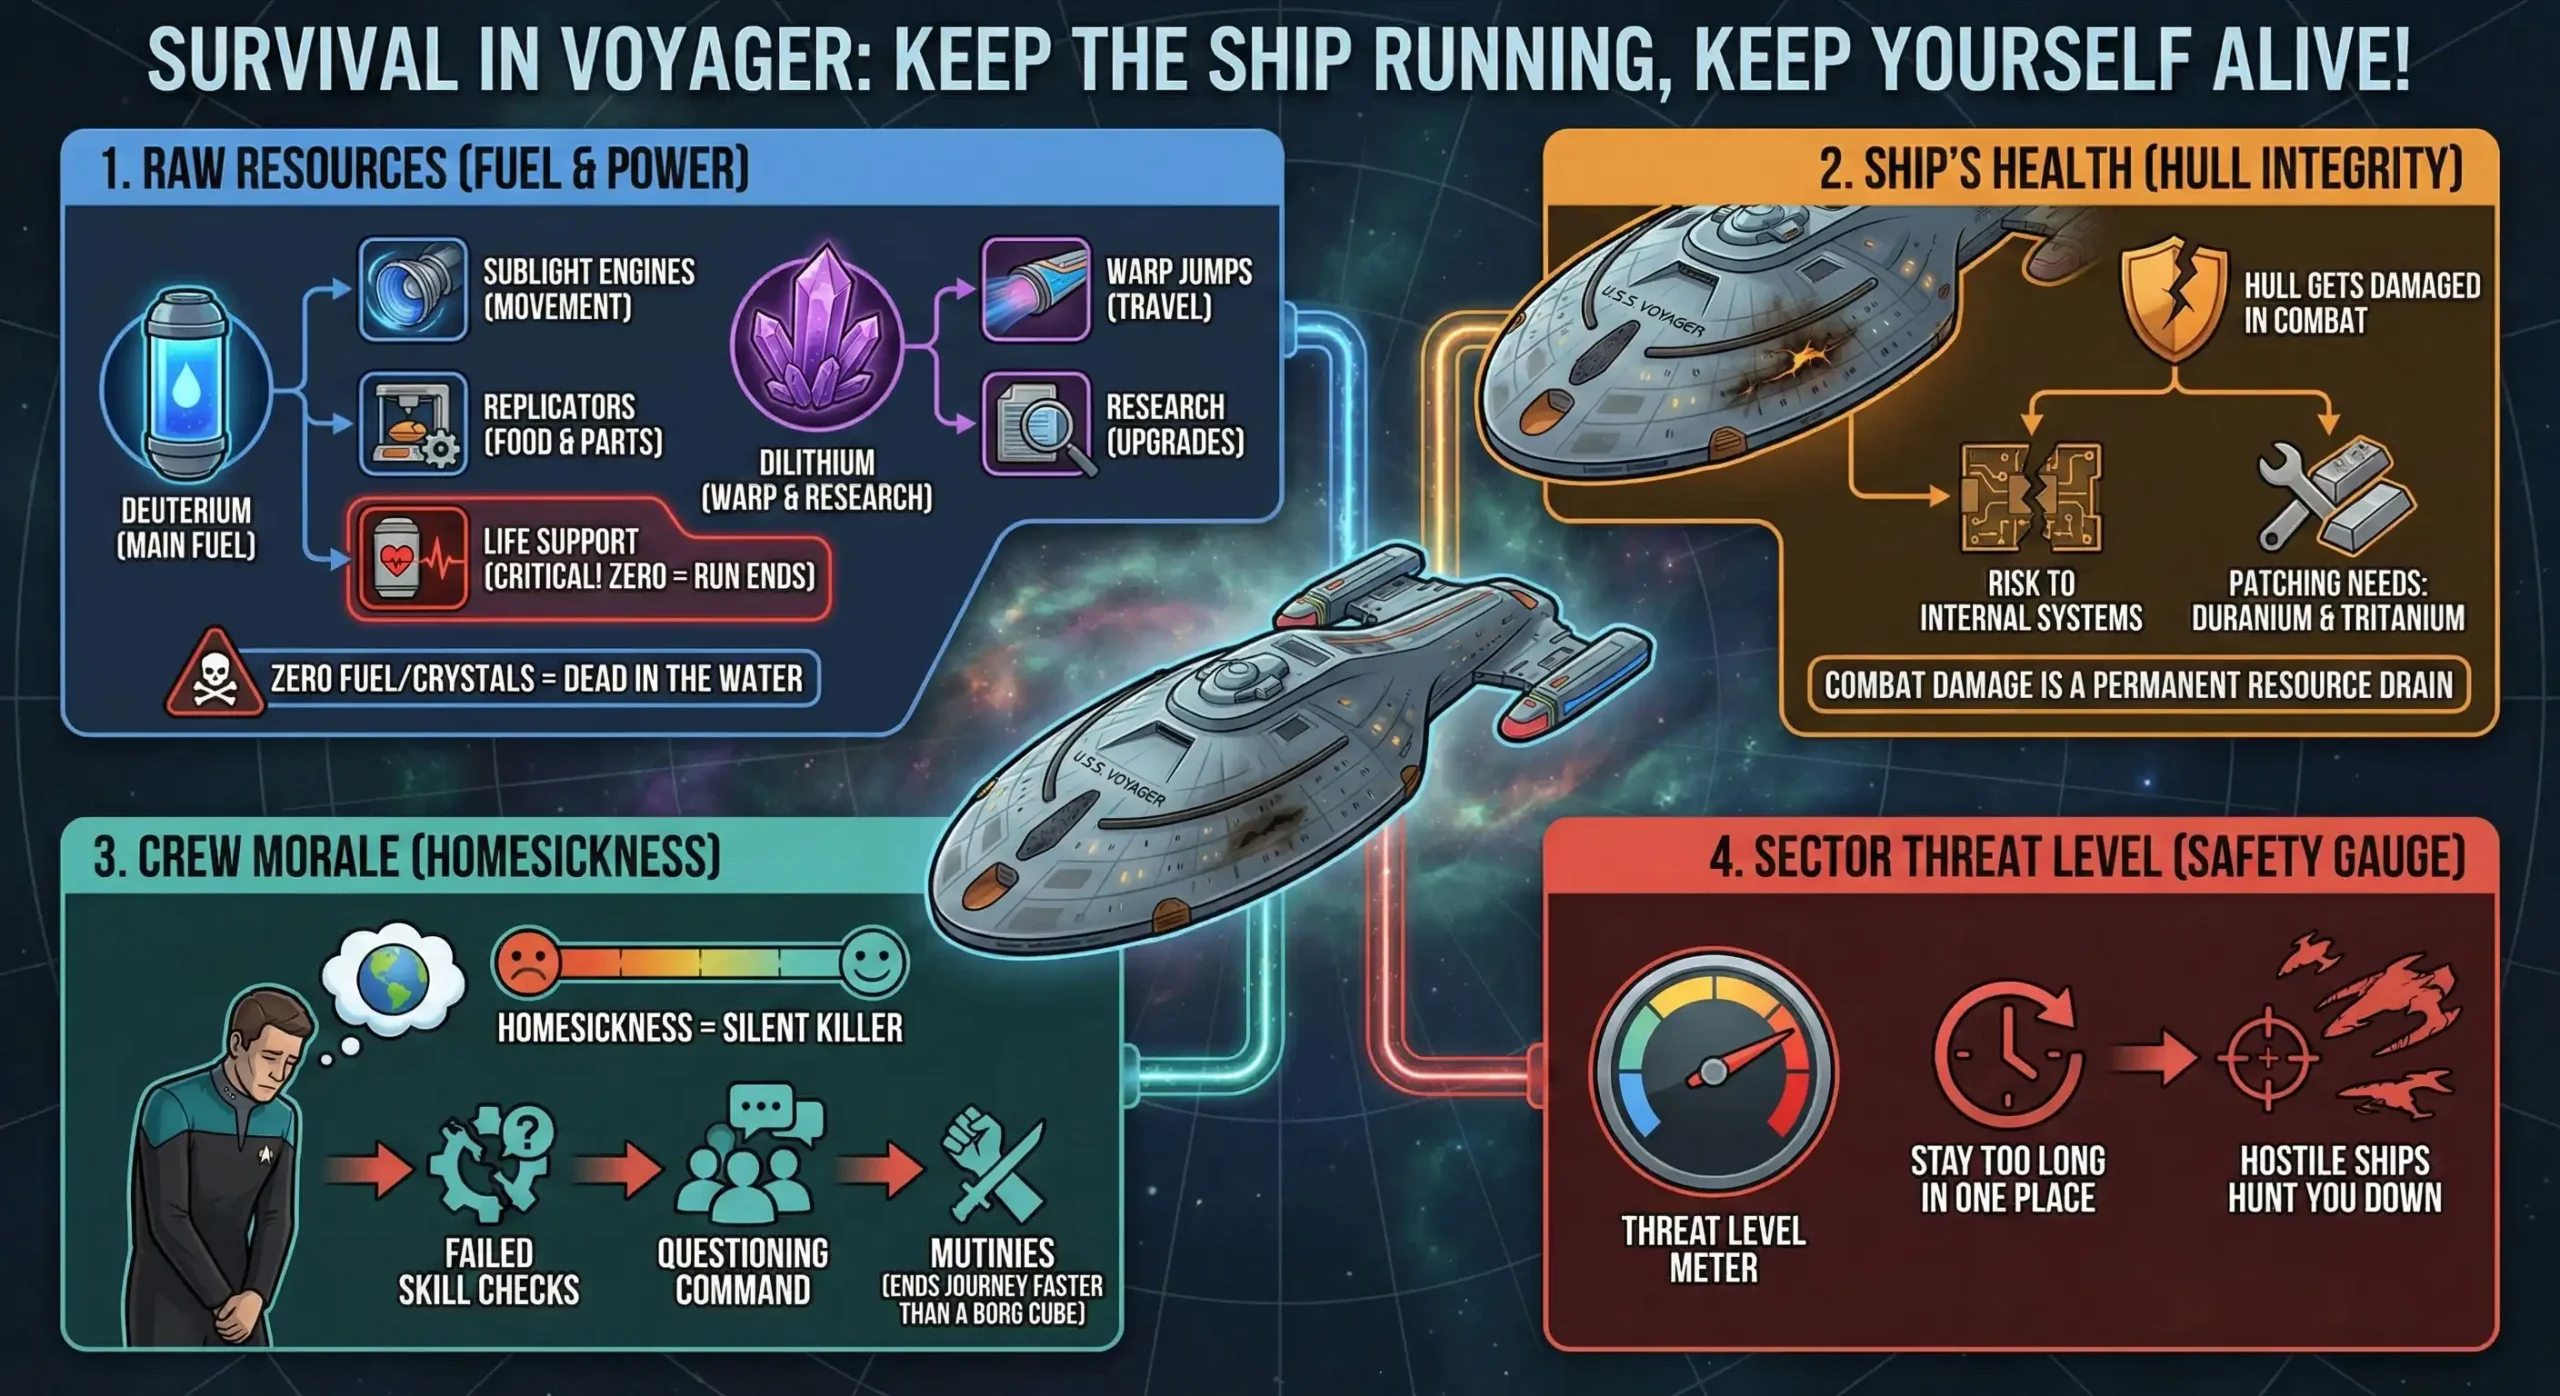
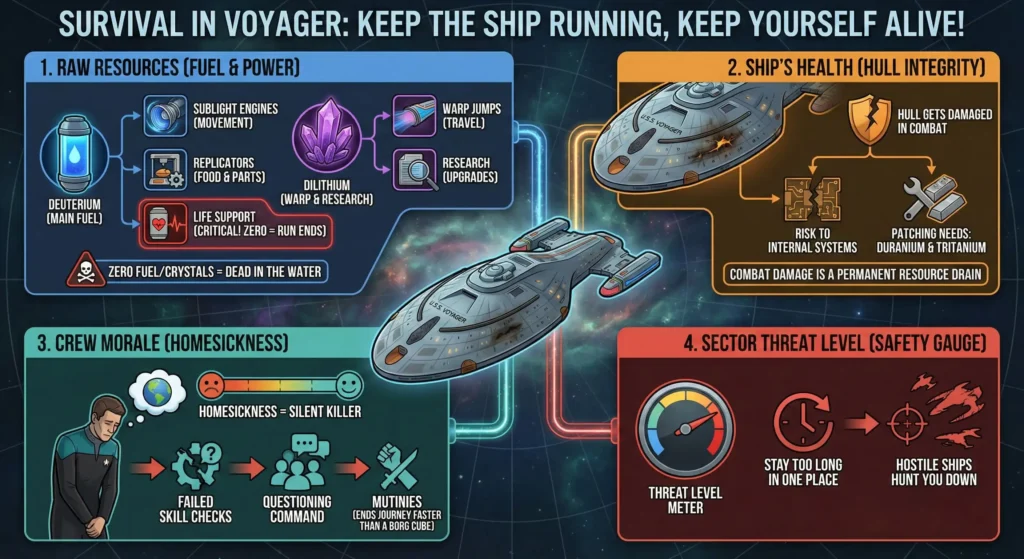
Voyager is your ship, and you need to understand what keeps it running. If it survives, you survive! As the captain of the ship, you always have to check four stats. Whenever I ignored survival management, I was chewed up by the Delta Quadrant.
1. Raw Resources: Deuterium is your main fuel. You use it for your sublight engines (to move the ship) and for replicators (to 3D print food and ship layout parts), but most importantly, it powers life support. If life support goes dark for a long time, your run ends.
Dilithium is also used to warp jump or do research. If either drops to zero, you are dead in the water.
2. Ship’s Health: Your ship’s hull gets damaged in combat. Keep it in check and spend resources to patch it. More importantly, every hit to the hull is a risk to your internal systems.
Combat damage isn’t just a number; it’s a permanent resource drain because you’ll need Duranium and Tritanium to patch the holes in the combat room.
3. Crew Morale: Being stranded in space for too long can make you crazy! “Homesickness” is how you measure morale and it’s a silent killer.
A depressed crew doesn’t just fail skill checks; they start questioning your command, and even lead mutinies that can end your journey faster than a Borg cube.
4. Sector Threat Level: Watch your sector’s threat level. This works as a meter that shows how safe it is to stay in one place. If you stay in one sector long enough, hostile ships will find and hunt you down.
Resource & Power Management
This game makes you learn efficiency, because if you’re not efficient, you can’t survive past Sector 3. But how can I be efficient?
Never Run Out of Fuel
Fuel is everything! Every time you move or use the replicator just for the sake of it, you’re wasting precious fuel. Low Deuterium? Forget about taking detours to scan random moons. If it drops to zero, you’ll go into Gray Mode, which means you’ll lose everything but basic life support.
Pay attention to your Dilithium as well. If you run out of it, you can’t warp out of a bad neighborhood or research the tech you need to survive. If you lack these essential crystals, roughly seventy percent of the pathways in the game are completely closed off to you.
Surviving Sector Transitions
The game’s campaign consists of twelve vast chapters that each take place in a distinct sector. When you complete a sector’s main quest, you unlock the ability to warp to the next sector. Once you leave a sector, you can never go back. And your ship enters the new sector in the same state as the last one.
Don’t carelessly rush through each sector, unless you are running for your life from a huge force. Take your time to loot resources and take whatever you can carry. Sectors three and four are specially good for gathering resources as they get completed quickly.
Balance the Power Source
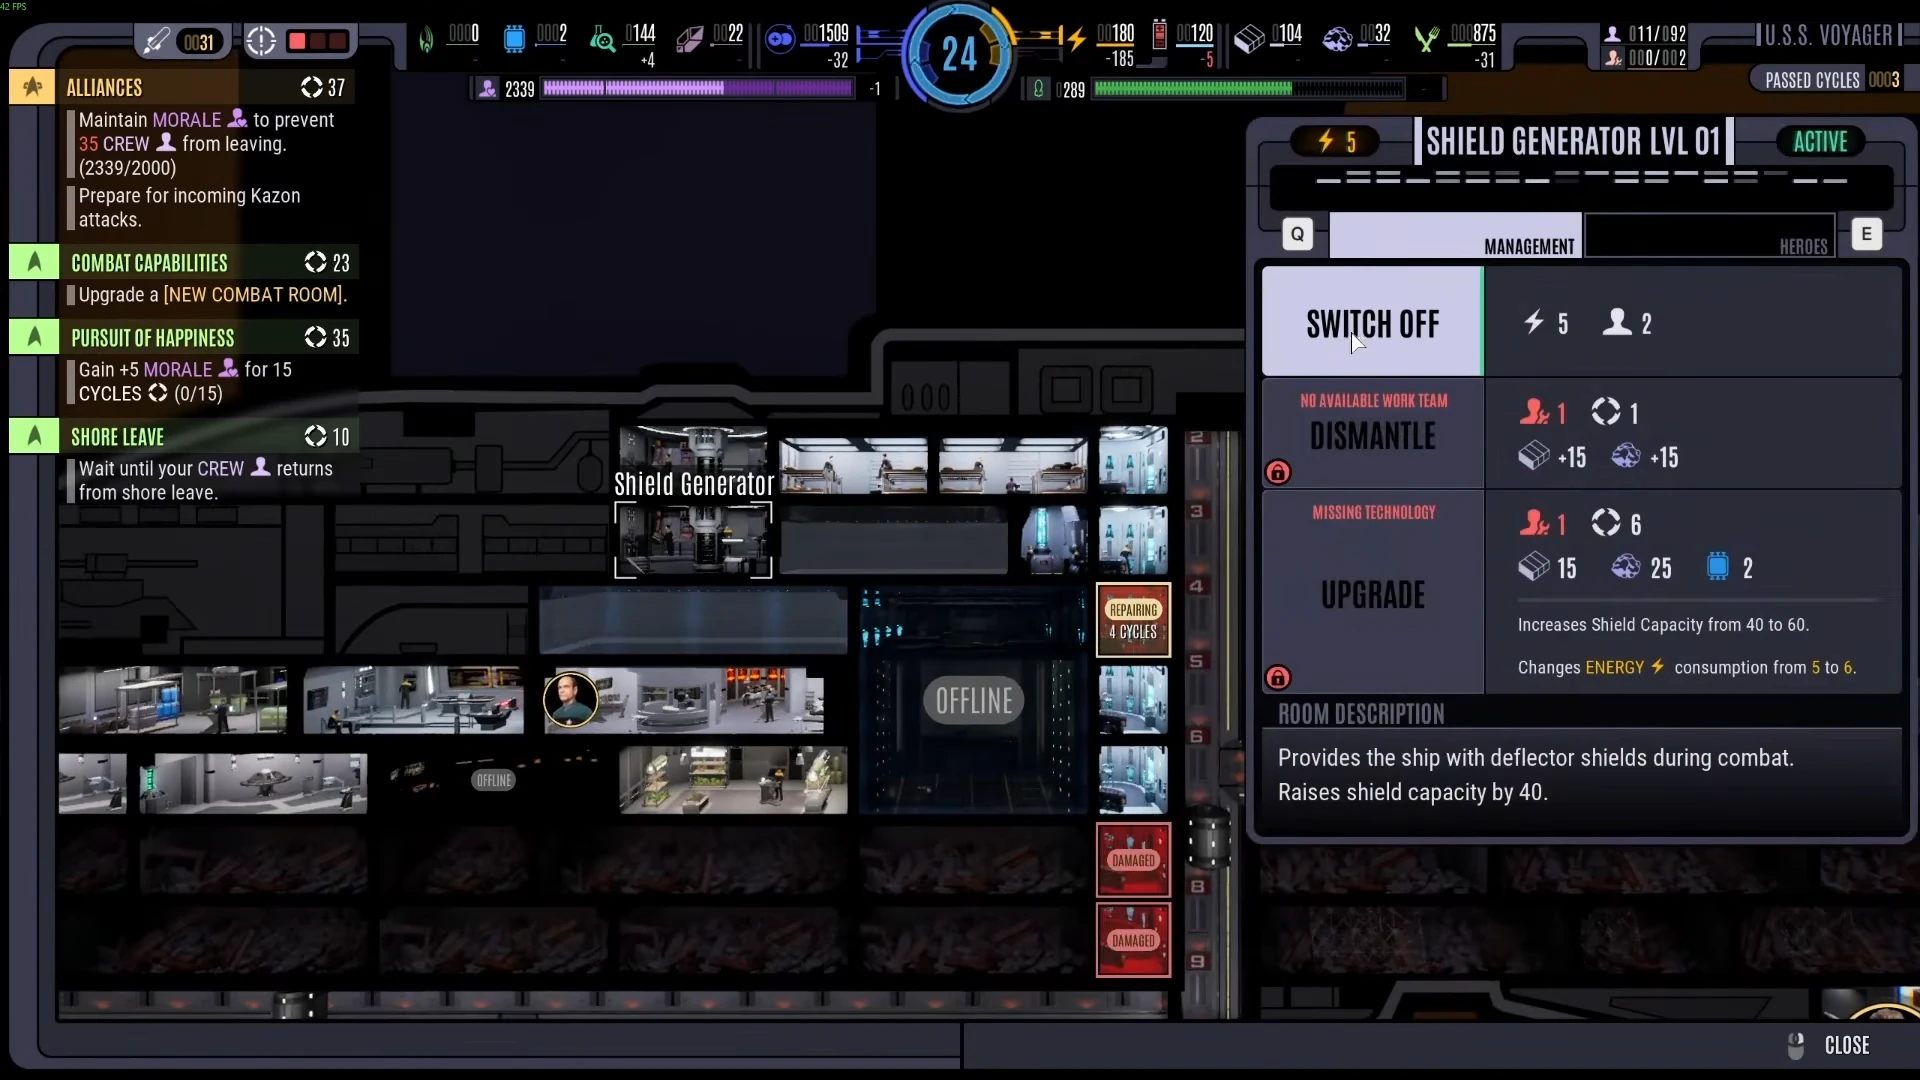
You can’t run the whole ship at once. If you power the Holodeck, Science Labs, and Warp Core simultaneously, you’ll drain your fuel in minutes. You need micromanagement.
Turn off unnecessary rooms. Cut power to the crew quarters when morale is stable. Even intentionally force Gray Mode during quiet cycles to save resources for the next jump.
Manage the Storage Capacity
Most new players, like myself, always fall for the storage trap. Your initial capacity is tiny. To add insult to injury, each Cargo Bay can only hold one resource type.
Build bays early and use them to store Deuterium. If you’re carrying useless trade goods or excess scrap, dump them. If you don’t have room for fuel, it’s over.
Star Trek Voyager Across The Unknown Walkthrough Rewards
Do not rush through the map blindly. The game hides mandatory tech upgrades behind specific random encounters. If you warp out of a sector too early, you lose access to it forever.
Vital Sector Rewards
The Delta Quadrant is unforgivingly vacant, but completing specific encounters grants you game-changing rewards. Here is a breakdown of what they are and where to find them.
| Reward | Source Location | Primary Benefit |
| Vidiian Surgical Device | Sector 2 (Phage Distress Beacons) | Cures permanent crew diseases to prevent random event deaths. |
| Micro-Wormhole Comm Relay | Sector 2 (Eye of the Needle) | Grants a massive permanent Morale boost by sending messages to the Alpha Quadrant. |
| Metreon Shielding | Sector 2 (Jetrel) | Grants complete immunity to radiation hazards, solar flares, and nebula storms. |
| Raven Astrometrics Data | Sector 5 (The Raven) | Reveals all hidden points of interest, hostiles, and resources on the sector map. |
| Species 8472 Bio-Armor | Sector 5 (Prey) | Provides passive, free hull regeneration over time without spending Duranium. |
Warning: If you warp to Sector 3 without finding this, sick crew members will slowly die off.
If you want to learn about the game’s hidden tech, like regenerative fusion, read my Star Trek Voyager Across The Unknown: All Hidden Technologies guide.
Star Trek Voyager Across the Unknown Tech Tree
You start the game with a busted ship. The default systems are terrible. You need to upgrade your tech tree immediately to survive this nightmare.
Essential Tech & Ship Building
The right research and ship modules are just as important as scavenging. Here are the core upgrades you should rush to build and the catch that comes with them.
| Upgrade | Source Location | Primary Benefit | Hidden Catch / Warning |
| Plasma Torch | Tier 1 Engineering Tree | Allows you to salvage Duranium from debris to patch your hull for free. | Missing this forces you to pay exorbitant Starbase repair fees, draining resources. |
| Engine Efficiency | Tech Tree Upgrade | Permanently lowers the Deuterium fuel cost for all ship movement. | Requires a heavy upfront Dilithium investment that must be balanced carefully. |
| Hull Reinforcement | Tier 2 Engineering | Dramatically increases hull integrity to prevent catastrophic failure in combat. | Essential for surviving torpedo hits; neglecting this makes space battles unwinnable. |
| Improved Scanners | Science Lab Research | Enhances early detection of hostiles and resource-rich anomalies. | Should be prioritized immediately after hull upgrades to avoid deadly ambushes. |
| Borg Tech Integration | Permanently lowers the Deuterium fuel cost for all ship movements. | Provides massive, overpowered buffs to your shields and weapon damage. | Adds an “Assimilation” hazard; critical systems may randomly shut down during combat. |
| Neelix’s Mess Hall | Ship Building Menu | Cooks meals from scavenged biological supplies instead of draining fuel. | Prevents the massive morale decay caused by relying on free emergency rations. |
Repairing for Free: The Plasma Torch
Bad news! Hull damage is permanent. Starbases charge a fortune for repairs. You need to unlock the Plasma Torch in the Tier 1 Engineering tree.
This tool lets you salvage Duranium scrap from destroyed enemy ships and asteroid fields. You can then use that scrap to patch your hull.
If you don’t get Plasma Torch, it’s much more expensive to keep the ship in one piece. And there’s always one more combat on the way. Trust me.
Stretching Your Fuel: Engine Efficiency
Every movement burns a lot of Deuterium. The Engine Efficiency upgrade permanently drops that fuel cost. It costs a lot of Dilithium upfront. Buy it anyway. The investment pays for itself back by Sector 3.
Many players skip this upgrade and run out of fuel mid-game, which essentially means death for a game whose main objective is movement. Get the upgrade as soon as your warp core is stable.
Pro-Tip: After you upgrade your engines, focus on Hull Reinforcement and Scanners. You won’t survive hard fights if one torpedo can destroy your ship.
Risking it All for Buffs: The Borg Tech Dilemma
As you go through the Delta Quadrant, you’ll come across disabled Borg cubes. Scan them to unlock the option to integrate Borg tech into Voyager. These upgrades give you massive buffs to shields and weapon damage. But there is a massive catch.
Borg tech increases the risk of a Cube Interception, which is practically impossible to survive in the first three sectors. This means the game’s randomness system works against your favor and makes you a more obvious target. Do you think the raw combat power is worth the risk?
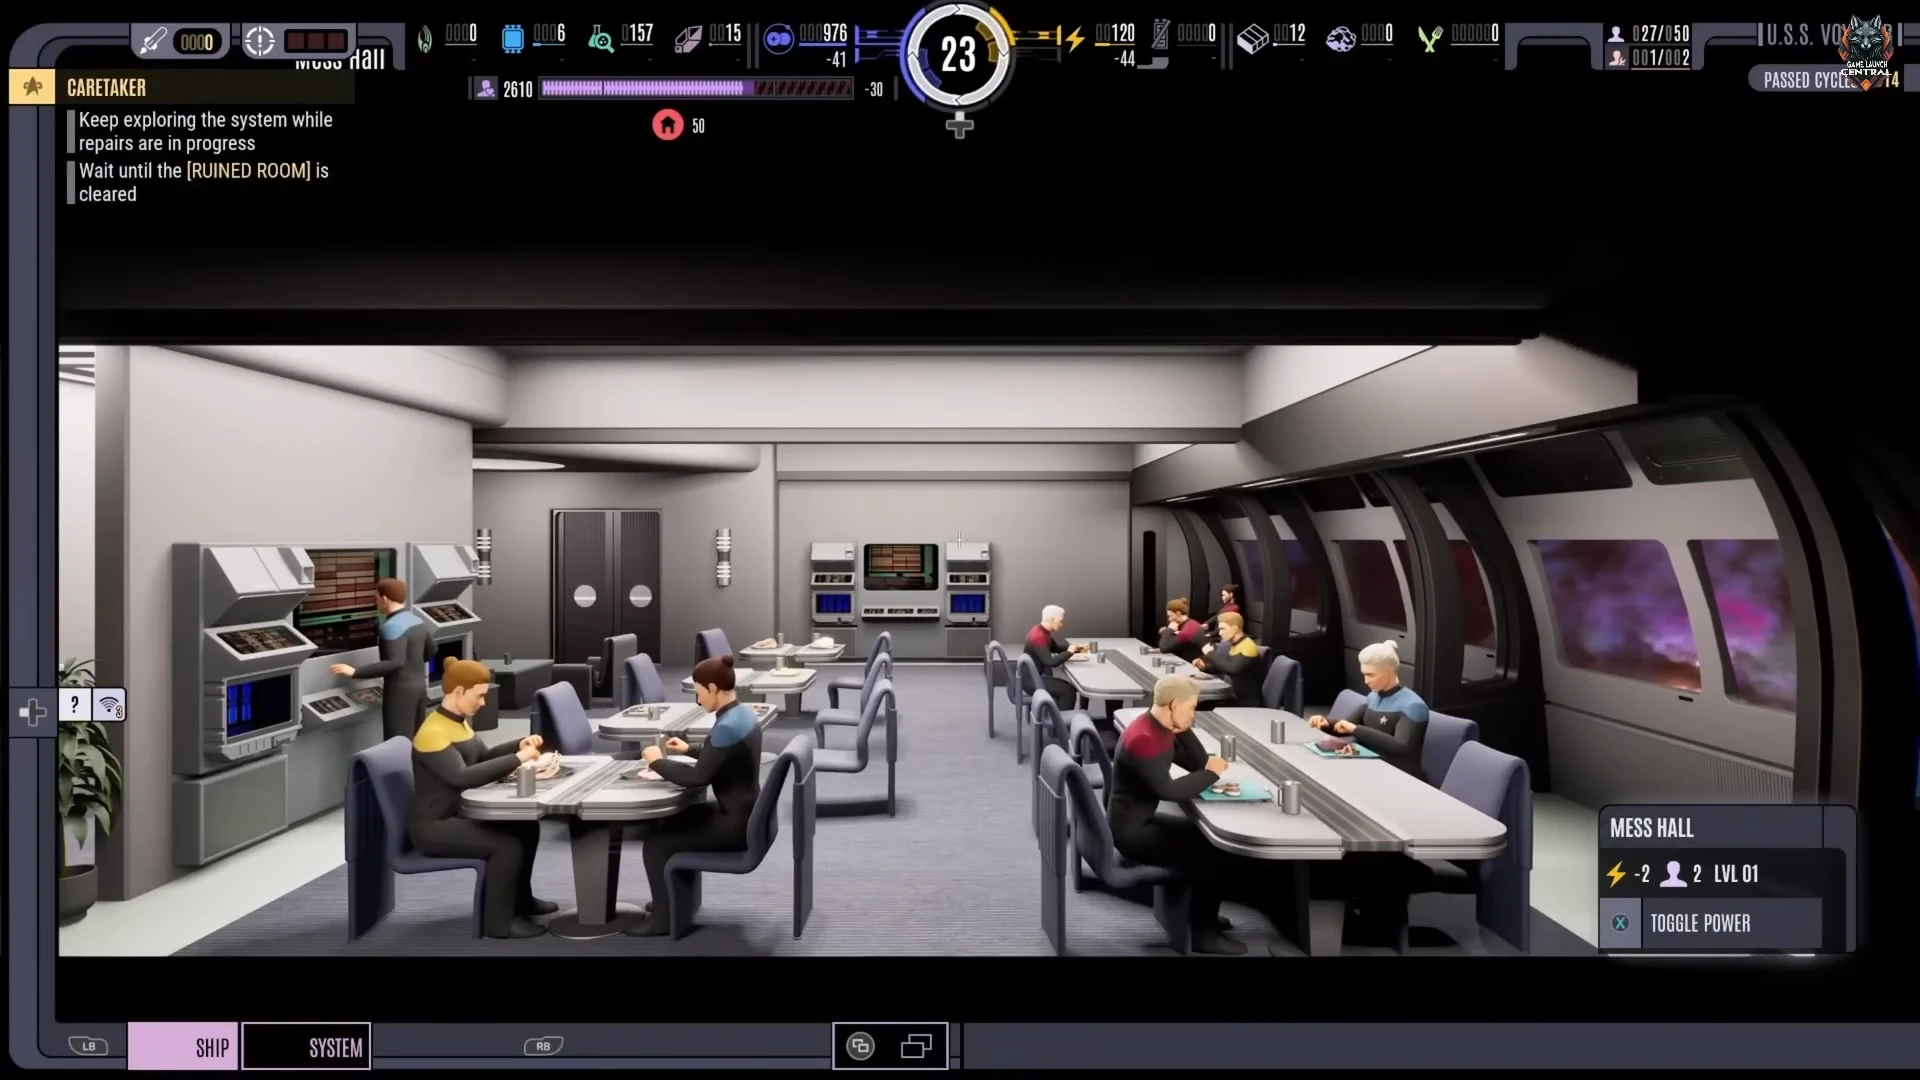
Feeding Your Crew: Neelix’s Mess Hall
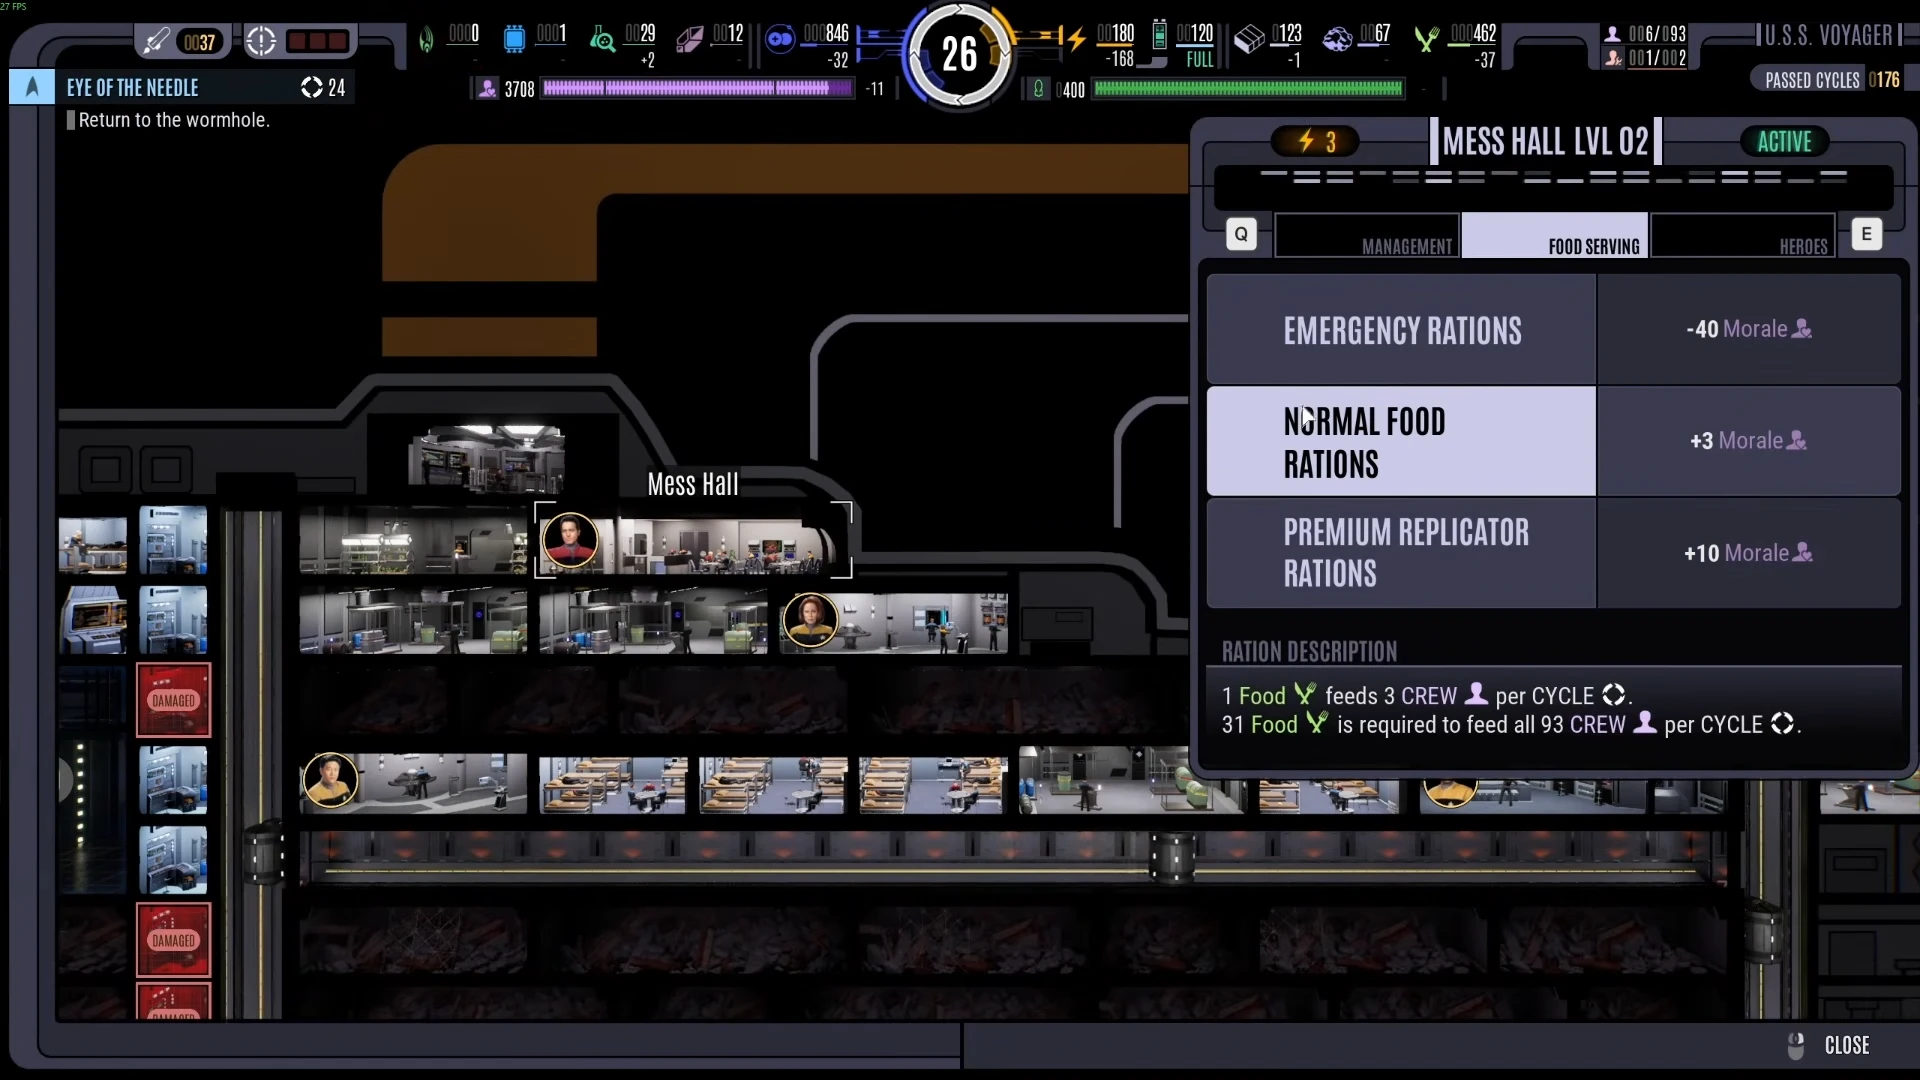
The Mess Hall should definitely be on your list of first places you build. You can technically survive on emergency rations, but they constantly bring down morale and will quickly break your crew.
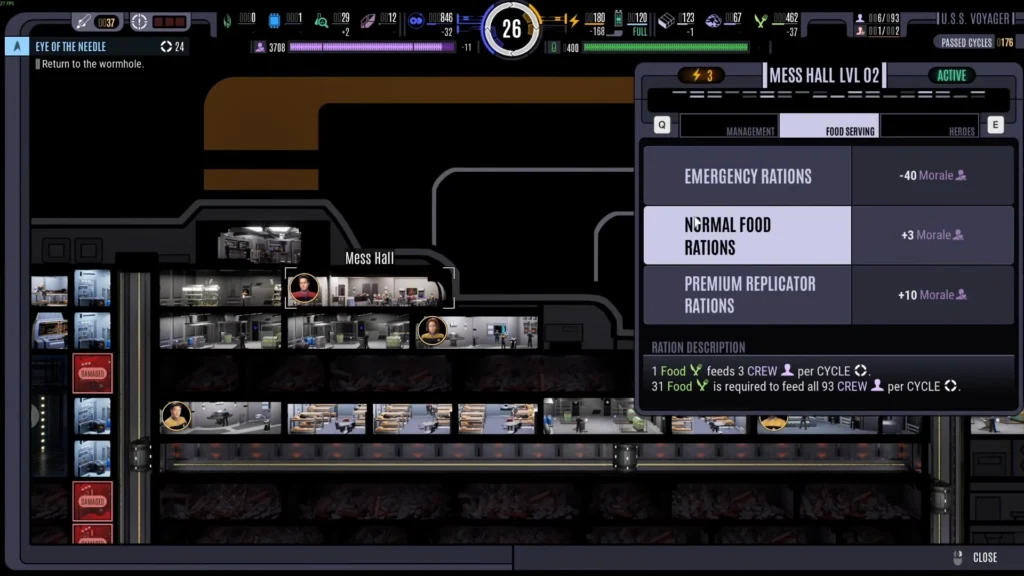
This room upgrade allows you to process raw biological salvage into real food. That means you are trading a common resource for invaluable crew stability and keeping Voyager functioning smoothly.
Crew Management & Away Missions
Your ship is only as good as the crew running it. If people lose their minds or die, Voyager stops moving. You have to keep everyone alive, rested and sane.
Homesickness and Morale Decline
In Across the Unknown, Homesickness is as real a threat as hostile ships. Each cycle that passes, their morale meter drops at a natural rate. A depressed officer has a higher chance of failing critical skill checks. He may even stir up a mutiny.
You need to keep their spirits up. Build recreation rooms as soon as you have spare materials. And when you sense conflict, try to navigate it with diplomacy to create a more stable environment.
Feeding Your Crew
Food is a brutal trade-off. You can replicate real meals, but they cost Deuterium. The only “free” food is the emergency rations. The catch is that rations tank morale fast. So serve emergency rations if your fuel tank is absolutely empty.
Switch Your Away Team
Away missions are incredibly dangerous. Permadeath is always active. That means if an officer dies on a planet, they are gone forever. Do not send the same team on every mission. This can quickly lead to fatigue.
A tired officer takes a massive penalty to their dice rolls and will likely die. Switch your Away teams constantly. I’d also recommend mixing junior officers into the lineup to give your senior staff time to recover.

Pro-Tip: Keep Captain Kathryn Janeway on the bridge at all times. As the Captain, she is restricted from joining away missions anyway, which is exactly why you have Chakotay to handle the dangerous ground work. Instead of risking her life in the field, focus on leveling her up through dedicated side missions.
Space Combat Tactics
If you like to constantly fight space wars, you’ve picked the wrong game. Voyager is an exploration vessel, not a warship. You need to be smart about when to engage and when to run.
When to Engage in Combat
Combat can be a tempting trap. Every time you fight, you risk permanent hull damage and crew permadeath. Even if you win, the resources you spend on repairs sometimes outweigh the salvage you recover.
If you encountered hostile factions, diplomacy and stealth options should be your priority. Only fight when it gives you an advantage or when you have to, like with the Trabe or Kazon. It’s best to think like a politician and not make any rash decisions.
Hero Synergy Tactics
Your heroes’ synergy is the best way to win space battles without taking heavy hull damage. A highly effective active team I’d recommend is Tuvok, Harry, and Chakotay.
Here is the manual timing strategy:
- Harry: Use his ability immediately when combat starts for an early advantage.
- Torpedoes: Wait for the enemy’s shields to drop, then manually fire.
- Chakotay: Activate his ability to increase your fire rate as you switch to a new target.
- Tuvok: Trigger his ability to instantly strip the new target’s shields.
Do Not Use Auto-Combat
When you do have to fight, do it yourself. The game’s AI has zero strategy. If you let it take over, it will just shoot phaser blasts at the enemy until they die. It doesn’t aim for their weak spots, nor does it try to minimize the damage you take.
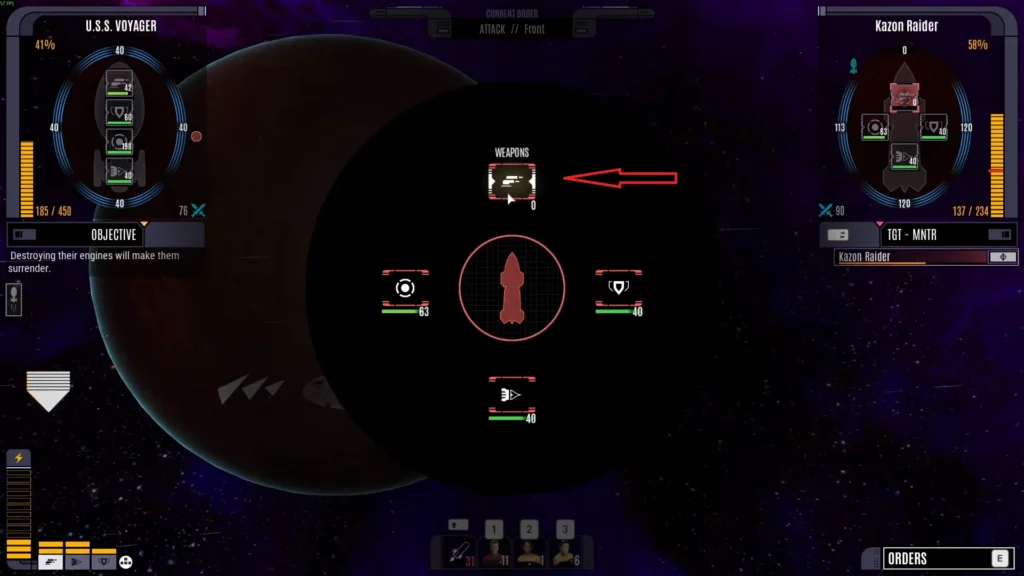
I always paused the game as soon as combat started. This lets you assess the battlefield and take manual control over different sections of the ship.
Fighting Strategy
You must manually target enemy systems to fight more efficiently. Check the enemy ship’s shield grid. If their forward shield is down, navigate Voyager so your weapons fire into that exposed quadrant.
Do not just shoot the center mass. Target specific vital units. For example, hit their weapons to reduce the damage you take. Aim for their sublight engines if you just need to cripple them and run away. Strategy is always better than brute force.
Star Trek Voyager Across the Unknown Tips
Across the Unknown does not explain its hidden mechanics. You have to learn the meta-strategies to survive the highest difficulties. Here are some tricks I learned to beat the system.
Using the “Sleep” Command
Sometimes the best action is no action. The crew depends heavily on the “Sleep” command to skip cycles. It’s a long journey, and it’s best to sleep through it.
If your ship is parked in a safe spot and the power grid is balanced, go to sleep. This way, you can passively generate resources or wait out a hostile patrol.
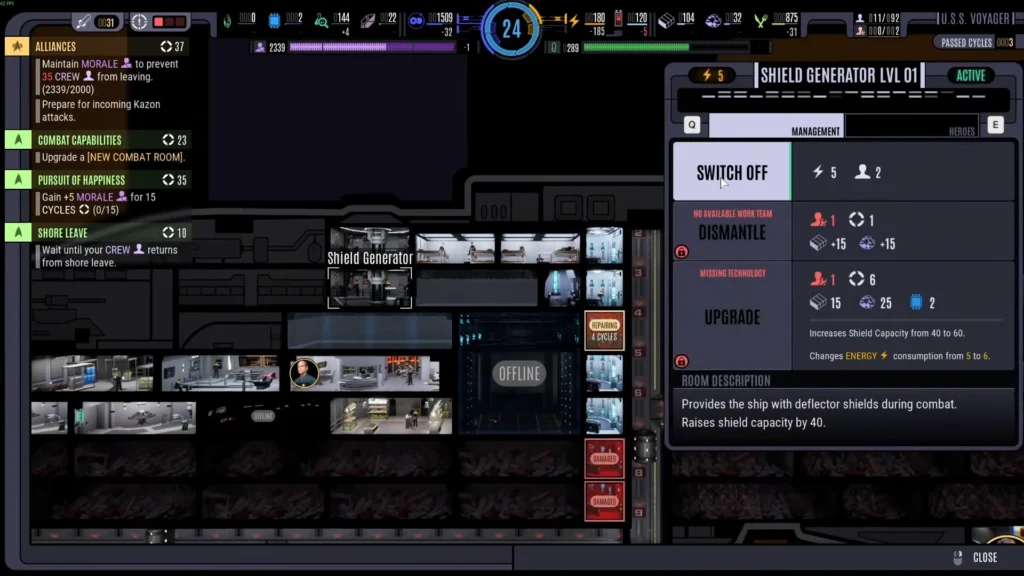
Warning: Be careful with this trick. Sleeping still increases the overarching sector threat level. That means if you sleep for too many cycles, you might wake up surrounded by elite hunters.
Crafting Bio-Neural Gel Packs
Most new captains think food is only useful for keeping the crew alive and morale high in Neelix’s Mess Hall. However, food is actually a critical secondary crafting material!
You need a surplus of biological supplies to manufacture Bio-Neural Gel Packs. If you spend all your food just for feeding the crew, you will eventually hit a wall in the mid-game where you cannot craft these advanced computer systems.
Leveraging the Aeroshuttle Bay
You don’t always have to risk navigating through hostile sectors just to find a stationary Trading Station when you have a massive resource imbalance. The game allows you to conduct resource trades directly through your Aeroshuttle Bay.
Upgrading and utilizing the Aeroshuttle turns Voyager into a mobile trading post. This upgrade allows you to swap excess Tritanium or Duranium for emergency fuel without making yourself a target at a public starbase.
FAQ
1. Can I manually save my game?
Not yet, but soon. Hotfix 1.0.2 added an autosave every five points of interest, and the developers confirmed a true manual save feature is coming in the next patch.
2. What happens if Voyager runs out of Deuterium?
The ship enters “Gray Mode.” Everything shuts down except basic life support. Unless you can trade for fuel immediately (like using your Aeroshuttle Bay), your run is over.
3. Why do my sick crew members keep dying in Sector 3?
You missed the Vidiian Surgical Device in Sector 2. Without it, you can’t cure diseases, and sick crew members will slowly die off.
4. Is Borg Technology worth the risk?
Only if you are desperate. It gives massive shield and weapon buffs, but adds an “Assimilation” hazard that means the game’s randomness system works against your favor and makes you a more obvious target.
5. Why can’t I send Janeway on Away Missions?
She’s the Captain, so she stays on the bridge. Send Chakotay instead. You level Janeway up through specific command-based side missions, not ground combat.