

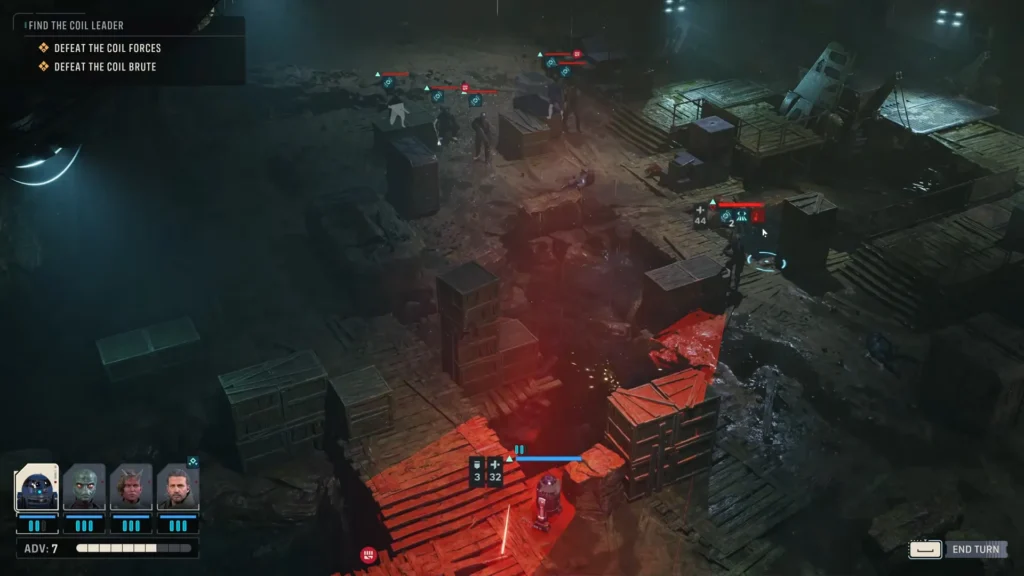
The Infinite Coil is the faction you hunt for most of Star Wars Zero Company, and it fights nothing like the Separatist droids. Every Coil unit carries a status called Resonance. When one of them dies, that Resonance moves to the nearest infected unit still standing. At 3 stacks the unit Surges, heals, gets stronger, and unlocks abilities it did not have a moment earlier.
That single rule changes how you play. Damage is not the problem in a Coil fight. Order is.
What you’ll read:
Who the Infinite Coil are
The Coil is a paramilitary cult aligned with the Separatist Alliance, led by Kundri Fathom. Its weapon is the Shadow Plague, spread by parasitic arthropods called Messengers. Survive the infection and you get dulled pain plus more physical strength. You also get a Force-bond to Fathom, which is the part nobody signs up for.
Fathom has two lieutenants. Visser leads the troops in the field. Typhon is an ST-series tactical droid who handles new plague strains and droid production.
Zero Company gets pulled in when the Coil takes Luunata, the mining world belonging to Jae Mordant. Bennic Halloren of Republic Intelligence puts up the contract, Jae pushes hard for it, and she joins the squad because she wants her world back. The Republic and the Separatists are busy fighting the Clone Wars out in the open, so nobody else is looking at this.
Coil troops are organic, not droids. Your Ion weapons do nothing here, which catches out anyone who built a droid-killing loadout in the first few cycles.
How Resonance works and why Coil enemies keep getting stronger
The game describes it as the plague crying out. A Coil unit’s death resonates with the nearest plague host, and enough Resonance makes that host Surge.
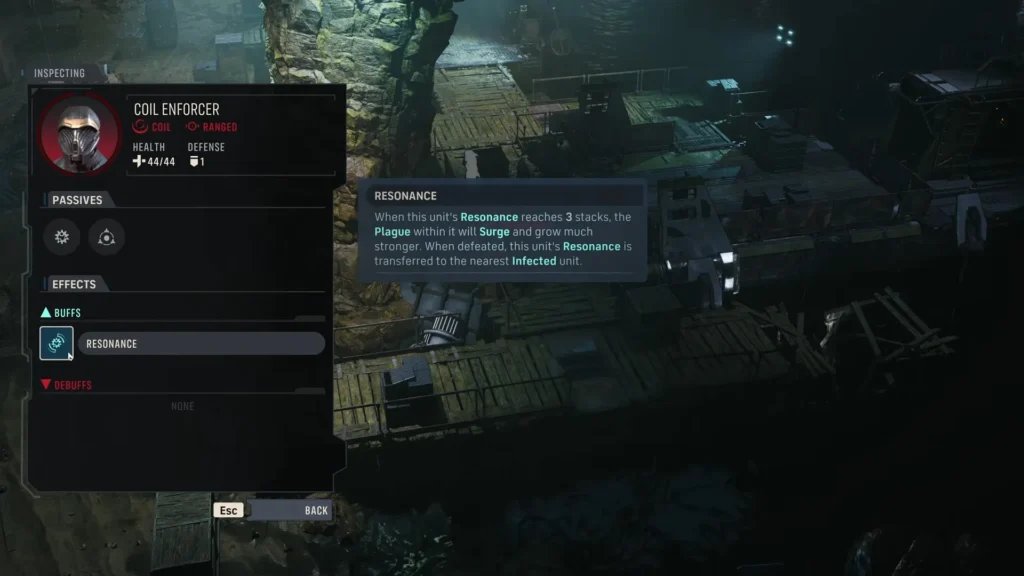
The word “nearest” matters more than people realise. Resonance is not handed out at random. It goes to whichever infected unit is physically closest to the one that just died, so you have some control over where it lands. If a full-health Enforcer is standing next to your target, the stack goes to the Enforcer.
Stacks cap at 3.
| Stacks | What it does |
|---|---|
| 1 | Small buff. Still a normal target |
| 2 | Bigger buff, and one more death nearby tips it over |
| 3 | Surge triggers |
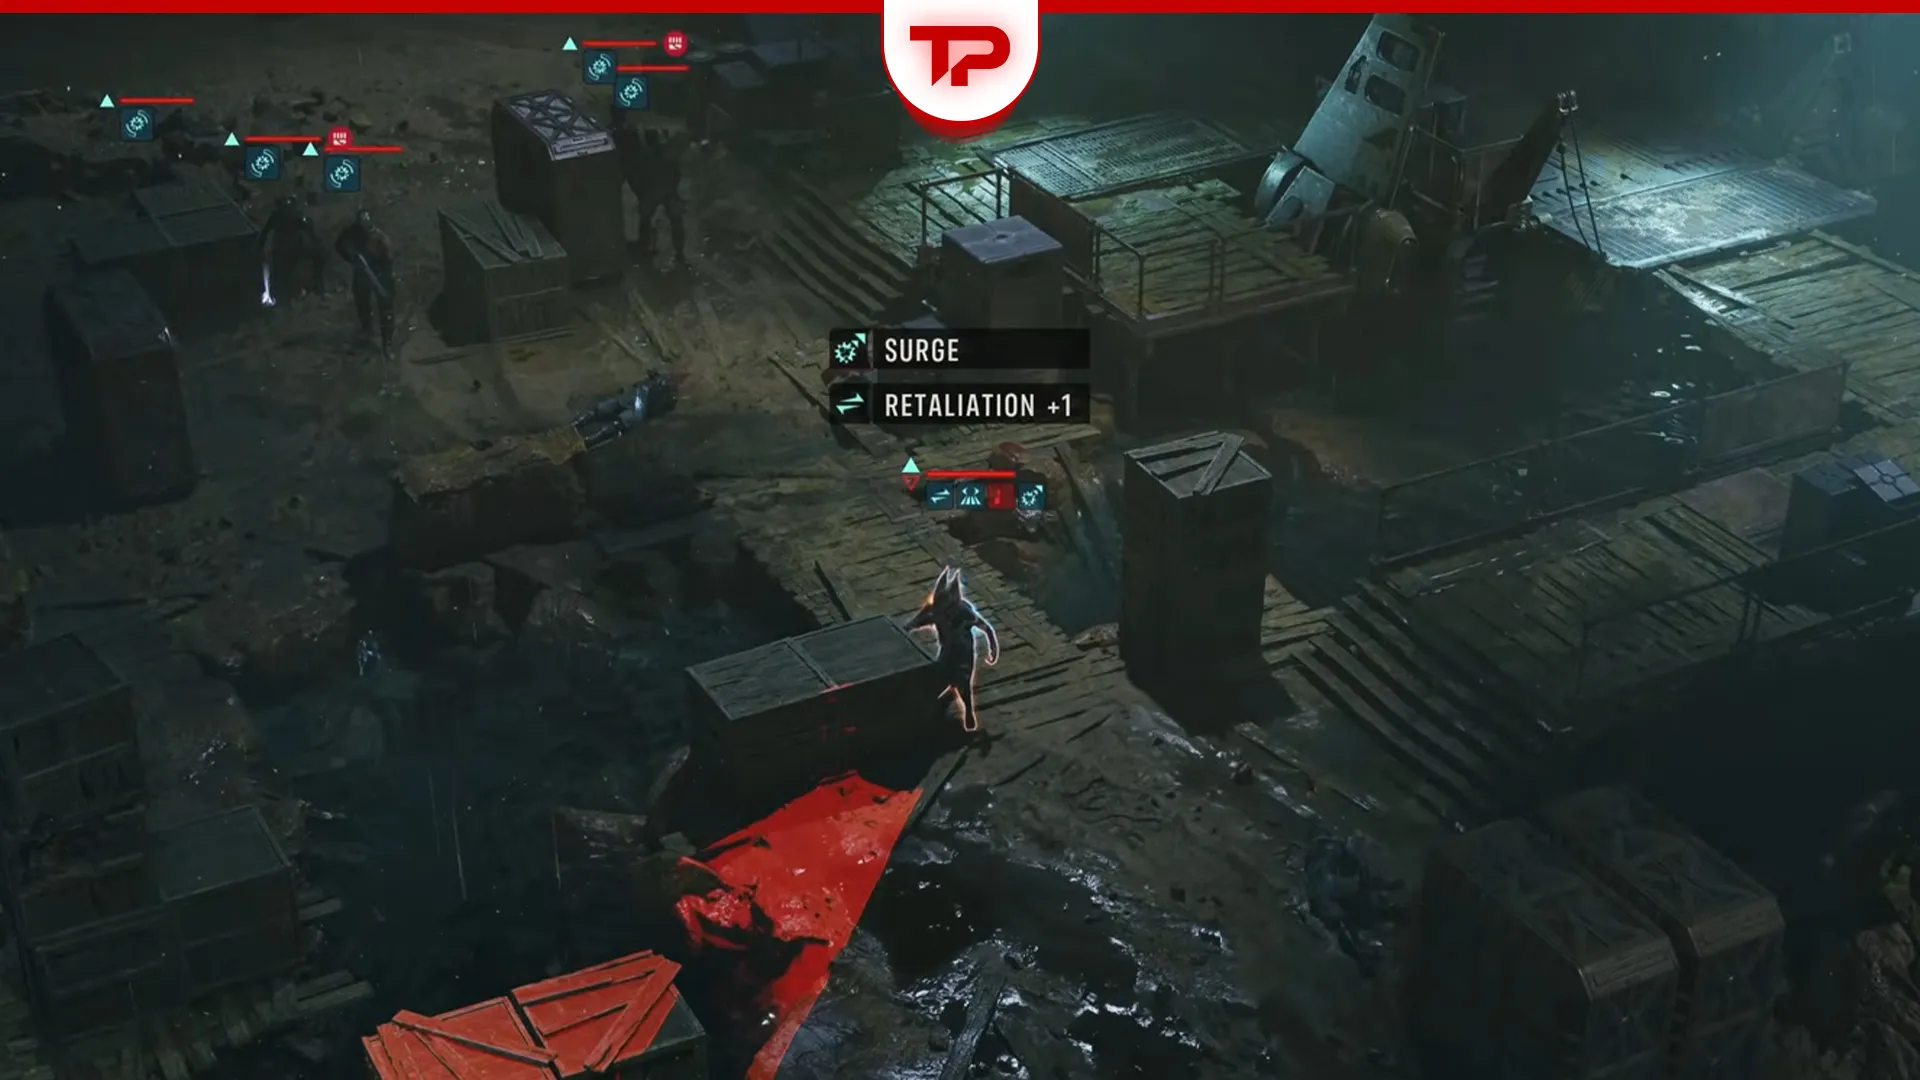
A Surge is not a small bump. In one fight I watched a Coil Enforcer go from 44 health to 66 and pick up Retaliation in the same instant, which meant every melee swing at it came back at me.
What a Surge gives a Coil unit
The list varies by unit, but the common results are a large heal, higher combat stats, and a new ability. Retaliation is the one you will meet most. Invisibility and attacks that reach through cover both show up too.
Once the Surge fires, the 3 stacks are spent and the counter resets to zero. So a Surged unit is dangerous, but it is no longer a Resonance battery for everything around it. There is a real argument for letting a Surged enemy live one more turn while you clear the units that are still stacking, though I would only try that with a Heavy holding Taunt.
The Coil also carries other plague statuses.
| Status | Effect |
|---|---|
| Infected | The base state. This unit resonates when nearby infected units die |
| Resonance | The stacking counter that leads to a Surge |
| Surge | Heal plus stat boost plus new abilities at 3 stacks |
| Plague Armor | Extra damage reduction on top of normal Defense |
| Chromatic Camouflage | The unit disappears from view until something reveals it |
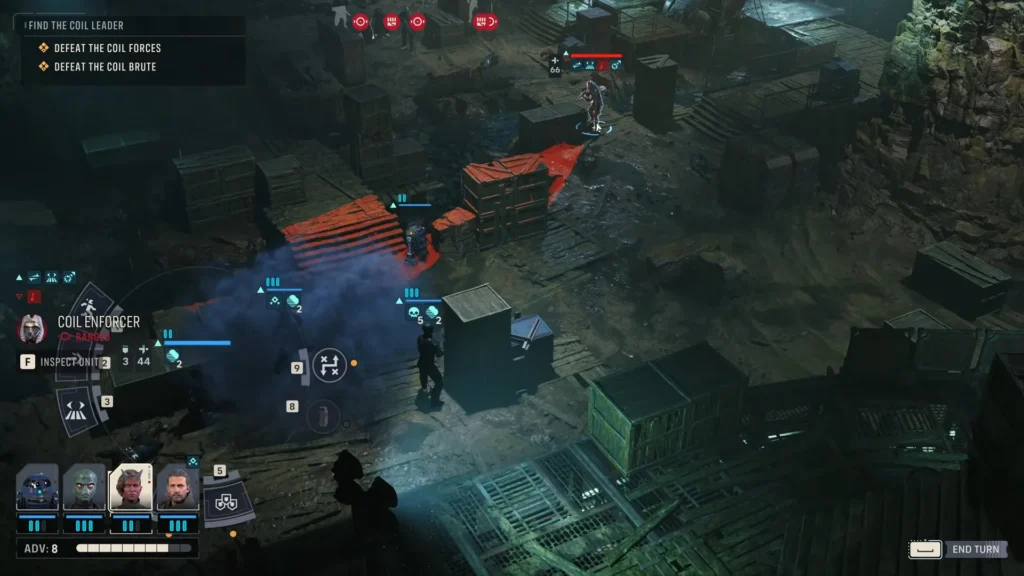
| Unnatural Resilience | Defense goes up sharply and the unit heals on its next action |
Unnatural Resilience is the one that makes a kill feel like it slipped away. You take a unit low, it shrugs, and it comes back with a chunk of health on its own turn.
Every Coil unit type and how to kill it
Seven unit types show up across the campaign, and each has a different reason to die early or late. Elite versions of these appear in later missions with more health and better gear.
| Unit | Role | Key ability | Why it hurts |
|---|---|---|---|
| Striker | Melee | Ambush, Camouflage | Ignores cover and range falloff. Can go invisible and open from stealth. Can be Taunted |
| Enforcer | Ranged | Melee Overwatch, Multishot | Sets its own Overwatch zones and fires more than once per turn |
| Brute | Frontline | Scream | Damages everything around it. Shrugs off physical damage with a big health pool |
| Guardian | Support | Shared Suffering | Soaks part of the damage you aim at its allies, so your focus fire stops working |
| Scourge | Suicide | Death Explosion | Blows up on death and damages everything in the radius |
| Seer | Control | Bind, Vicious Bind | Locks an Operator in place. Ignores Armour and Ray Shields |
| Captain | Command | Resonate, Super Heal Prep | Feeds Resonance and sets up heals |
Best kill order in a Coil fight
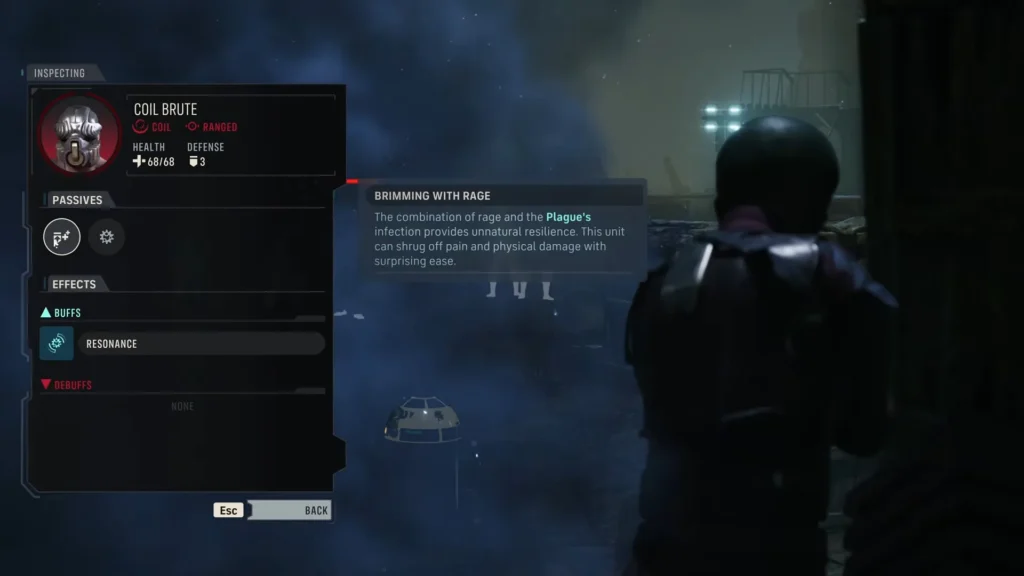
- Any Surged unit. Nothing else on the board is worth your action points while one of those is alive.
- Strikers, before they reach you. Overwatch on the choke points does most of this work for you.
- Guardians, because your damage is being wasted while one is up.
- Seers, since a bound Operator is an Operator you have lost for the turn.
- Everything else, but always with an eye on which infected unit is standing closest to your target.
Scourges break the rule and I have never found a clean answer for them. Kill one at range and the explosion misses you, but the Resonance still lands somewhere. Kill it in melee and you eat the blast. My habit is to shoot them early from distance and accept that a stack goes to whoever is nearby.
Coil upgrades and which one to block in a Crisis Mission
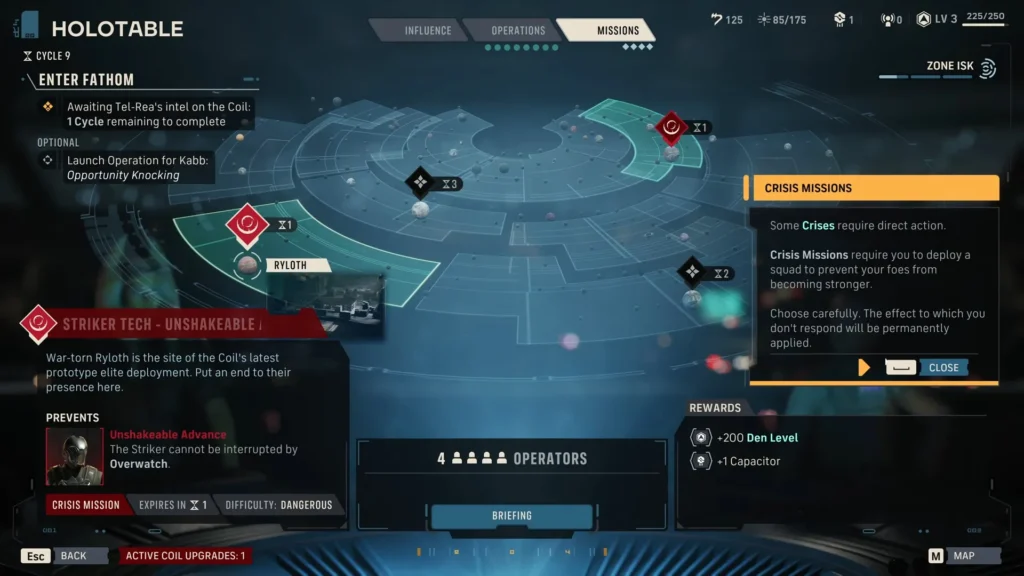
Every cycle the Coil improves its units, and the Holotable shows you a pair of prototype upgrades. A Crisis Mission gives you a window to knock out one of them. The game is blunt about it in the briefing. The effect you do not respond to is applied immediately.
You cannot stop both. That is the part players get angry about on release week, and it is working as intended rather than a bug. Crisis Missions also expire after a cycle, so a skipped one means the Coil takes both upgrades for the rest of the run. These are permanent changes to how those enemies fight, not a difficulty slider you can walk back later.
All confirmed Coil upgrade choices
| Upgrade | What the Coil gains | My take |
|---|---|---|
| Fleet Footed | Permanent Movement Range buff for Strikers | Block this on higher difficulties. Strikers that cross half the map ignore your whole cover plan |
| Deadly Reflexes | +4 Damage for Enforcers | Enforcers shoot far more often than Strikers reach you, so this one adds up over a campaign |
| Shocking Strike | Striker melee applies Shocked | Annoying rather than fatal. The cheapest one to give away |
| Resonating Strike | Striker melee attacks grant the Striker 1 Resonance | Block it. This turns every hit you take into free Surge progress |
| Enforcer surge trigger | The first time an Enforcer drops below 50% health, it gains +1 Resonance | Rough, because it fires exactly when you are trying to finish something off |
| Overwatch immunity | Striker movement can no longer be interrupted by Overwatch | Overwatch only stops a Striker half the time anyway, which makes this less painful than it reads |
The Striker Tech Crisis Mission on Vandor is the one to watch for. Its briefing tells you the Coil is testing prototype enhancements for the striker, and resonating strike is the upgrade you get to knock out before rollout.
Which Coil upgrade I block first
Two rules cover most of these choices.
- Anything that generates resonance beats anything that adds raw damage. More resonance means more surges, and a surge is worth far more than 4 damage.
- Ranged upgrades outweigh melee upgrades over a full campaign, since your squad can usually deny a melee unit with position but cannot deny a rifle.
Best squad setup against the Coil
| Slot | What it does in a Coil fight |
|---|---|
| Medic | Combat Stim II and Surgeon’s Tools carry you through the wave structure. Give them a long rifle so they still contribute on quiet turns |
| Heavy | Taunt pulls Strikers onto the one Operator built to survive them |
| Sharpshooter | Removes Strikers at range and lands the big crits on a Brute |
| Melee or Trick | Rocket Strike III for clusters, Kabb’s Uppercut II to knock a target out of cover |
The Astromech is the awkward call. Against organic Coil troops its damage barely registers, and the standard advice is to leave it at the Den. Deep Target Scan is the counter to Chromatic Camouflage though, and it strips Evasion while dropping enemy Defense by 4 and raising your chance-to-hit by 20%. On a map full of invisible strikers I bring it anyway.
Health matters here for a different reason. Every time an operator goes down they pick up an injury, and 3 injuries kills them for good with permadeath on. Heal a turn early rather than a turn late.
Utility items that shut down Resonance
- Impact Bomb and Rocket Strike III hit hardest on reinforcements, which always arrive grouped.
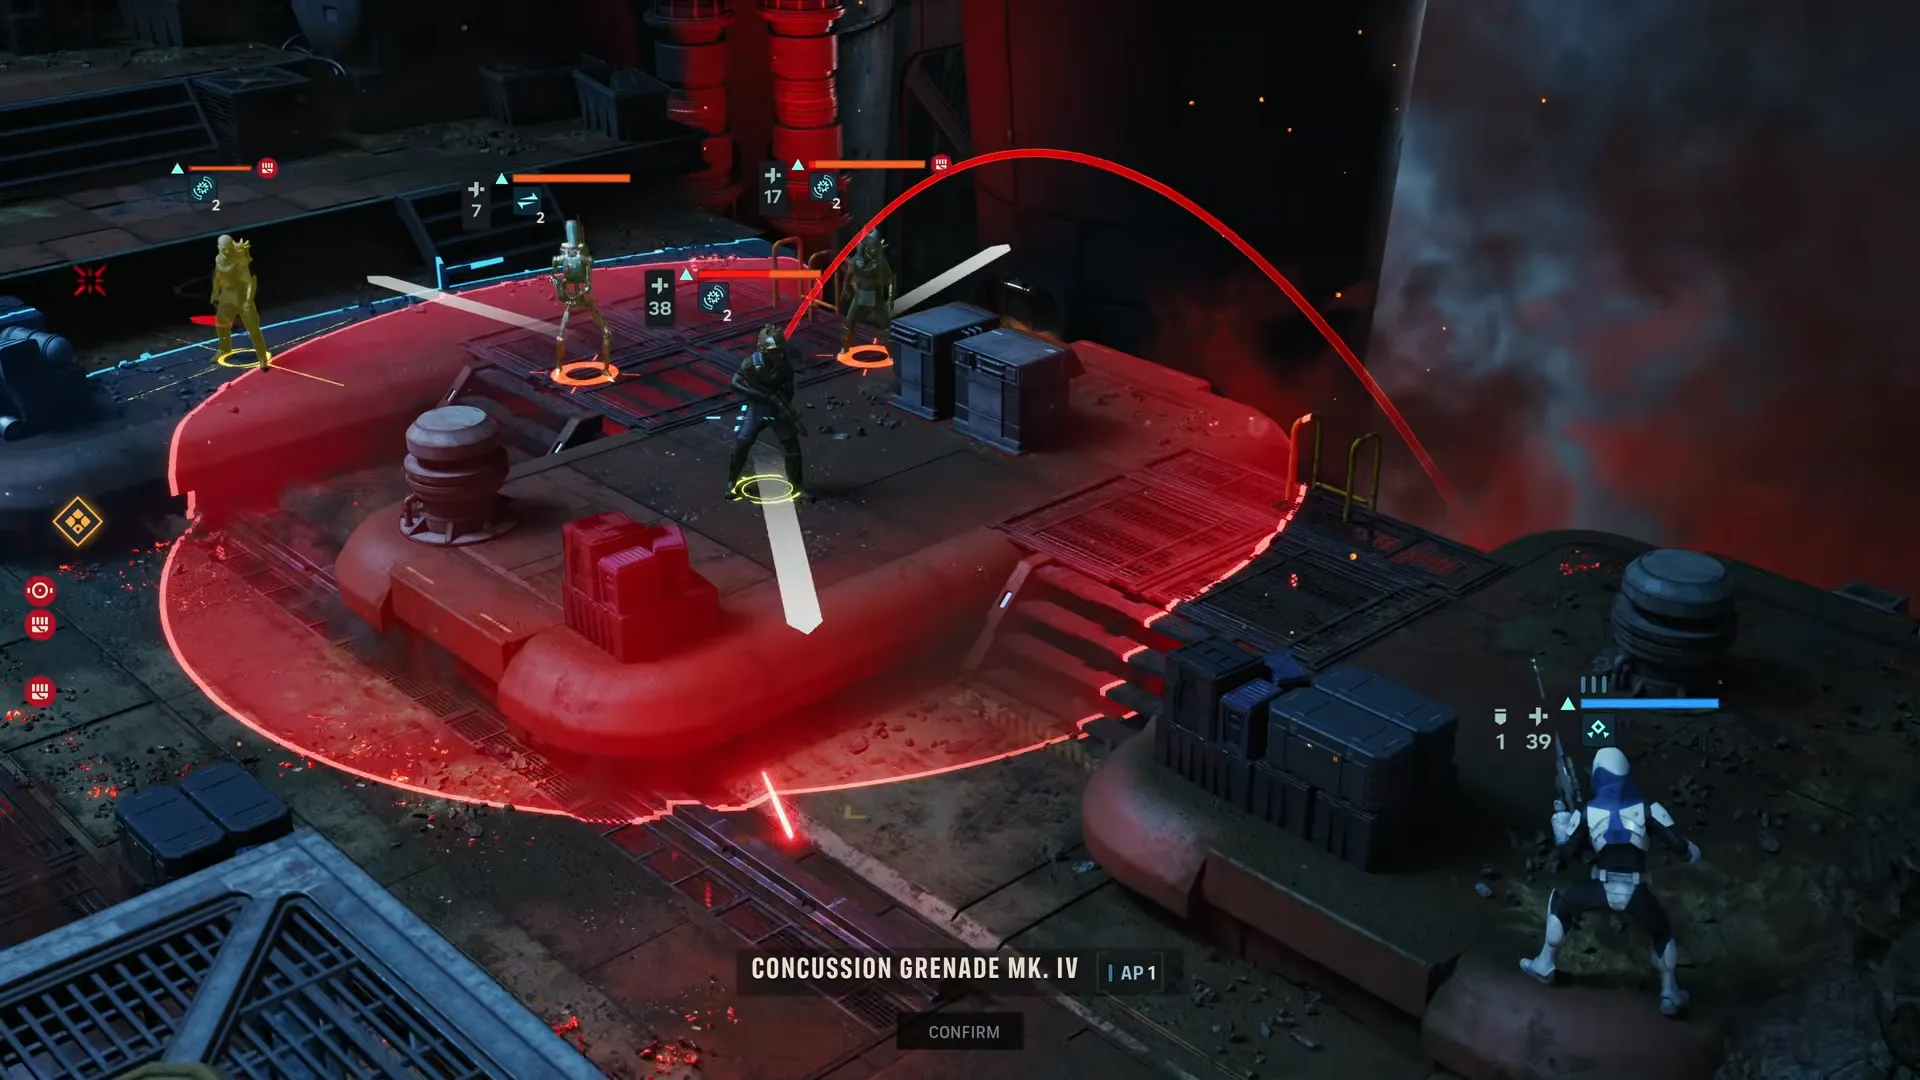
- Concussion Grenades push enemies into ravines and water for kills that cost you nothing.
- Easy Mark II makes the follow-up attacks guaranteed critical hits, which is how a Brute dies in one turn instead of three.
- Bull Rush costs a single action point and combines damage with knockback, useful when a target will not leave cover.
How to fight Kundri Fathom, Visser and Typhon
All three leaders sit far above the rank and file. The toughest ordinary Coil unit has 92 health.
| Leader | Health |
|---|---|
| Kundri Fathom | 350 |
| Typhon | 250 |
| Visser | 200 |
Fathom heals through incoming damage, so chip shots go nowhere. You either open the fight on her with everything you have or you clear the room first and take her last. Anything in between wastes a lot of turns.
What Single Coil Condenser does, and why it is not the faction
Searches for “coil” also turn up a weapon mod, which is a different thing entirely. The Single Coil Condenser is a basic barrel modification that raises critical hit damage on the blaster it is attached to. Spiral Condenser does the same job at a higher tier.
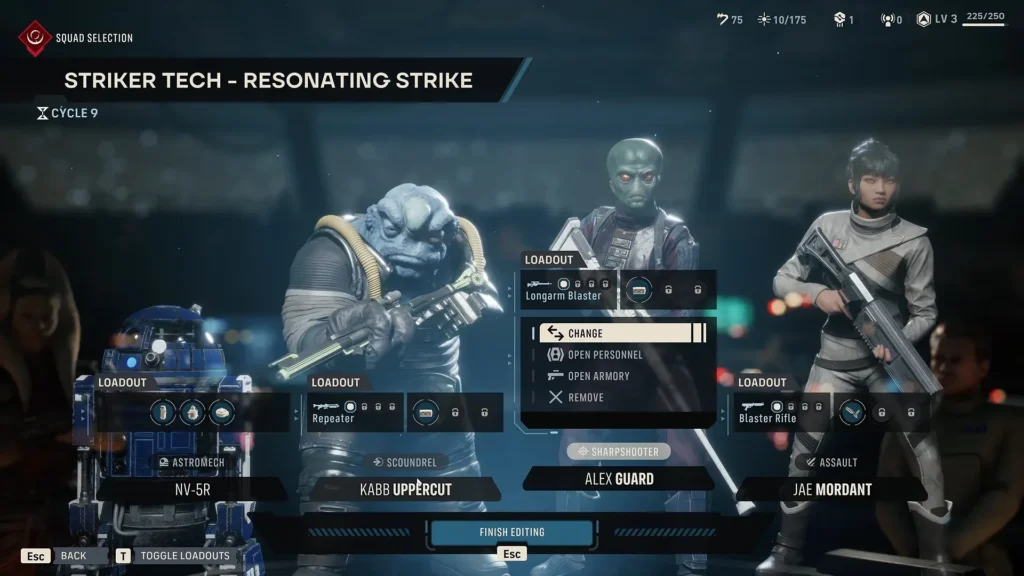
You can pick up a single coil condenser from the Contact Sawtooth operation if you set up comms close to the distress signal, or from Ghost Ship by searching the bridge once the Droid Repair Bay is built. A coil condenser worth +2 critical hit damage also turns up as a Tactical Mission reward.
None of this has anything to do with Kundri Fathom.
FAQs
Do Coil enemies come back stronger if they escape a mission?
Yes. Units that flee or survive return ghost-buffed later, with better stats and gear. That is the argument for finishing a fight rather than clearing the objective and extracting.
Does Resonance still transfer if I knock a Coil unit off the map?
Players report that enemies killed by falling out of bounds do not pass their stacks on. I have not tested it enough to state it as fact, but concussion grenades and Force push are worth trying when a stacked unit is standing near an edge.
Can I chain stuns on a Surged unit to keep it locked down?
No. Once an enemy has been dazed or stunned it resists both for the rest of that combat, so control effects work once per target and no more.
Do Coil units appear in every mission?
No. Zero Company fields three enemy factions, and the Separatist Alliance and Outlaws take their share of the map. Plenty of missions mix Coil troops with battle droids, which is where kill order gets hard.
Star Wars Zero Company