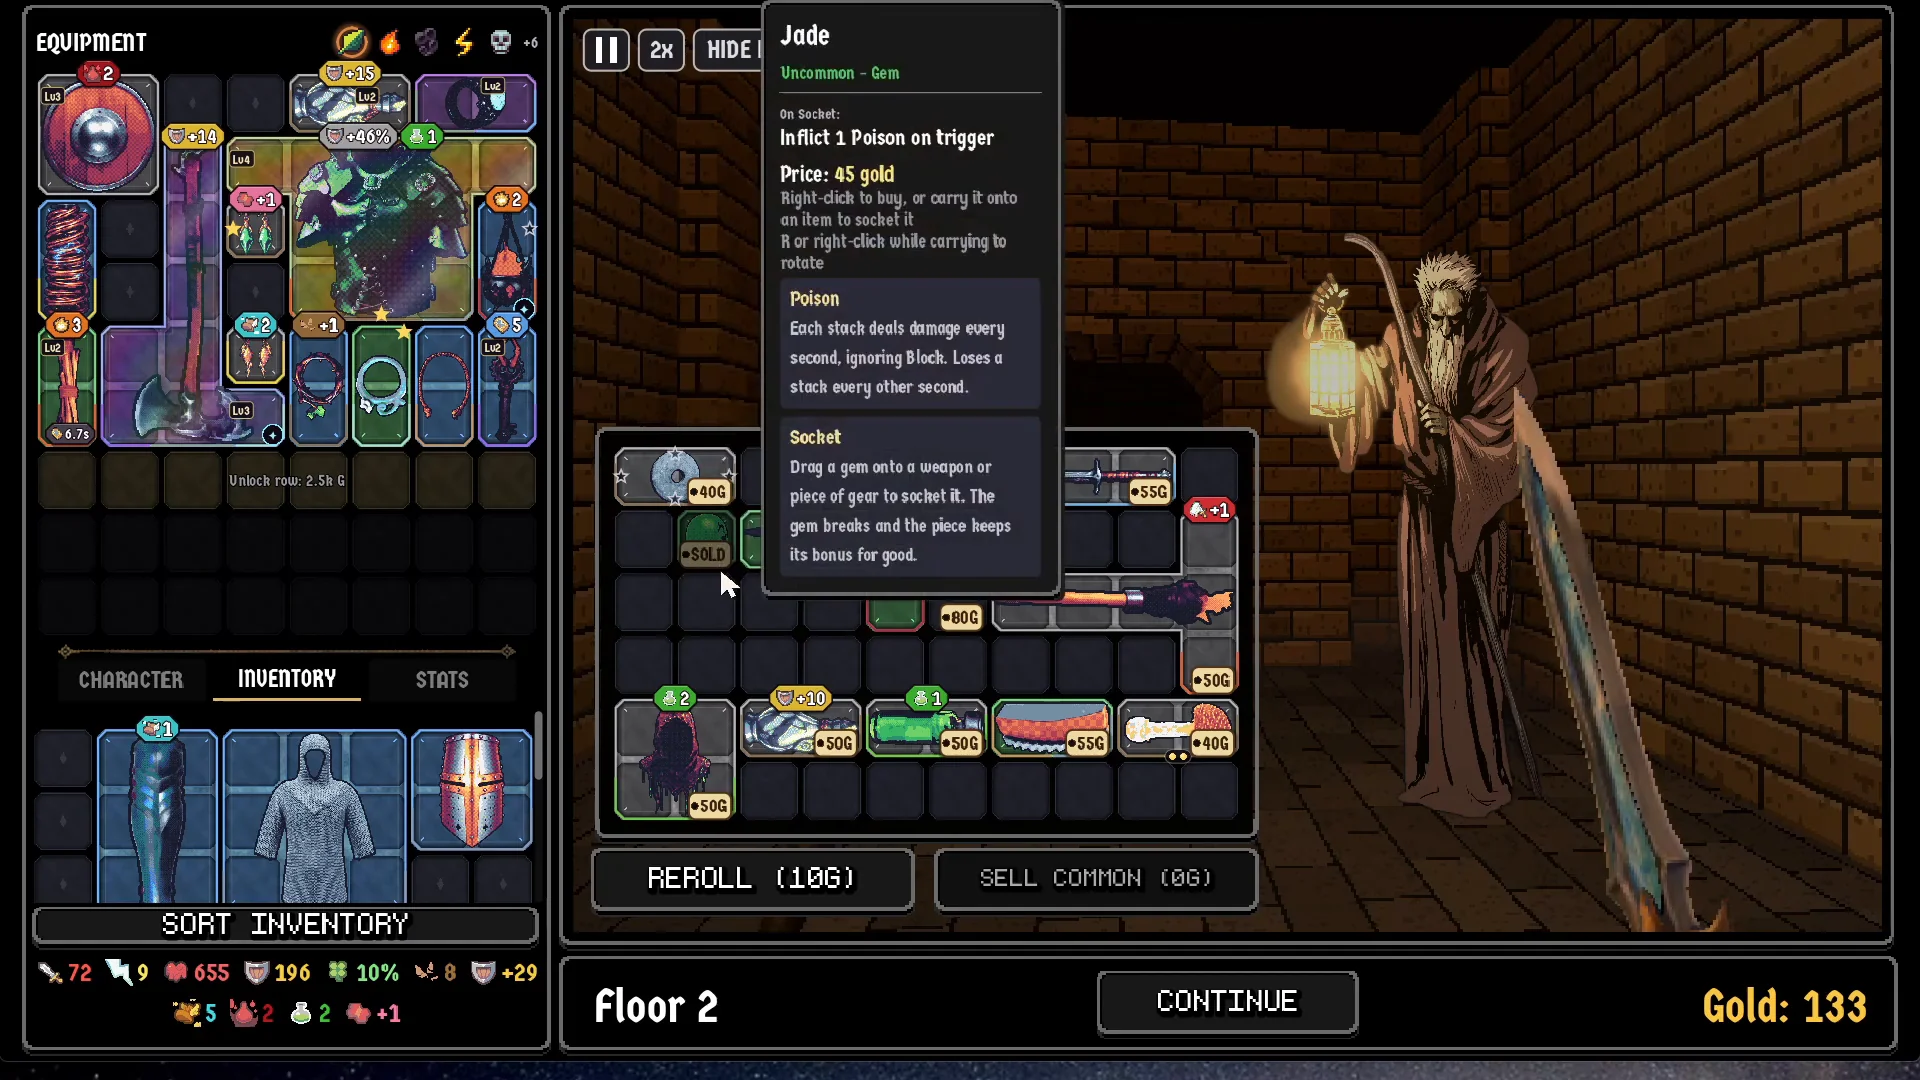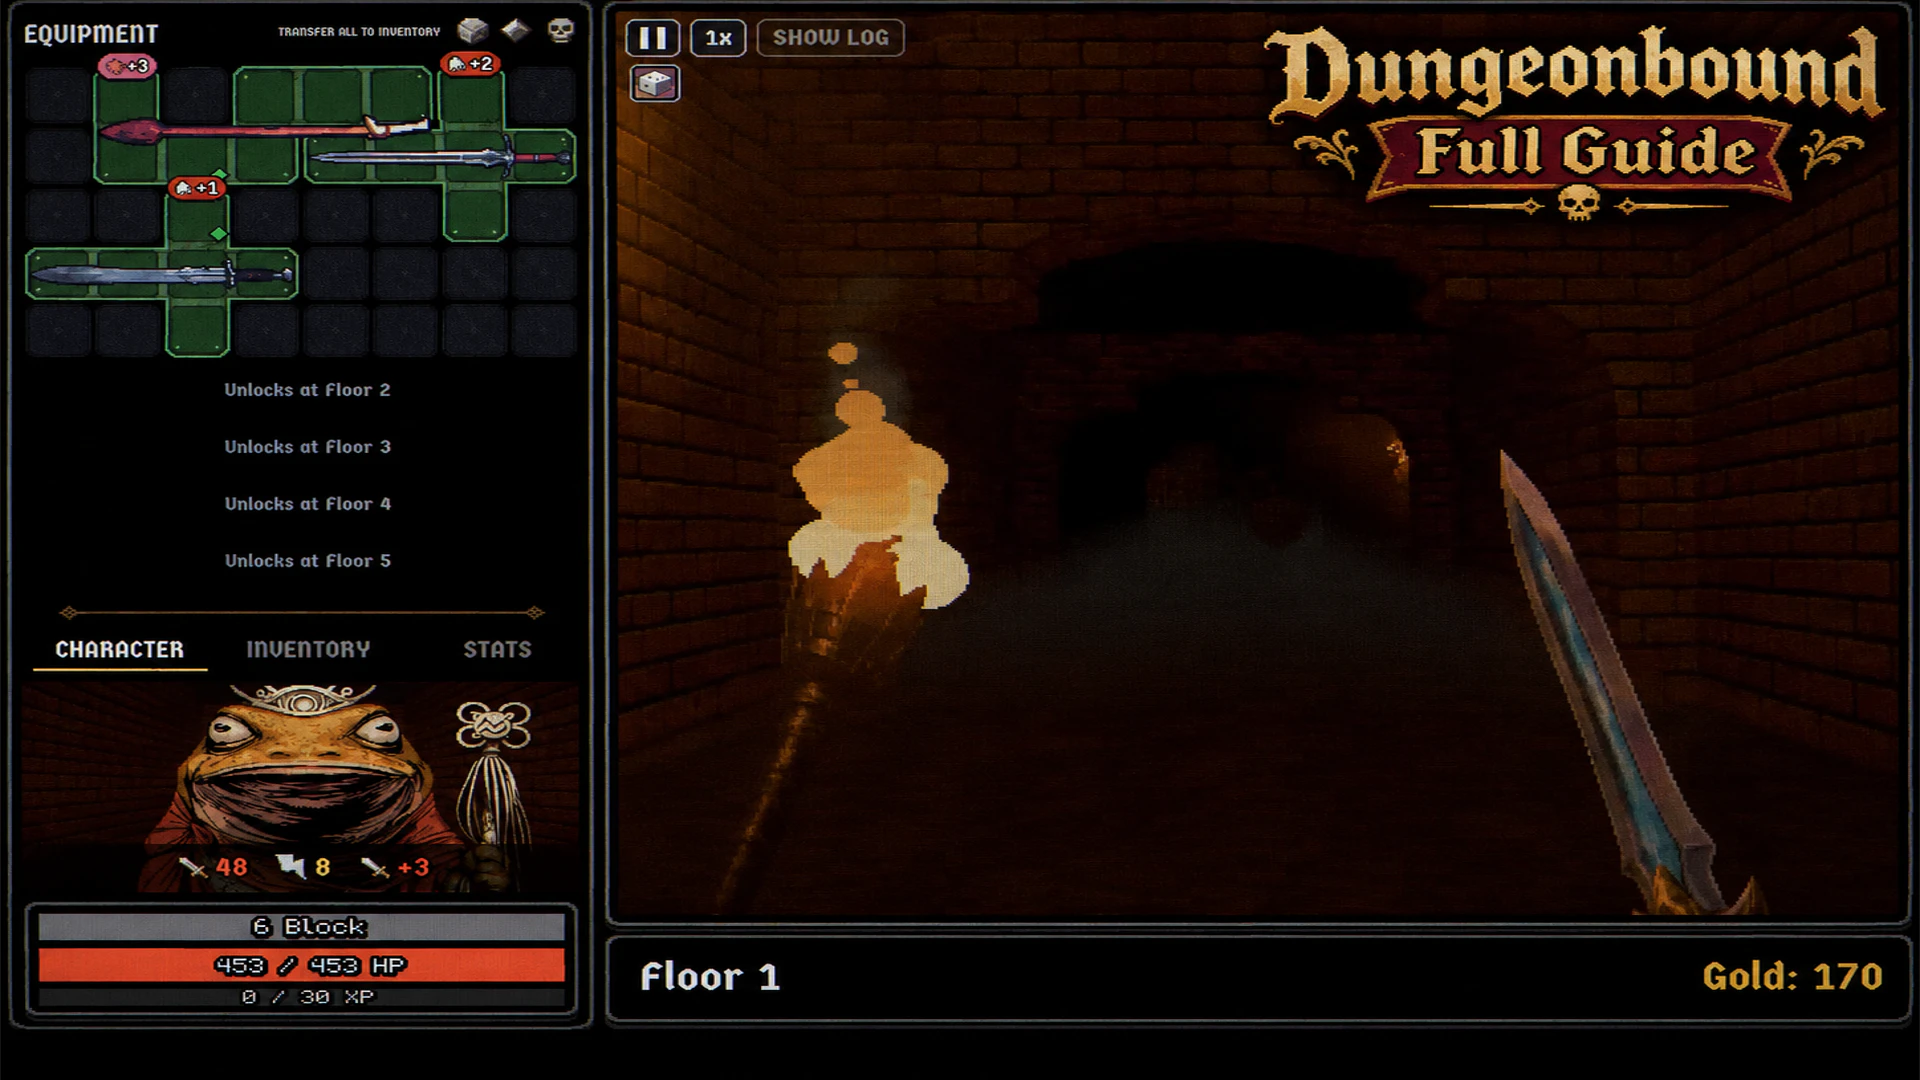


Dungeonbound is a super neat indie game where your equipment does the fighting for you. Put the wrong item in the wrong spot, and a perfectly decent build might fall apart before you reach the next boss. I’ll get into the itty bitty details of how to start your first run, build stronger equipment, and make progress through the game’s different modes. I’ll also explain the combat mechanics that aren’t immediately obvious, especially how item triggers work.
The full release of Dungeonbound changed a few things; climb runs now start with 10 hearts, potions no longer break, and the Daily challenge has a new final boss, and so, the tips you learned in the demo version of the game no longer work for you.
Slash your path open to…:
Which Dungeonbound Mode Should You Play?
In terms of main modes, there are two: the Long Haul, which lets you grow stronger across multiple attempts, and The Climb, where you build a character for a self-contained run. A self-contained run means a run where you start fresh, build your equipment during that run, and lose that build when the run ends.
| Mode | How It Works | What Happens When You Lose |
|---|---|---|
| The Long Haul | Persistent campaign with seven heroes and permanent upgrades | You return home with your progression |
| The Climb | Roguelike runs against monsters and optional rival builds | Lose all 10 hearts and your current build is gone |
| Co-op | Shared climb for 2–4 people | The team loses hearts together |
| Versus | 1v1 or 2v2 race through the same dungeon | Teams compete in a final board battle |
| Daily | A 10-floor challenge that ends with Death | Your damage against Death determines your score |
The Long Haul
Probably the most common mode you’ll play the game. It’s less difficult than the other modes because when you die, you don’t just lose everything you collected with your hard-earned blood and sweat. Death isn’t a complete reset here. I recommend this mode for your first run.
In this mode, each campaign hero has a separate level, Gold balance, and upgrade tree. Keep in mind that the progress you made with one character doesn’t replace another character’s progress. You keep your accumulated progress and return to the hub, where Gold and Skill Points help you prepare for another descent. There are more than 400 permanent upgrades across the seven campaign heroes, divided into five categories: 1. Damage 2. Defense 3. Sustain 4. Economy 5. Unlocks
The Climb
The Climb is the roguelike side of Dungeonbound. You choose a specialist hero, put together an equipment board, and try to survive difficult encounters that get harder by the minute. The build you create here only belongs to that one run you put it together. Losing the last heart ends it. You start with 10 hearts, and the number of hearts you lose changes based on which floor you’re on.
| Floor | Hearts Lost per Defeat |
|---|---|
| 1–2 | 1 |
| 3–4 | 2 |
| 5 and above | 3 |
The further you progress, the riskier things will get. But here’s something even more interesting: The Climb also features asynchronous PvP. That means instead of fighting another person in real time, you face a saved version of their equipment board. Your own completed floors can contribute builds to that pool. If you’d rather learn without rival encounters, Dungeonbound also offers PvE-only climbs and a Rival Fights option.
Co-op and Versus
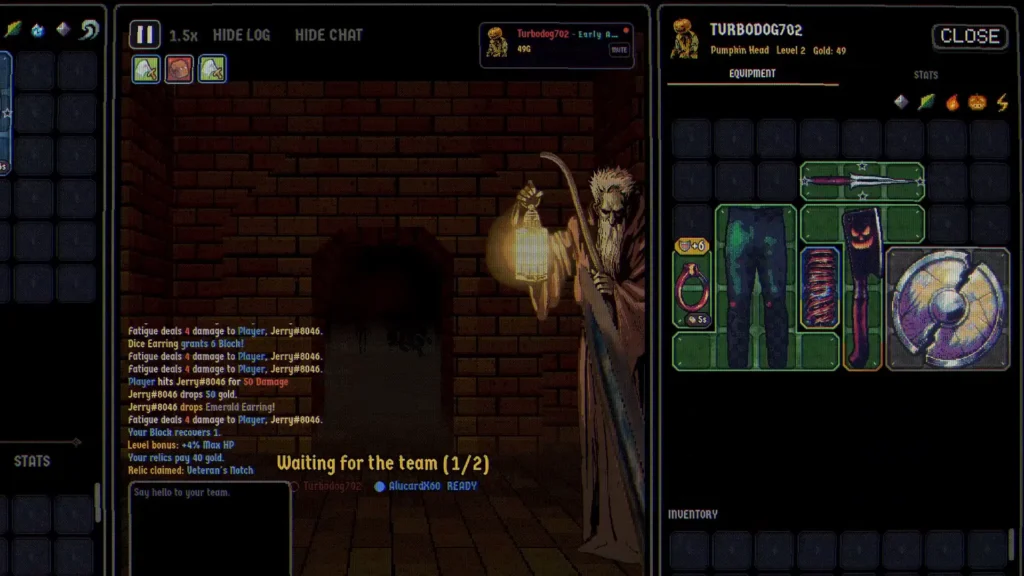
Co-op allows 2–4 people play together. Everyone uses their own hero, with a personal shop and Gold balance.
The entire team shares the 10-hearts pool! Don’t become a liability.
You can give your equipment to teammates, but if there is any dispute over the loot, you can rest assured; the game has designed a dice roll system for such occasions. I also found some items that were specifically meant to be given to another member of the party. Teams can (thankfully) save their co-op climbs, and the game supports replacing a departing member with a bot. In the v1.0.5 update, act bosses became a single battle for the whole team. HOWEVER, an extra elite tags along with the boss. And for each extra player, there will be an extra elite.
Versus is different from Co-op. In this mode, two solo competitors or two teams race through the same dungeon seed. After floor eight, their equipment boards face each other in a final fight. A lobby with two people starts a 1v1 match. Four people create a 2v2 match. Versus also has its own Daily Run. Both multiplayer options are available under the Play menu.
The Daily Challenge
Daily Challenge has a fixed seed that is mutual for all players during that day. It has 10 floors so there’s no news of it becoming an endless mode. Your final opponent in this mode is Death, who appears in a rainy graveyard. The goal isn’t to just reach the deepest floor. The goal is to deal the most damage possible to Death. Your score directly comes from the damage you deal to Death, so make sure you’ve enough protection and damage prepared when you reach him.
How to Start Your First Dungeonbound Run
- Choose your mode. Start with The Long Haul. Choose an Unranked or PvE Climb if you want to experiment with a run-based build.
- Read your hero’s abilities. Check the affinity types and any equipment restrictions shown in the character tooltip.
- Inspect your equipment. Some items grant passive stats, but there are also those that activate when you attack or when a timer finishes.
- Place useful items on your Equipment Board. Remember that an item left in your storage bag isn’t part of your active combat equipment.
- Start a fight and inspect the result. Watch your damage output and pay attention to which effects activate.
- Improve the part of the build that failed. If you lose, check the combat logbook.
Dungeonbound Heroes and Affinities
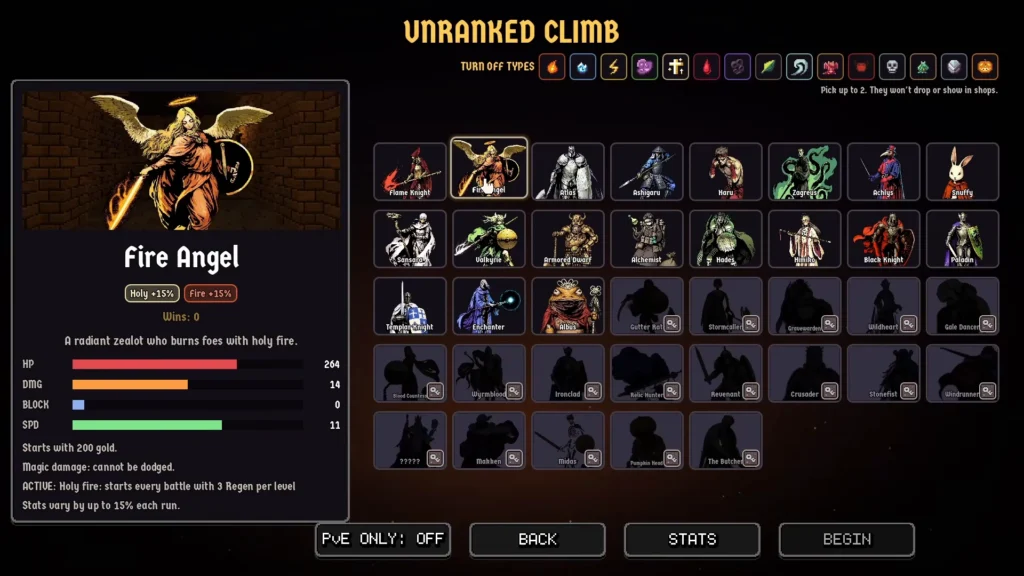
We have two different and distinct hero rosters in Dungeonbound. One is for the Long Haul and the other is for The Climb. Let’s check each one out:
The Long Haul Classes
| Class | Features |
|---|---|
| Warrior | One of the seven permanent-progression heroes, with its own upgrades |
| Mage | Has Lightning, Frost, and Fire subclasses with separate purchases |
| Rogue | Has an independent campaign progression tree |
| Monk | Has its own progression and class-specific equipment interactions |
| Archer | Features ranged equipment and bow-related mechanics |
| Alchemist | Specializes in potions, including brewing and fusion |
| Paladin | Uses holy equipment and has combat-healing abilities |
We got the Mage over here with the interesting subclasses; the three elemental subclasses keep their purchases separately. Changing your chosen element doesn’t mean throwing away everything invested in the others. That’s kind of fun, right?
The Alchemist has a different relationship with potions from most heroes. Her equipment mechanics has something interesting: brewing. In the updated potion system, you can have those effects be incorporated into forged gear.
The Climb Heroes
| Hero | Mechanics |
|---|---|
| Flame Knight | Fire/Metal affinities and sword-focused interactions |
| Albus | Poison/Earth builds featured in gameplay |
| Ashigaru | Spear-focused equipment interactions |
| Valkyrie | Holy/Lightning equipment combinations shown in gameplay |
| Pumpkin Head | Halloween hero associated with Haunted gear and Terror |
| Jeiku | Gambler-style hero with six katanas and exclusive items |
The hero’s affinity affects the value of matching equipment. Flame Knight build shows the Brotherhood Blade receiving a 15% affinity stat bonus. The same item also grants Multicast to other swords at the start of battle. That doesn’t mean every hero receives exactly 15% from every matching item. Use the tooltips to see the actual bonus.
The same goes for item types. Some equipment SPECIFICALLY rewards having multiple swords or other matching pieces, but don’t assume every shared tag automatically provides the same set bonus.
Best Dungeonbound Builds
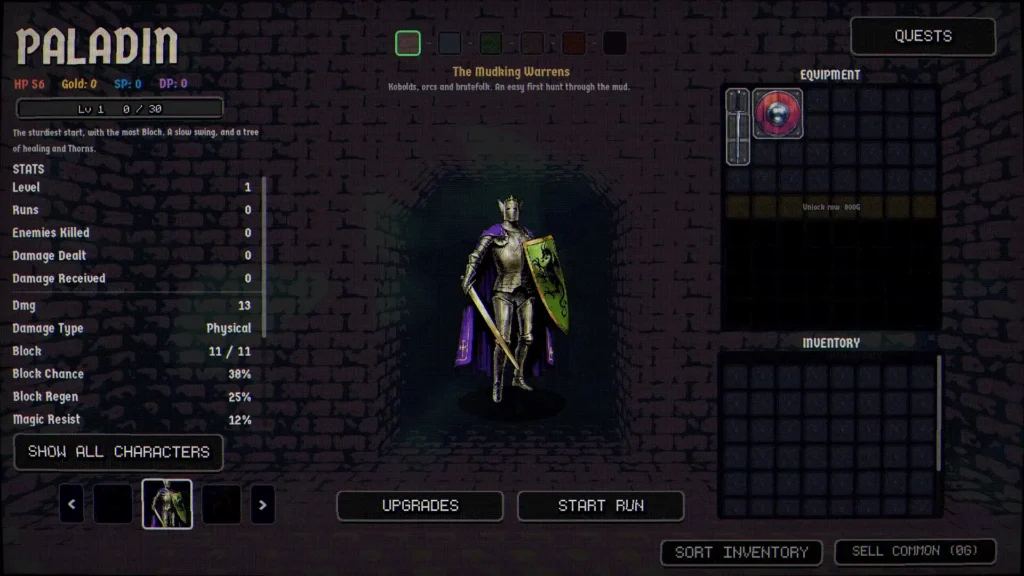
There are several types of builds you can revolve your playstyle around, but the trick to the Dungeonbound builds is simple: Choose equipment whose effects support the same goal.
Attack-Based Builds
This type of build is all about equipment that activates when your hero attacks. Sword synergies are a good example for this build. The Brotherhood Blade grants other swords additional Multicast at the start of battle, for example. This is good enough reason to pay attention to how many suitable swords you have equipped, rather than choosing each weapon solely for its individual Damage stat. Speed also becomes relevant when your important effects depend on attacks.
The downside is that fast attacks can trigger more retaliation against certain enemies, especially builds built around Thorns. Before investing further in Speed, check whether your increased attack frequency is actually helping you survive.
Timed-Item Builds
Timed builds rely on equipment that activates on its own each time a timer finishes. The Adder Ring’s Poison application and Storm Coil’s Chain Lightning are good examples of effects with individual timers. Builds of this type should care about how frequently those timers complete, not merely how quickly the hero swings.
Silence and Stun are especially important threats because they directly interfere with item activation. Root can also cause problems for a build that depends on Charge. If I were building around timed effects, I’d pay close attention to the enemy’s disruption tools rather than stack damage without considering counters.
Potion Hybrids
The new potion system makes hybrids an actually valid build path to take. Start with an item you already want to keep, then examine what a potion fusion adds to it.
A healing effect could make an offensive item more self-sufficient, while another potion may contribute to damage. However, check the result’s shape and resource requirements. A hybrid isn’t automatically better because it has a text wall on the tooltip.
The Long Haul Progression Builds
The Long Haul is a little different because permanent upgrades allow you to improve the hero between attempts. A failed run will show you that you’re short on damage or don’t have enough equipment space, or something even worse. Rather than chasing an entirely new build from scratch, use the Gold and Skill Points you’ve earned to address the weakness that got you killed. The campaign’s permanent progression also makes it possible for you to take risks and experiment with whatever build type you like.
Common Build Mistakes
Newer players often make these mistakes more, be mindful of each and every one of them:
| Mistake | Better Approach |
|---|---|
| Equipping the highest-rarity item automatically | Compare its effect with your existing synergies |
| Ignoring the equipment layout | Recheck adjacency after moving pieces |
| Leaving useful equipment in the bag | Move it onto the active board before battle |
| Stacking Speed for timed effects | Check whether the item actually uses On Attack |
| Fusing valuable gear without reading the result | Inspect the variant preview and any lost effects |
| Rerolling until you’re broke | Save enough Gold to buy a useful item |
| Treating every status as direct damage | Check whether it disables equipment or changes defenses |
| Assuming more healing fixes every loss | Check your damage output before Fatigue begins |
How to Upgrade and Fuse Items in Dungeonbound
Dungeonbound gives you several ways to improve equipment. Some systems level an existing piece, while some others combine items into something new. Let me help you understand the differences so that you won’t go on wasting Gold for nothing.
Duplicate Merging
| Items Used | Result |
|---|---|
| Level 1 + Level 1 | Level 2 |
| Level 2 + Level 2 | Level 3 |
| Two Level 2 items made from four Level 1 copies | Level 3 |
You can’t simply drop a new Level 1 item onto an existing Level 2 copy and expect it to become Level 3. You need another matching Level 2 copy. Equipment can be merged up to level 10. Don’t forget that curses or previous fusion changes also prevent two similar pieces from merging.
Forges and Shrines
| Station | What It Does |
|---|---|
| Fusion Forge | Combines two items and lets you choose between two resulting variants |
| Mega Forge | Combines 2–4 touching items into a forged piece |
| Affinity Forge | Changes one item type to match a type belonging to your hero |
| Upgrade Altar | Improves an item and offers additional paid upgrades |
| Gambler’s Forge | Risks an item for possible rewards, including cursed outcomes |
| Dismantling Bench | Sacrifices equipment for stat benefits |
| Cursed Shrine | Offers bonuses with potential drawbacks |
| Sanctifying Altar | Offers a blessing interaction for equipment |
| Gemcutter’s Bench | A specialized station related to socketed gems |
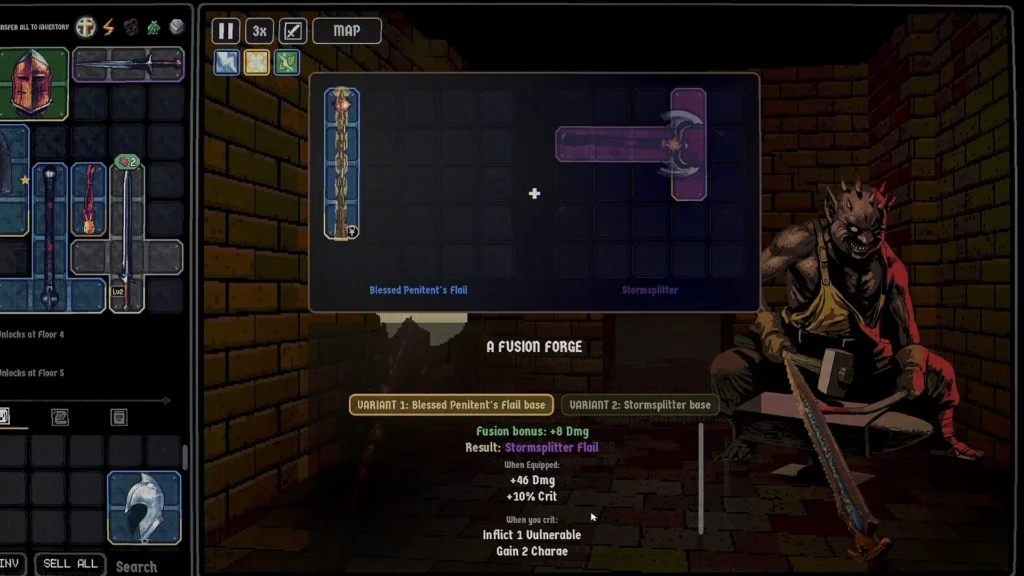
The Fusion Forge is one of the most useful systems because it changes how much space your equipment needs. Instead of keeping two large pieces separate, you can combine them into a hybrid. The preview shows two selectable variants and the resulting stats. Compare the item shape before committing. Don’t assume that the item placed on the left will always determine the exact result. There is another important rule for timed equipment: two fused timed items share one timer. That can change how often their effects activate. A fusion that looks powerful on paper may not behave like two independent timers anymore.
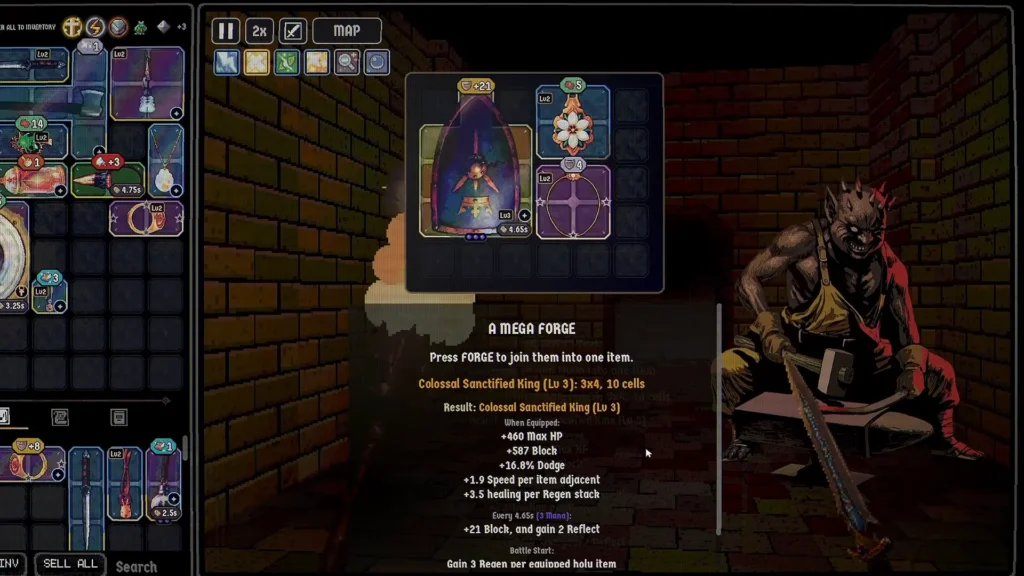
The Mega Forge combines two to four touching pieces. It’s designed for larger combinations, but not every original property is guaranteed to survive. Read the list of effects that would be lost before accepting the result. Ordinary Fusion Forges are most common on floors two and three. Mega Forges are especially likely around floors five and ten, though those appearances aren’t guaranteed.
The Affinity Forge is worth considering when a strong item doesn’t match your hero’s type. It allows you to replace one of the item’s types with one belonging to the hero. The Gambler’s Forge carries a different kind of risk. It may improve your item, but cursed outcomes are possible.
The Upgrade Altar and Gambler can both be reused for Gold. With the November 14 update, the additional cost is calculated from the item on the stage, starting at 60% of its shop price and increasing by another 25% for further uses. Dismantling deserves special care. It involves sacrificing equipment for stat benefits, but don’t assume it transfers every unique effect printed on the original item. I’d inspect the exact preview before feeding a valuable piece into any station. A legendary item isn’t worth sacrificing just because its rarity looks impressive.
Potions
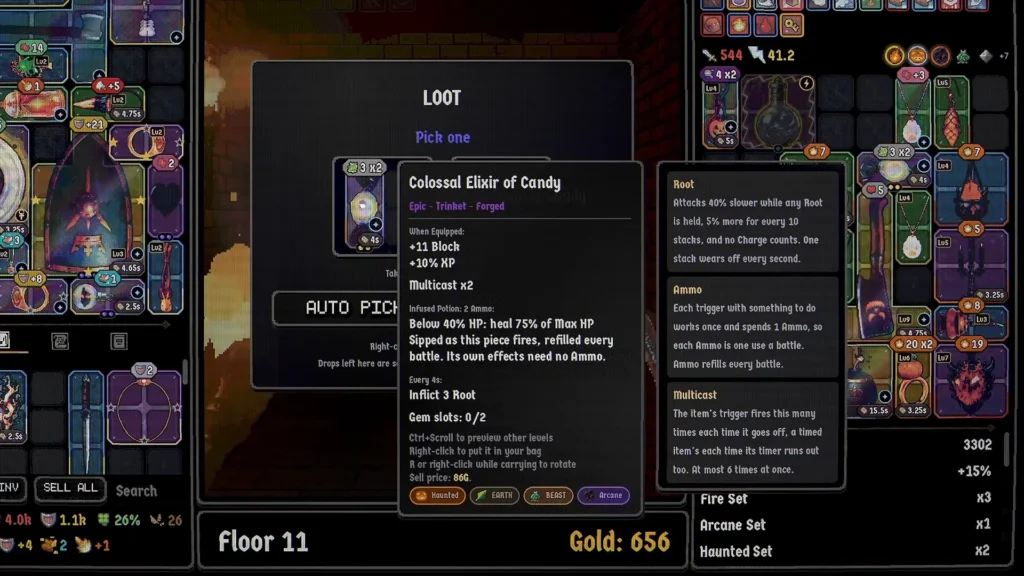
Potions no longer break, and their ammunition refills every battle. That makes them far more reliable than older advice suggests.
| Potion Rarity | Size |
|---|---|
| Rare | 1×3 |
| Epic | 2×2 |
| Legendary / Alchemist-only | 2×3 |
The best things about potions is that they can be upgraded and fitted with gems. You can also fuse a potion into another item. The resulting equipment retains its own effects and gains the potion effect, with ammunition that refills for each battle. Two identical potions can also be combined to level them up. Keeping a potion separate makes its effect easier to manage, while fusion may free up board space for another useful item.
How the Equipment Board Works
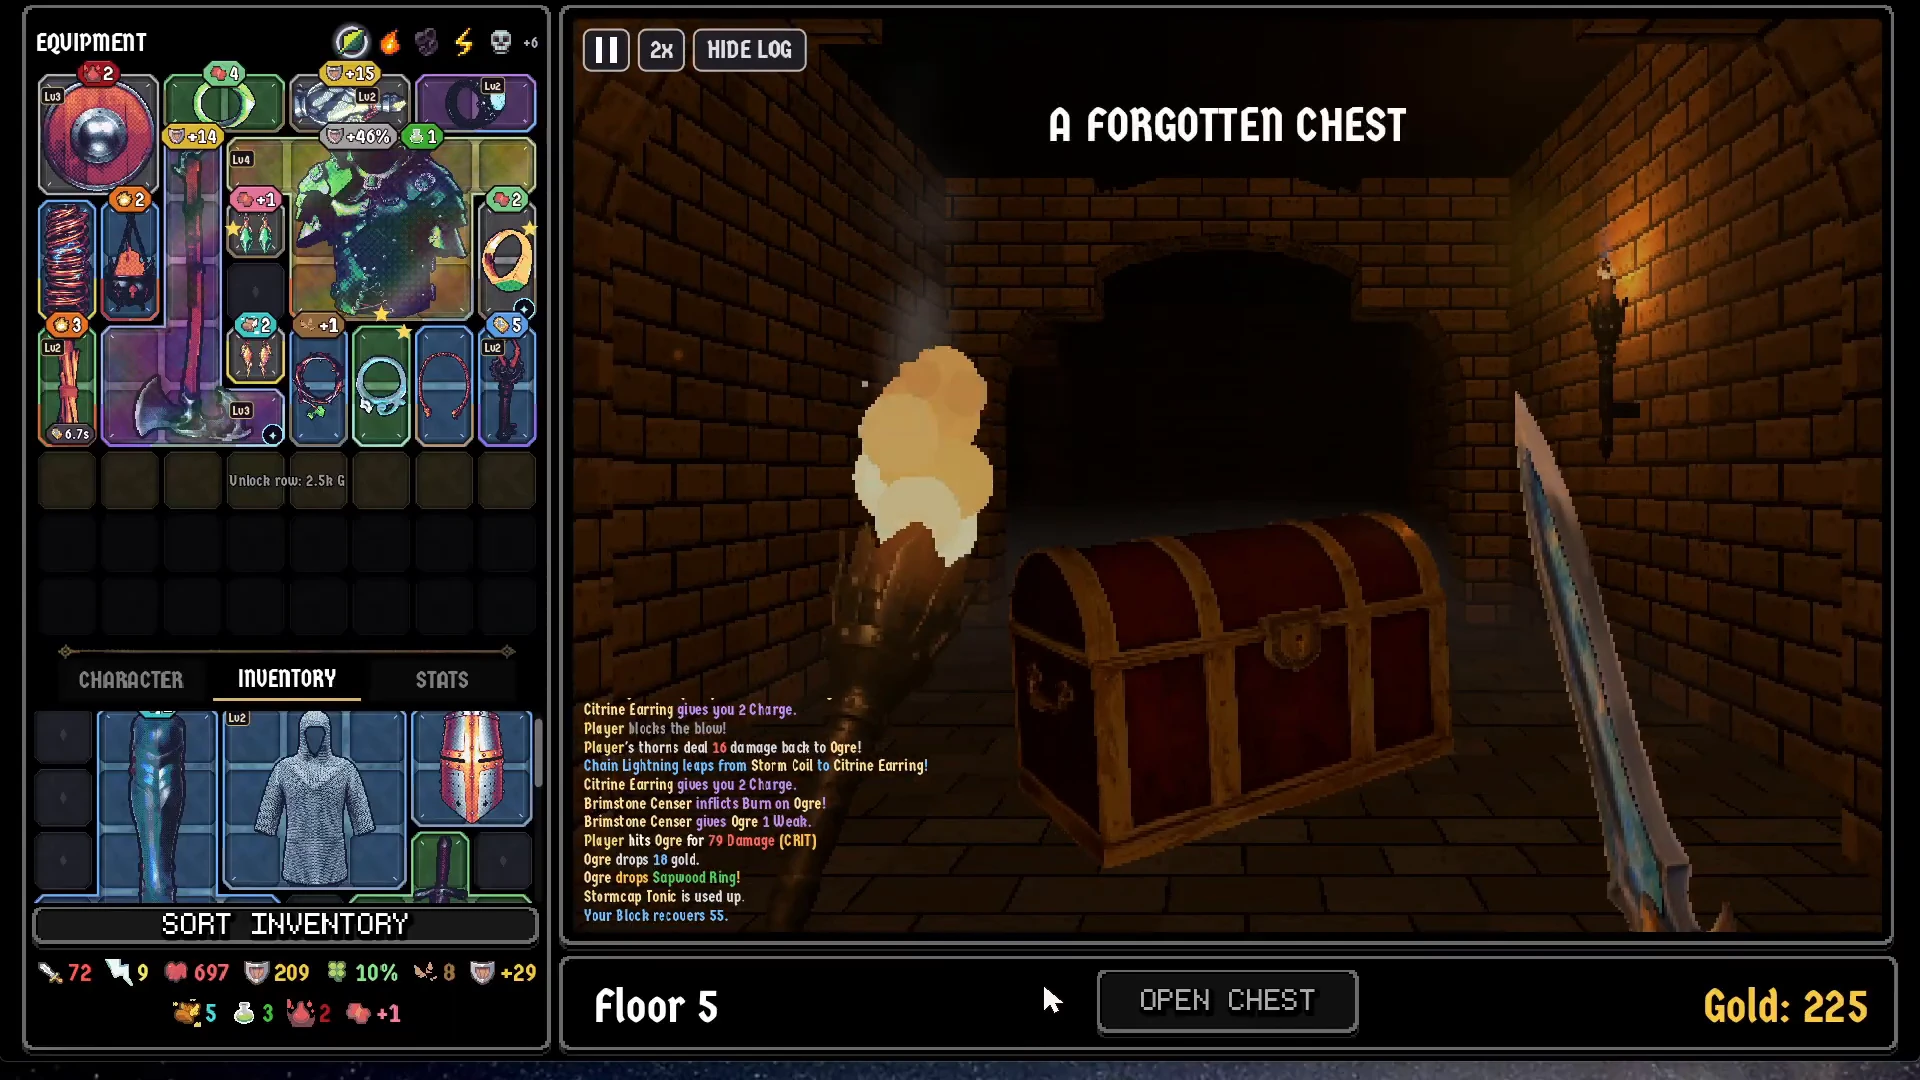
Dungeonbound’s equipment grid is where your build either makes or breaks. Every item takes a certain number of squares in the grid. The ironic thing is that a smaller item can beat a larger one even when its individual stats look worse.
Equipment vs. Inventory
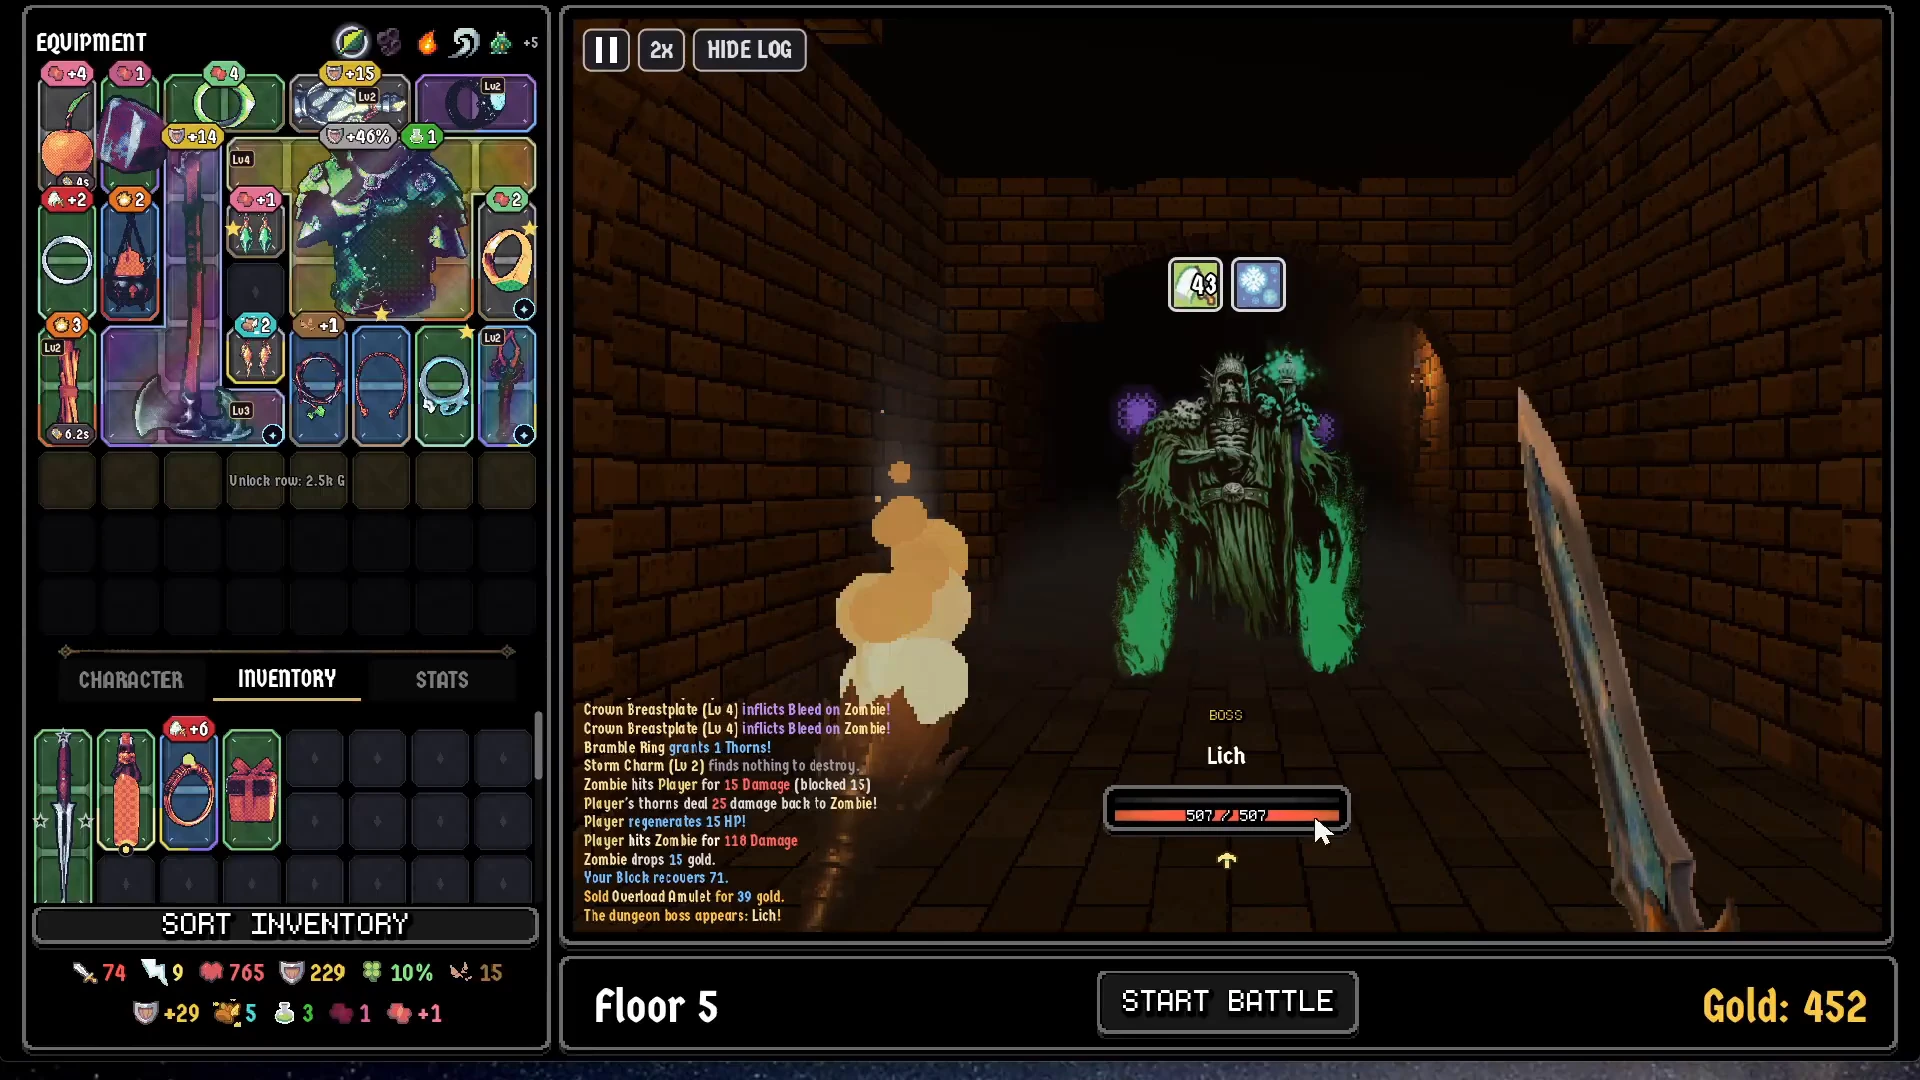
The Equipment is your active combat board. The pieces you put here will provide the stats and effects used in combat.
The Inventory, on the other hand, is like a storage for all the items you’re not using. Use it to make space for your Equipment.
If you need to rotate items in your boards, press R. There’s also an option to preview item levels with Ctrl and the mouse wheel. I do recommend using the hotkeys because otherwise, things can take much more time.
Adjacency and Affinities
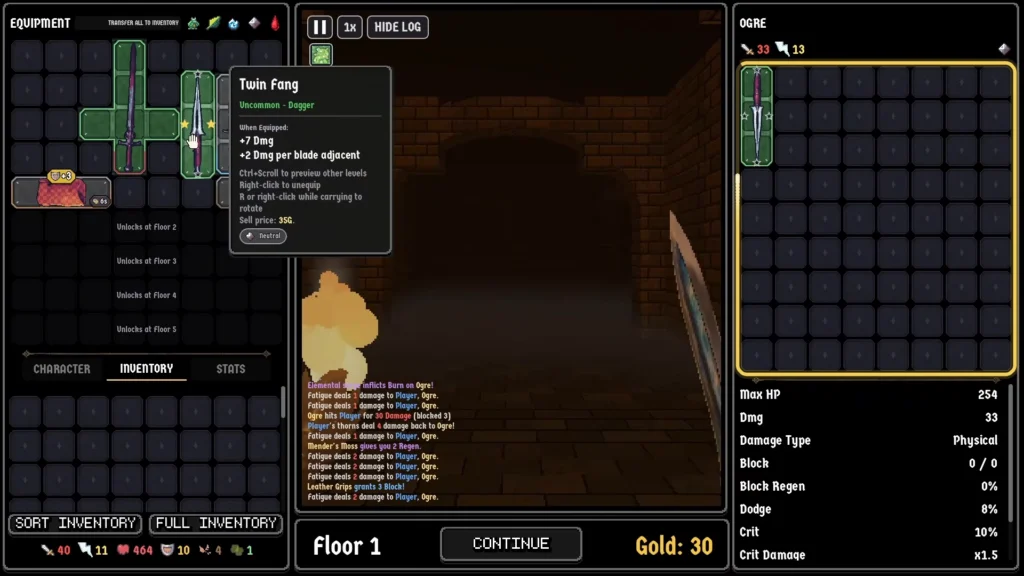
If you place certain items next to other certain items, they gain additional effects. Putting a sword next to other swords might give it certain bonuses. The exact requirement comes from the item’s description, so pay very close attention to that. The interface highlights potential item neighbors, so you can tell which pieces are responsible for an effect.
Affinities are another integral part of the Equipment system. An item matching your hero’s affinity will receive additional stats. The November balance update also fixed shops so that now 25% of their item selections come from your hero’s types. Matching gear is worth paying attention to, since a useful effect might still solve the problem your build currently has.
Runes and Gems
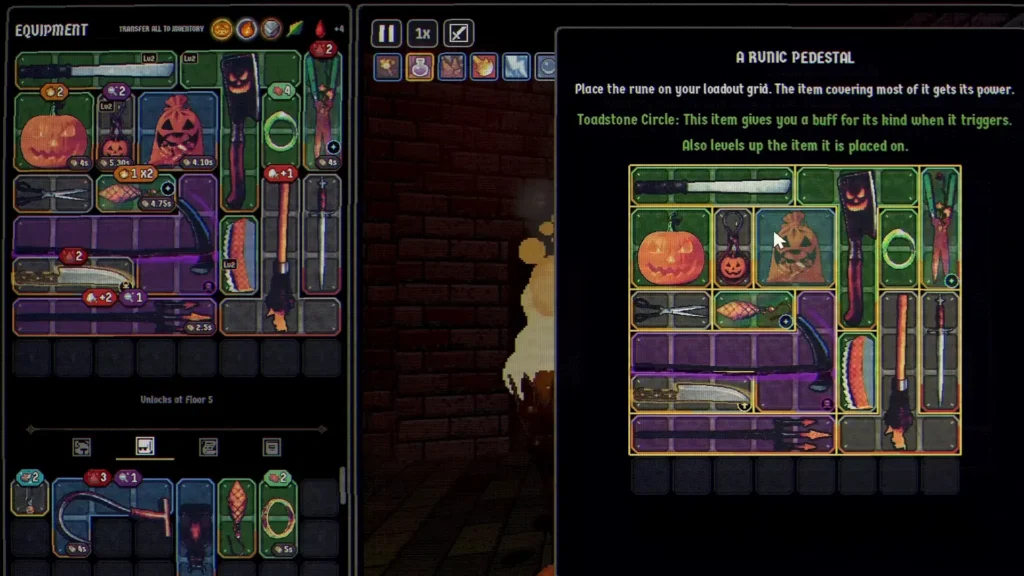
Runes affect equipment placement directly. The rune system uses 2×2 areas on your board. A rune enhances the item that covers most of its four squares. Don’t forget: this is different from the older idea (back in the demo days) that every item touching a rune automatically receives its effect. If you want a particular weapon to benefit, position it so that it takes most of the rune’s area’s space. Then check the tooltip to make sure the bonus went where you expected. The November rune update introduced 36 new runes!
Gems work through item sockets. They can add effects to equipment, including status applications. These are the Gems I found in the game and their respective effects.
| Gem | Associated Effect |
|---|---|
| Ruby / Fire Opal | Damage or Burn-related effects |
| Emerald | Poison or recovery effects in documented examples |
| Topaz | Critical-related bonuses |
| Moonstone | Dodge-related bonuses |
| Onyx | Thorns |
| Citrine | Timer or cooldown-related effects |
| Fletcher’s Garnet | Adds ammunition to a bow for the Archer |
How Combat Works in Dungeonbound
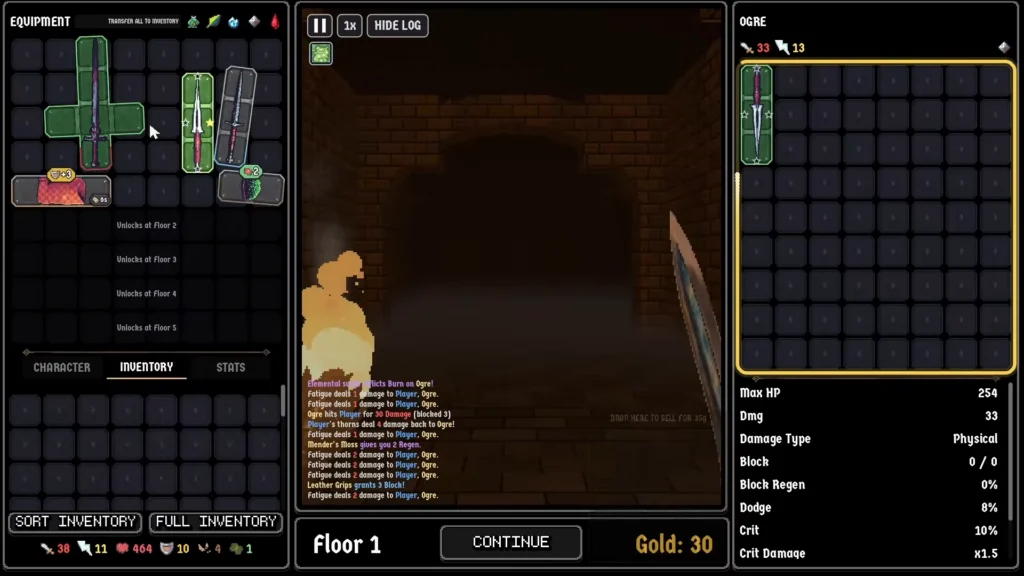
Players usually refer to Dungeonbound’s combat system as Autobattler. The name might give off simplistic vibes, but there’s more to it than the eye sees. Your equipment determines what happens when your hero attacks. Other items activate independently, and status effects can change the outcome even when your damage looks impressive. The key is understanding why each effect activates.
On Attack vs. Timed Items
We have four types of Equipment effects: Passive effects provide their benefits while the item is equipped. Battle-start effects activate when combat begins. On Attack effects activate when your hero performs an attack. Timed effects activate independently at their specified intervals.
Speed, Multicast, Fatigue and Defense
Speed quite literally means how often your hero attacks. Higher Speed can help activate effects tied to those attacks, but with the November update there came a change: Speed uses a curve. It continues providing benefits without allowing attacks to become instantaneous. Forget the old linear Speed formula.
Multicast lets an item activate its effect additional times. It’s particularly useful when those extra activations produce meaningful damage or another valuable effect. The Multicast system now includes all sources and displays its value on item indicators. However, there’s another important limit to consider: Fatigue.
Fatigue starts after 60 seconds of combat. A build focused entirely on surviving may eventually struggle if it doesn’t produce enough damage. The longer a fight continues, the more important it becomes to finish the opponent rather than simply absorb everything. Don’t be a damage sponge, alright?
Defense also differs between modes. The Halloween update removed Block Chance and Magic Resist from the Climb Mode. In the Long Haul, those defenses have a max cap of 90%.
Status Effects Explained
Here is a list of all statuses you can get or inflict in the game:
| Status | Effect |
|---|---|
| Poison | Deals damage over time and bypasses Block |
| Burn | Deals periodic damage; updated to tick every 1.5 seconds |
| Bleed | Builds toward additional damage through its trigger interactions |
| Freeze | Disrupts opponents and reduces Dodge |
| Stun | Slows affected items to half speed and causes self-damage when they fire |
| Terror | Damages the affected character when it attacks |
| Blind | Removes 5% Dodge per stack, up to 50% |
| Silence | Disables one timed or Mana item per stack |
| Root | Makes attacks 40% slower and prevents Charge from helping |
| Transmute | Changes an item into a random item of the same shape for 6 seconds |
| Unhealing | Reduces healing received by 15% per stack |
| Thorns | Returns damage when attacked; this damage hits Block first |
| Regen | Provides recovery over time |
| Charge | Supports faster activation, but is suppressed by Root |
| Weak | Reduces damage output |
| Vulnerable | Makes the affected target more susceptible to damage |
Shops, Gold and Dungeon Routes
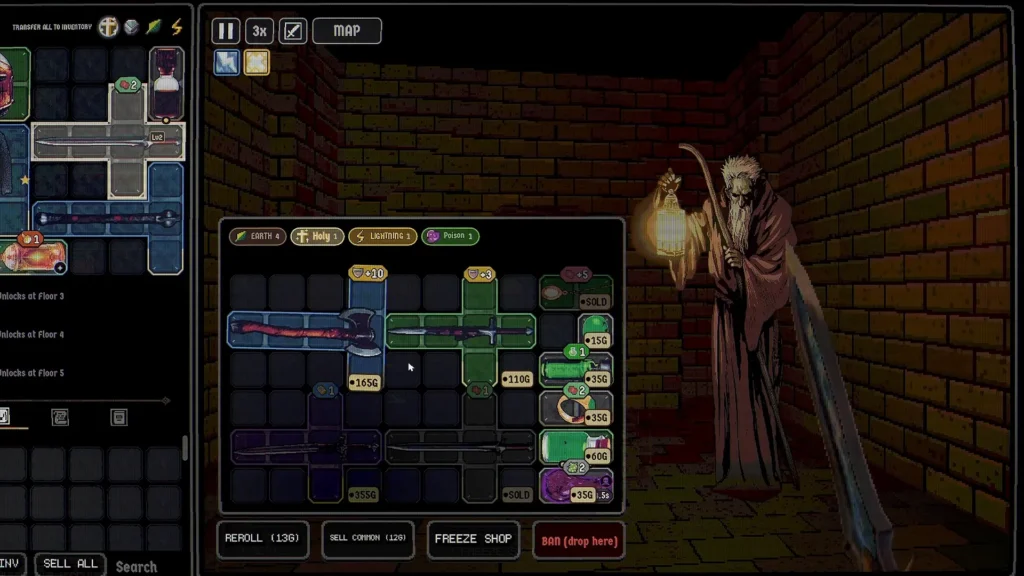
Gold is one of the easiest resources to waste, especially when rerolling shops in search of a particular item. The November 14 balance update introduced several limits that affect how much you should spend.
| Mechanic | Current Documented Rule |
|---|---|
| Selling items | Returns no more than 70% of their value |
| Shop discounts | Maximum 28% |
| Floor 1 reroll | Starts at 10 Gold |
| Floor 8 reroll | Starts at 31 Gold |
| Floor 15+ reroll | Starts at 52 Gold |
| Repeat rerolls | Cost doubles with each additional reroll |
| Item bans | Cost the item’s price and last for that run |
Let’s imagine you’re on floor one without a free-reroll effect. Your first reroll costs 10 Gold. The next costs 20, and the third costs 40. That’s 70 Gold spent on just three rerolls, before you’ve purchased anything. I’d rather leave a shop with one useful item than burn through the budget in pursuit of something that might not appear, and I think you should do the same. Oh and the shop also has a BAN area. Drag an item into it and pay the price to prevent that item from appearing in future shops during the same run.
Which Dungeon Route Should You Choose?
Routes offer different rewards and services, so you gotta be careful of which one you’re picking. Question mark paths and fights generally pay more Gold at their exits. Shrine and shop routes pay less, so they need to justify themselves through what they offer. I would choose based on what the build needs next.
If you have two pieces that would work better as one, a Fusion Forge might solve your space problem. If your core item is already strong but underleveled, an Upgrade Altar could be more useful. There’s no reason to treat every shrine as an automatic upgrade. A cursed reward might be excellent for one build and disastrous for another. Remember that.
The Long Haul Dungeons and Permanent Upgrades
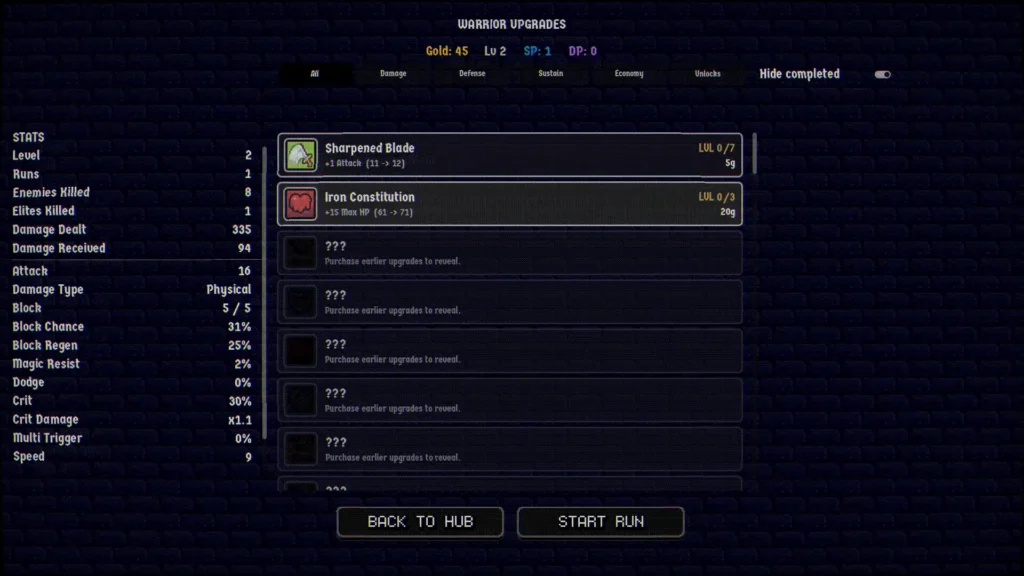
The Long Haul has five main campaign descents. The Halloween update also introduced The Hollow Patch as a seasonal dungeon.
| Dungeon | Main Threats | What to Prepare For |
|---|---|---|
| The Mudking Warrens | Kobolds, orcs, and brutefolk | Early combat fundamentals and basic survival |
| The Bonevault Crypts | Undead, curses, and cold | Debuff pressure and defensive disruption |
| The Chittering Deep | Beasts with large HP pools | Sustained damage before Fatigue becomes a problem |
| The Infernal Court | Demons with strong hits and critical attacks | High incoming damage and Burn |
| The Wyrmroost | Dragons | Difficult late-campaign encounters |
Permanent upgrades are the main difference between The Long Haul and The Climb. After returning from a dungeon, check your upgrade options before starting another attempt. The campaign includes upgrades for your board and general combat performance. Gold and Skill Points support your long term progression.
You don’t need to spread your resources evenly across every category. If the main problem is survival, look for upgrades that address the damage you’re actually taking. If your fights regularly reach Fatigue, a stronger offensive system might be the next best thing for ya.
The Mage’s separate elemental progressions are another reason to read the upgrade screen carefully before investing. And if you want to change your campaign build, the options menu includes RESET SKILL TREE. This refunds purchased upgrades except unlocks. It isn’t described as a complete character or save reset.