

In Zombies Aren’t Real, you clear a level by killing every zombie on the map. Your score is the share of civilians you save, and each level sets a minimum. The early levels ask for 4%. This Zombies Aren’t Real beginner guide comes down to four rules: build small Safe Zones with gates, use a Broadcast building to call civilians in, keep every wall inside your garrisons’ range and spend every Skill Point before the battle.
Jump to a Section:
How a Level Works in Zombies Aren’t Real
Every level has two parts. First comes the planning phase, where nothing moves and you spend money on Safe Zones, walls and units. When you press Ready, the outbreak starts and the battle phase begins.
Planning Phase vs Battle Phase
In the planning phase, civilians stand in groups across the city and no zombies exist yet. Hold Alt and use the middle mouse button to tilt the camera and check streets and building heights. Take your time here. Most levels are won or lost before the first zombie appears.
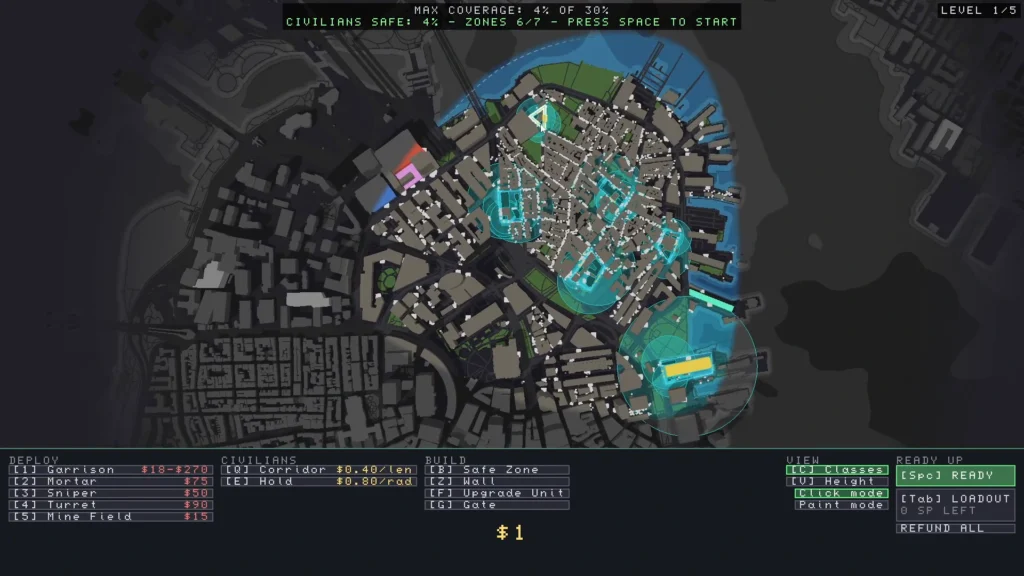
Once the battle starts, your main tools are battle abilities like Paratroopers and Air Strike. You pay for them with Skill Points (SP) in the Loadout, which opens with Tab. You can pause at any time and switch the speed between 1x and 4x.
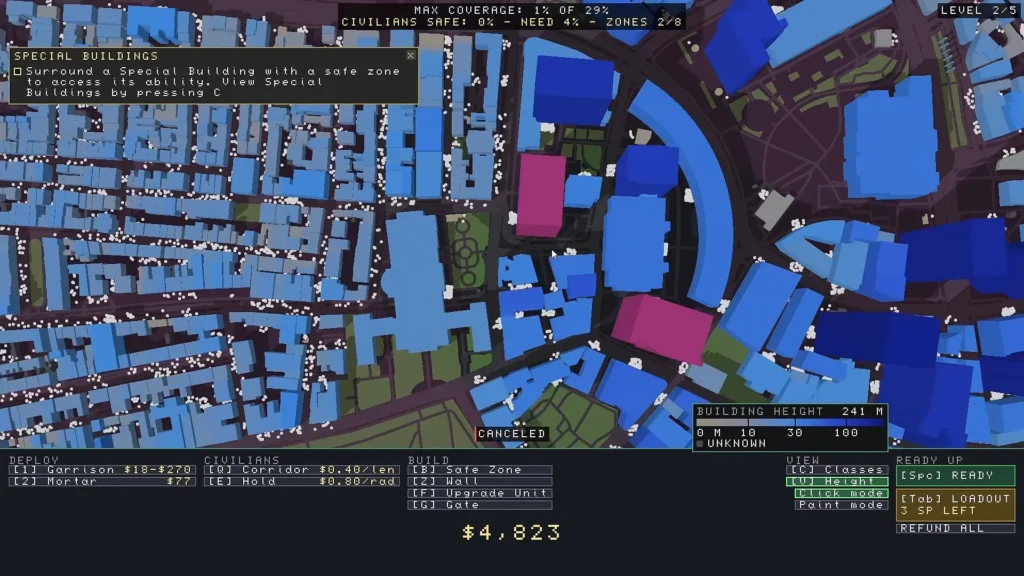
- V: show building heights (darker blue means taller)
- C: show special buildings by class
- 1 / 2 / 3: Garrison / Mortar / Sniper
- G: Gate
- X: refund a unit
- Tab: open the Loadout
- Space: start or pause the battle
- Enter: close a Safe Zone
- Right-click: add or remove a Safe Zone corner
- Ctrl + Z: undo
Level Expansion, Refunds and Restarts
Each city is a chain of levels. You start in a small part of the city, and every cleared level makes the map bigger. You also get more money and more Skill Points. Your Safe Zones and units carry over to the next level. Boston has five levels, and the largest New York levels cover all of Manhattan with over 500,000 civilians.
Refund All removes everything you built and gives back the full cost. Use it when the bigger map makes your old layout useless.
Expect to lose often. The game is built around restarts, so change one or two things and try again. After a loss, a debrief explains what went wrong, and red flags on the map mark where your walls broke.
Every civilian you leave unprotected eventually turns into a zombie you have to kill. So each civilian you save is also one less zombie in the fight.
Badges and Difficulty
Each level gives a badge based on how many civilians you saved: Bronze, Silver, Gold, Diamond or Ruby. The share you need for each badge changes from level to level, and every level has its own leaderboard.
The end screen breaks down kills for each unit type, both per unit and in total, plus cost per kill. Check it after every run. It shows which units earn their price.
You can pick Fixed or Adaptive difficulty in Settings > Gameplay. Adaptive adjusts the challenge to your skill, while Fixed stays the same.
Click a badge on the level screen to see the exact setup you used to earn it. That makes it easy to rebuild a run that worked.
Zombies Aren’t Real Safe Zones
A Safe Zone is a walled area that protects the civilians inside it. Zombies never spawn inside a Safe Zone. Units inside an intact zone get unlimited reloads, except for turrets. The zone holds until zombies break through a wall.
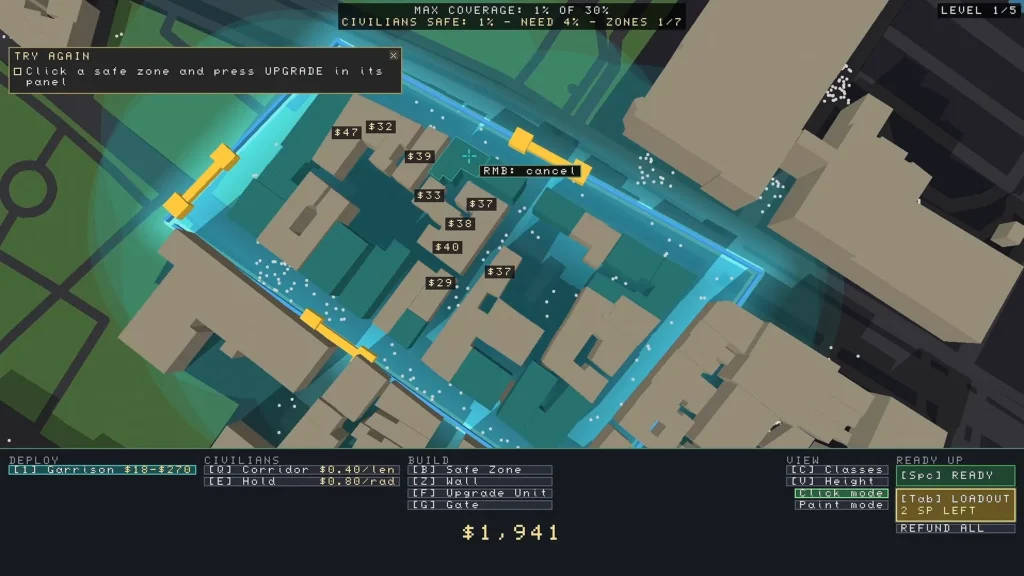
How to Place and Edit a Safe Zone
- Select the Safe Zone tool and left-click to place corners around buildings and civilians.
- Click the first corner again or press Enter to close the shape. A zone needs at least three corners.
- Drag any corner to reshape the zone. The cost updates as you drag.
- Right-click a wall to add a corner. Right-click a corner to remove it.
The price depends on wall length, so bigger zones cost more. A compact, round shape holds the most space for the least wall. Each level also limits how many Safe Zones you can build, and a single wall can’t go past a set length. A perk later gives you three extra Safe Zones.
Why Every Safe Zone Needs Gates
A zone without gates is closed. Civilians outside can’t get in, even with zombies right behind them.
Most civilians also stay where they are until zombies get close. They only run for a zone when something chases them or a Broadcast building calls them. Place gates on main roads and at the ends of bridges, close to where civilians gather. Gates also give civilians a way out if the zone falls.
Keep the Wall Inside Garrison Range
Most breaches happen where no garrison can shoot at the wall. A wall pushed out into a park or an open field is the classic weak spot.
Click a garrison to see its range. Then drag the wall in until it sits close to your garrisoned buildings. If a stretch of wall has no building near it, cut that stretch out of the zone.
Wall Upgrades vs More Firepower
Select a Safe Zone and press Upgrade to give its walls more health. Small zones are much cheaper to upgrade than big ones. Upgrades still cost a lot, and extra guns usually do more for the same money. Upgrade the zone that takes the main push, then spend the rest on firepower.
You can also draw plain walls without making a Safe Zone. They cost less. Use them to close a gap or to double the wall across a bridge.
Nested Zones and Bait Zones
A nested setup puts a small Safe Zone inside a bigger one, with gates between them. If the outer wall breaks, civilians run into the inner zone, and the units there keep their unlimited reloads. Keep the inner zone away from the outer wall so one breach can’t hit both.
A bait zone is a small, cheap zone you expect to lose. It gathers civilians and slows the horde before it reaches your main base. Bait zones work best with Militia or Airlift, which the next section covers.
- Every Safe Zone has gates on the sides civilians will come from
- Every stretch of wall is inside at least one garrison’s range
- Each special building inside a zone has an ability picked
- Mortars and snipers sit on tall buildings (check with V)
- All Skill Points are spent in the Loadout
- Your main zone has a fallback, like an inner zone
What Each Special Building Does
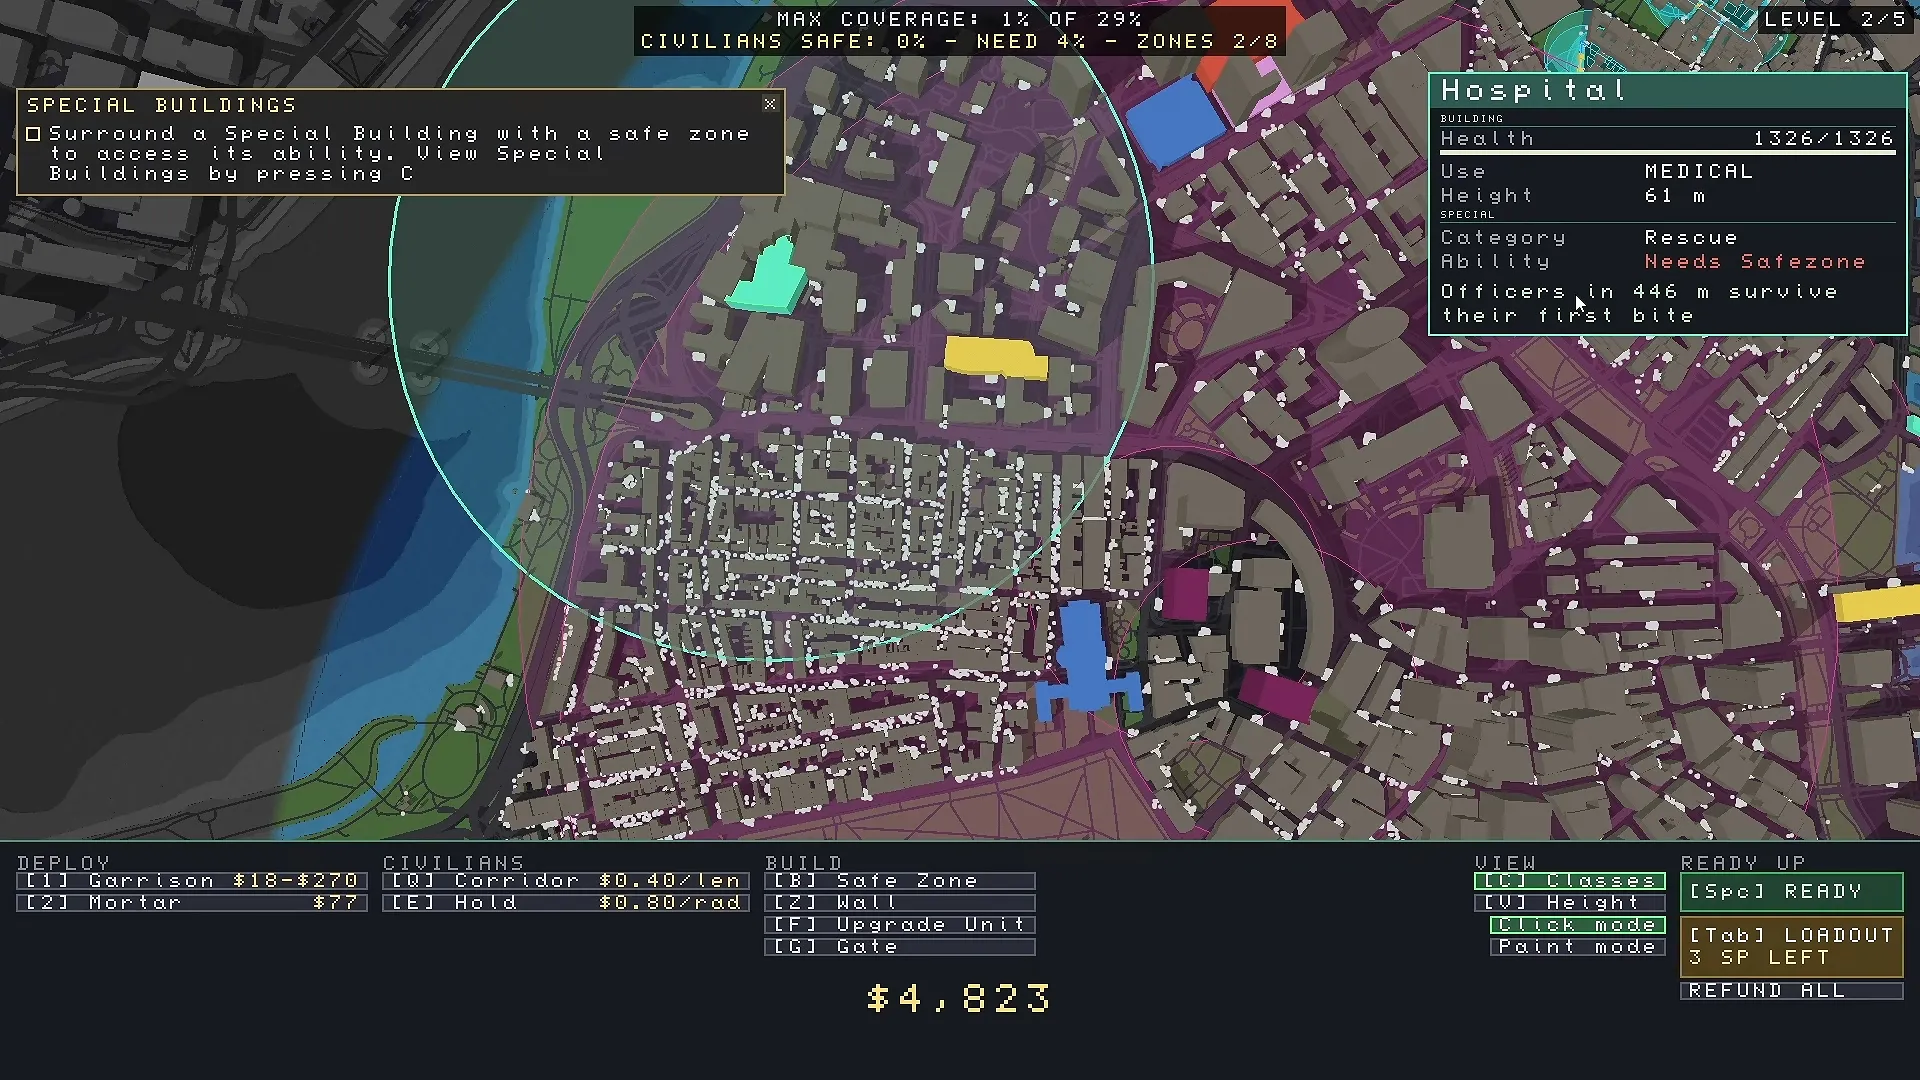
Some buildings come with special abilities. Press C to highlight them by class; Civic buildings show in blue. A special building has to sit inside a Safe Zone before you can pick its ability. Most abilities work within a radius that changes from building to building. Check the coverage circle before you pick one.
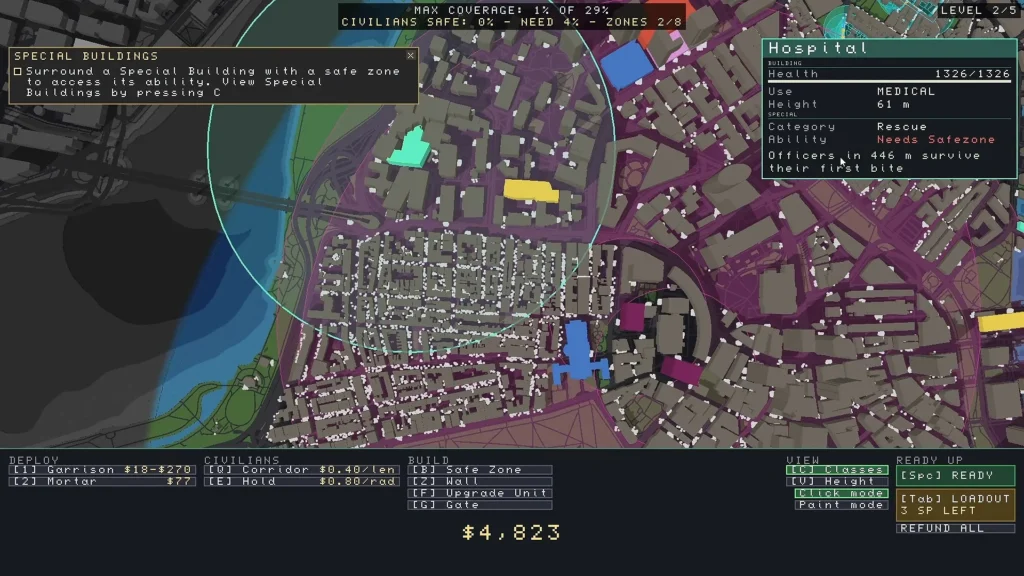
You can put a garrison on a special building too. Many of them are large, so they make good garrison spots.
| Class | Ability | Effect |
|---|---|---|
| Civic | Police | Spawns an officer every 2 seconds, with up to 100 guarding the zone |
| Civic | Militia | On a breach, 35% of civilians in range take up arms |
| Civic | Broadcast | Calls civilians in range to run into the zone |
| Civic | Radio Tower | Units on buildings in range reach 50% farther |
| Trade | Budget | Units placed in range cost 20% less |
| Trade | Reduced Cost | The unit on this building costs 60% less |
| Trade | Repair | Walls in range heal 40 HP per second |
| Armory | Supply | Guns in range reload faster |
| Armory | Command Post | Guns in range fire faster |
| Rescue | Medic | Officers in range survive their first bite |
| Rescue | Airlift | Flies civilians out of the zone over time |
Civic Buildings
Broadcast is the best way to fill a zone early. It sends civilians in range running toward the zone at the start of the battle. Civilians still need a gate to get inside, so add gates on the sides they run from.
Police officers stay in the zone and walk to whichever wall is under attack. Set the station to Pursue, and they leave the zone to hunt zombies across the map. A station that gets overrun stops sending officers.
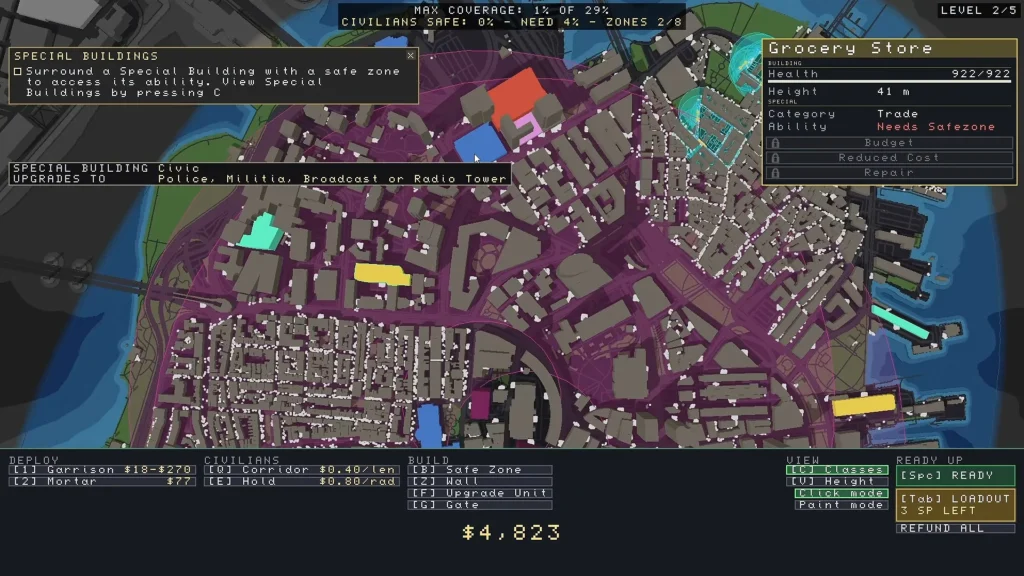
Militia turns 35% of the civilians in range into fighters the moment the wall breaks. They clear a lot of zombies, but civilians who join the Militia no longer count as saved.
Radio Tower boosts garrisons, snipers, mortars and turrets on buildings in its range. A second tower that overlaps the first adds another 25%.
Civilians who become Militia no longer count toward your saved total. Use Militia only in zones you expect to lose.
Trade Buildings
Budget cuts 20% off garrisons, snipers, mortars, turrets, mines, C4 and battleships placed in its range. Put expensive units like the Howitzer next to a Budget building.
Reduced Cost does nothing until a garrison, sniper, mortar or turret sits on that building. Then that unit costs 60% less, which also makes it cheap to level up. A tall Trade building with a sniper or mortar on top is a strong pick.
Repair heals walls in range at 40 HP per second, and two Repair buildings that overlap stack. Shape the zone so the whole wall sits inside the repair radius.
Armory Buildings
Supply makes guns in range reload faster. Command Post makes them fire faster. Both help nearby garrisons put more bullets into the horde. If one zone holds two Armory buildings, take one of each.
Rescue and Explosive Buildings
Medic keeps officers alive through their first bite. It pairs well with Police and with Paratroopers dropped near the zone.
Airlift flies civilians out of the zone over time. Civilians who leave this way are safe, so an Airlift zone can fall late in the battle without a big loss.
Some buildings, like gas stations, are explosive. They blow up when a blast touches them and can destroy your nearby buildings.
Keep mortar fire, C4 and air strikes away from explosive buildings near your walls. One stray hit can wipe out your own garrisons.
Best Special Building Combos
A few pairings show up in almost every strong setup. Build your zones around them whenever the map gives you the right buildings.
- Broadcast + Militia: Broadcast fills the zone, and Militia turns that crowd into a counterattack when the wall breaks. Use it in forward zones you expect to lose.
- Broadcast + Airlift: Broadcast pulls civilians in, and Airlift flies them out. The zone can fall later with little loss.
- Police on Pursue + a garrison on the station: The garrison holds the building while officers thin the horde out on the map.
- Radio Tower + Mortars or Snipers: Tall buildings plus 50% more reach can cover most of a district.
- Budget or Reduced Cost + expensive units: Place Howitzers or a leveled sniper where the discount applies.
- Medic + Police or Paratroopers: Officers in range survive one extra bite.
Where to Place Garrisons, Mortars, Snipers and Turrets
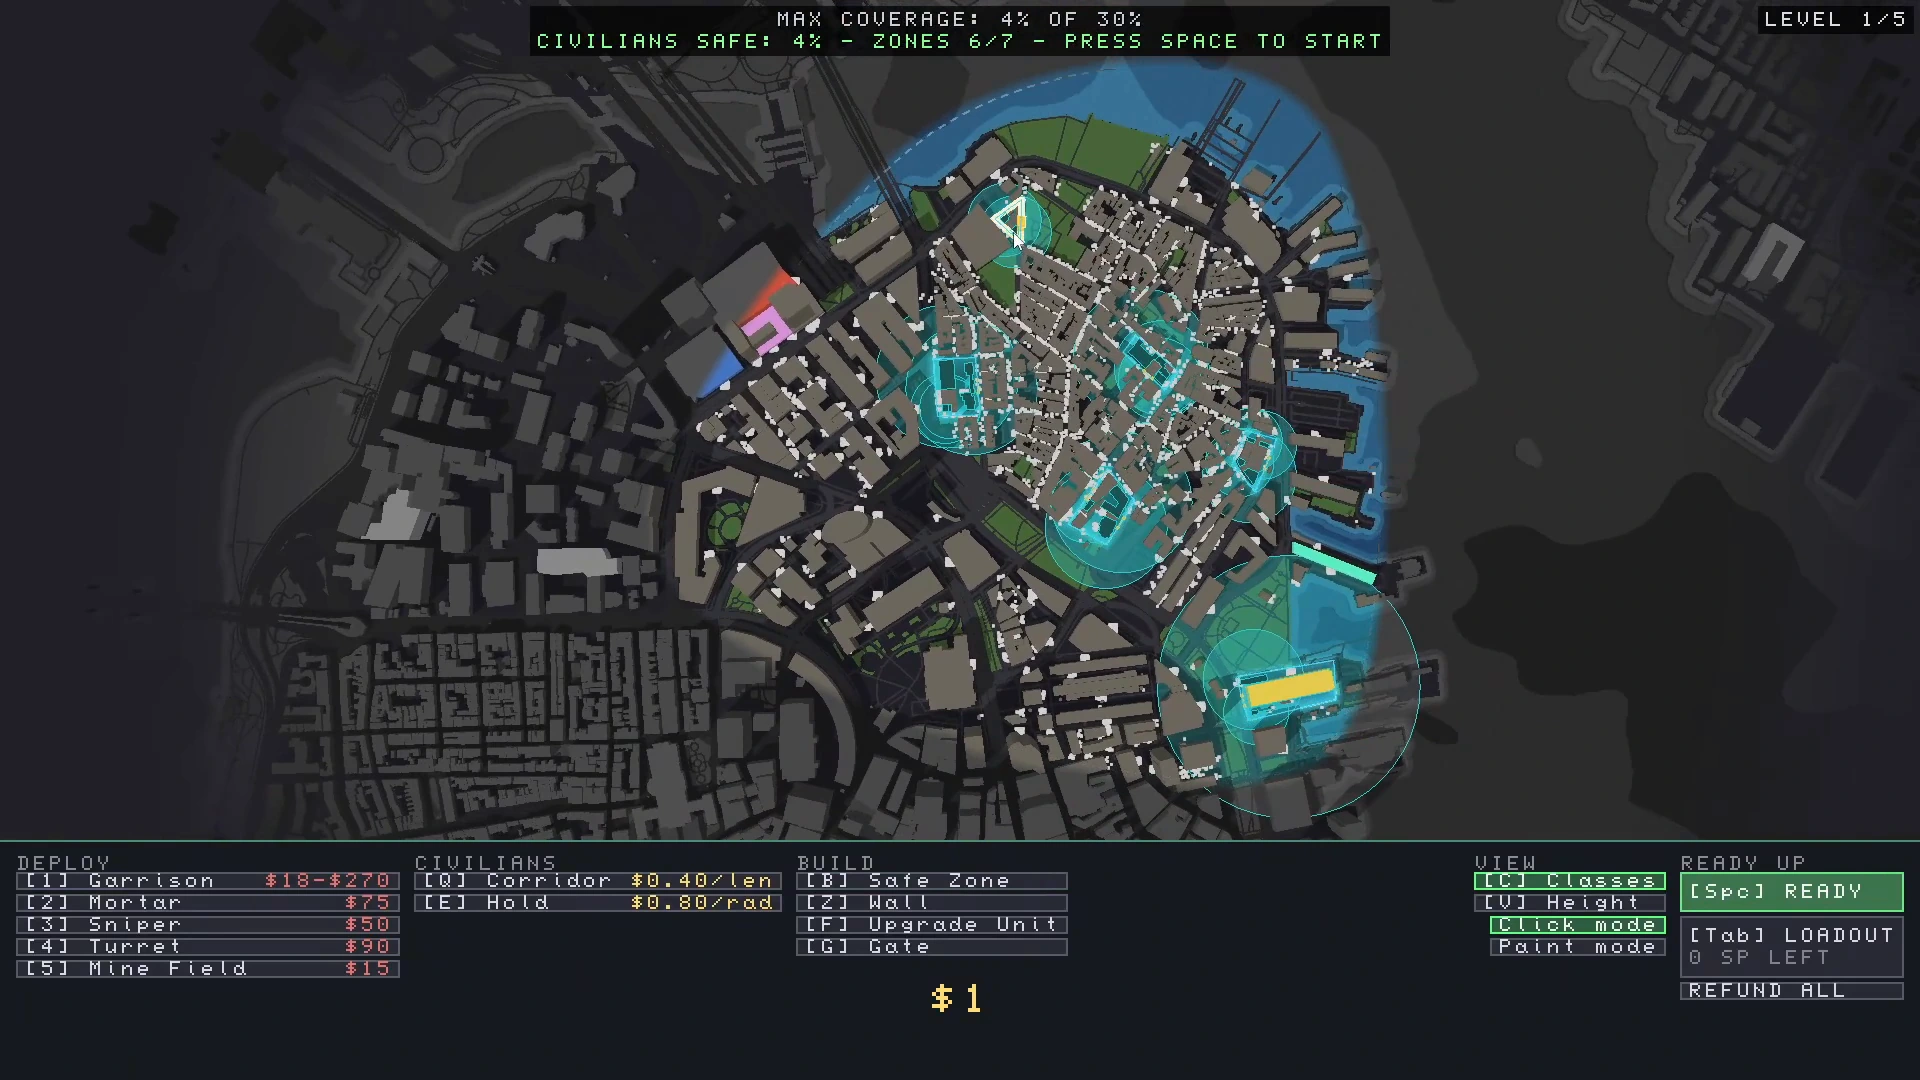
Most defenses go on buildings, and the building you pick affects their range. Minefields go on streets, and Battleships go on water. Press V to see building heights before you place anything. Paint mode lets you drag across several buildings to put one unit on each. Click mode places them one at a time.
| Unit | Best spot | Key facts |
|---|---|---|
| Garrison (1) | Small buildings along the wall | 5 damage per shot; a bigger building only adds range and cost |
| Mortar (2) | Tall buildings | Area damage of 10, or 30 after one level up; each new mortar costs $1 more |
| Sniper (3) | Tallest buildings, aimed at bridges and roads | 80 damage, very long range, limited firing angle; shoots mutated zombies first |
| Turret | Bridges and street choke points | Very fast fire, 1,000 rounds, never reloads |
| Minefield | Streets the horde will use | Explodes a moment after zombies set it off |
| C4 | Bridges and crowded streets | You set it off yourself with the detonate tool |
| Howitzer | Tallest building inside a zone | Huge range across most of the map; costs more each time |
| Battleship | Water near bridges | Works like several mortars; can’t hit targets close to itself; costs more each time |
Garrisons
A garrison fires the same amount no matter how big its building is. A big building only adds range and cost. Several small garrisons along the wall give you more firepower for the same money, but each one covers less ground.
A level up makes the magazine bigger, so the garrison fires longer between reloads. One level up is usually worth the money. Garrisons deal 5 damage per shot, and zombie health rises during the battle. Once it passes 5, garrisons stop killing in one hit, and you need stronger units behind them.
Mortars and Snipers
Height sets the range for both. A mortar on a tall tower can cover a whole district, while one on a low roof barely reaches the next street. A level up raises mortar damage, but the blast stays the same size.
Mortars hit everything in the blast, including civilians crowding at your gates. Keep their targets away from places where civilians gather.
Hold the left mouse button and drag to aim a sniper. Point it down a bridge or a long road. Pick Nearest First for a choke point or Farthest First for long coverage. Snipers matter more as the battle goes on. Their 80 damage per shot still hurts after zombie health climbs past what garrisons can handle.
Turrets
Turrets fire faster than garrisons, but they never reload, even inside a Safe Zone. Treat them as a one-time burst. Their range grows with the size of the building’s footprint, and height doesn’t help them.
Put turrets where the horde passes early, like bridges and street choke points. Bridge pillars also take turrets. A turret there spends all its ammo before the zombies ever reach your wall.
Ammo Rules Inside and Outside Safe Zones
Ammo decides how long your defense lasts. These rules apply in every battle.
- Units inside an intact Safe Zone get unlimited reloads (turrets are the exception)
- Once zombies breach the zone, units inside lose their unlimited reloads
- Units outside a Safe Zone cost more, get a limited number of reloads and wait 12 seconds before their first shot
- Turrets never reload anywhere
- Helicopters fly off the map to rearm, then come back
- APCs drive back to a Safe Zone to rearm
How Corridor and Hold Move Civilians
Corridor and Hold move civilians that no Broadcast building can reach. Both cost money, so save them for the gaps between your Broadcast circles.
Corridor
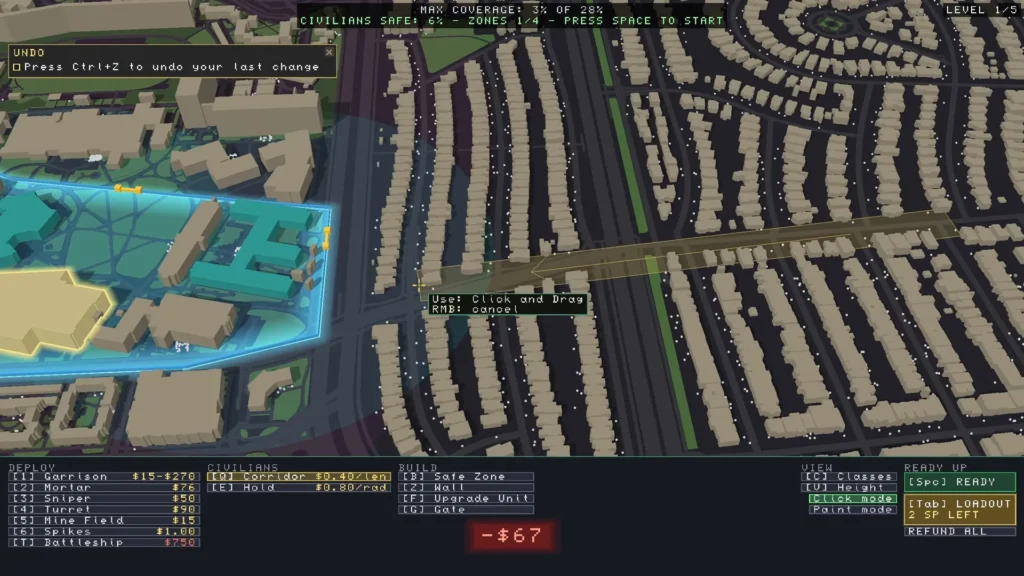
Click and drag to lay down a yellow lane. Civilians who walk into it move fast in that direction. You can make the lane wider, and a wider lane costs nothing extra.
Civilians in a corridor walk in a straight line and don’t steer around buildings, so lay corridors along roads. You can chain them as one corridor can end where the next one starts in a new direction. The best trick is to end a corridor just inside a Broadcast radius. Civilians then run the rest of the way into the zone.
Hold
Hold places two circles. The outer circle pulls civilians toward the inner one, and the inner circle keeps them there until a corridor pulls them out. Civilians move slowly toward a Hold.
Hold works best inside a zone. It pulls civilians away from the wall, where breaches and mortar fire kill them. It also packs them together for Call to Arms.
The developer plans to make civilians smarter and improve evacuation tools like Corridor and Hold. How these tools work may change after updates.
Which Battle Abilities Are Worth Skill Points
Battle abilities are your answer when the plan starts to break. You buy them with Skill Points in the Loadout (Tab), you get more points as the map grows, and new abilities unlock as you clear levels. Between runs, you can take points out of one ability and put them into another.
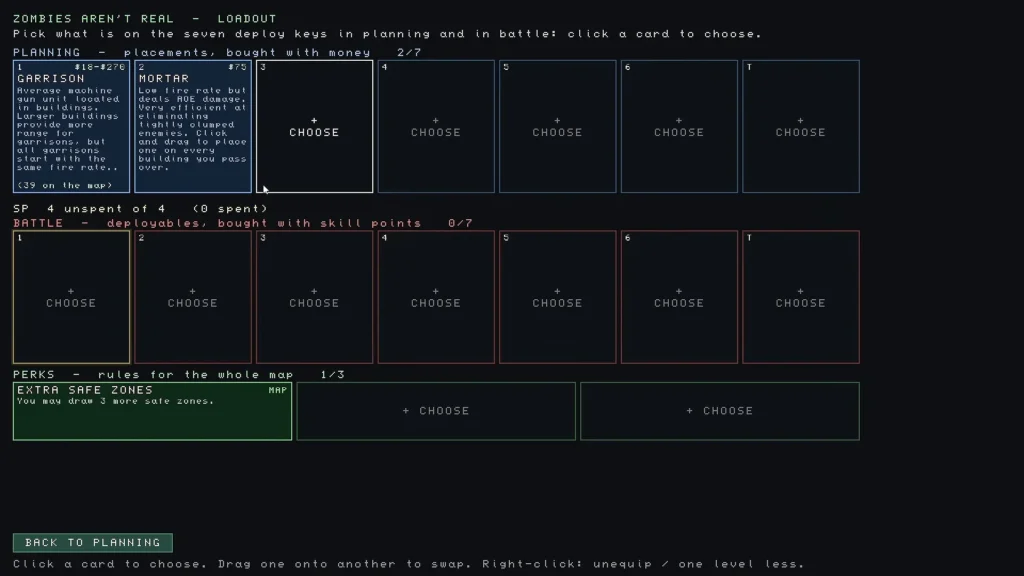
Spend every point before the battle. Unspent Skill Points do nothing.
| Ability | What it does |
|---|---|
| Paratroopers | Drops 20 officers per point who hunt zombies |
| Helicopter | Gatling gun gunship that clears big crowds and rearms off the map |
| Air Strike | A bomber drops six bombs after a short delay |
| Firebomb | Starts fires that burn zombies over time and spread across parks |
| Gas Bomb | Stuns zombies inside a gas cloud |
| Cruise Missile | One fast explosion with almost no delay |
| APC | Armored vehicle that shoots as it drives and rearms at a Safe Zone |
| Tank | Air-dropped vehicle that fires explosive shells |
| Controlled Demolition | Topples a tall building in the direction you choose |
| Call to Arms | Arms a crowd of civilians as police |
| Security Bus | Picks up civilians and drives them to a Safe Zone |
The list also includes Medevac, Bulldozer, Cluster Bomb, Rally and AC-130.
Paratroopers and Helicopters
Paratroopers are your best tool for stopping an outbreak early. You can drop them the moment the battle starts, so they can surround an outbreak and wipe it out before it spreads. Hold the left mouse button and drag to paint where they land. The plane drops them when you let go.
They land in Hunt mode, which means they chase and kite zombies. In Hunt mode they sometimes get trapped in corners. Switch them to Guard to keep them inside a Safe Zone, defending the walls.
Helicopters are built for big crowds. When they run out of ammo, they fly off the map, rearm and come back. Send them where the horde is thickest, and keep one in reserve for emergencies.
Air Strikes, Fire and Gas
An Air Strike arrives after a delay, so aim at where the horde is heading. Drag to spread the six bombs in a line. Spaced-out bombs break a big horde into smaller groups that your garrisons can handle. A single click stacks all six bombs on one spot, which is the best way to break a bridge. Bombs also flatten buildings and kill civilians in the blast.
Firebomb fire damages zombies over time and spreads through parks and other green space. Zombies don’t avoid it. Drop it on green space along the horde’s path, or on a bridge they have to cross. Fire works best early, while zombie health is still low.
Gas Bomb stuns every zombie inside its cloud. Use it to pin a horde in place under mortar fire.
Ground Vehicles and Evacuation Tools
APCs drive around shooting and return to a Safe Zone when they need ammo. Ground vehicles can get stuck in corners, though, and then sit useless for the rest of the level.
Security Bus and Medevac carry a limited number of civilians and don’t draw crowds to them, so they save fewer people than other abilities. Call to Arms only covers the civilians inside the circle you drag, so it often misses part of the crowd.
Late-Game Abilities
Two abilities are best saved for the biggest maps.
The Cure works like a disease for zombies. It spreads from zombie to zombie and turns them to ash, then fades out over time. You get one per battle, and it does the most damage in a dense horde.
The Nuke levels every building in its blast and kills every zombie inside it. It kills every civilian there too, so save it for areas you have already lost.
How to Handle Mutating Zombies and Swimmers
Zombies get tougher the longer a battle runs. Their health climbs over time, and some of them mutate into special zombies. You can track zombie health in the corner of the screen, next to the civilian and zombie counts.
How Mutation Works
Mutating zombies gather into a tight, swirling cluster. When the mutation finishes, every zombie in that small radius gains a special ability. Kill the cluster before it finishes.
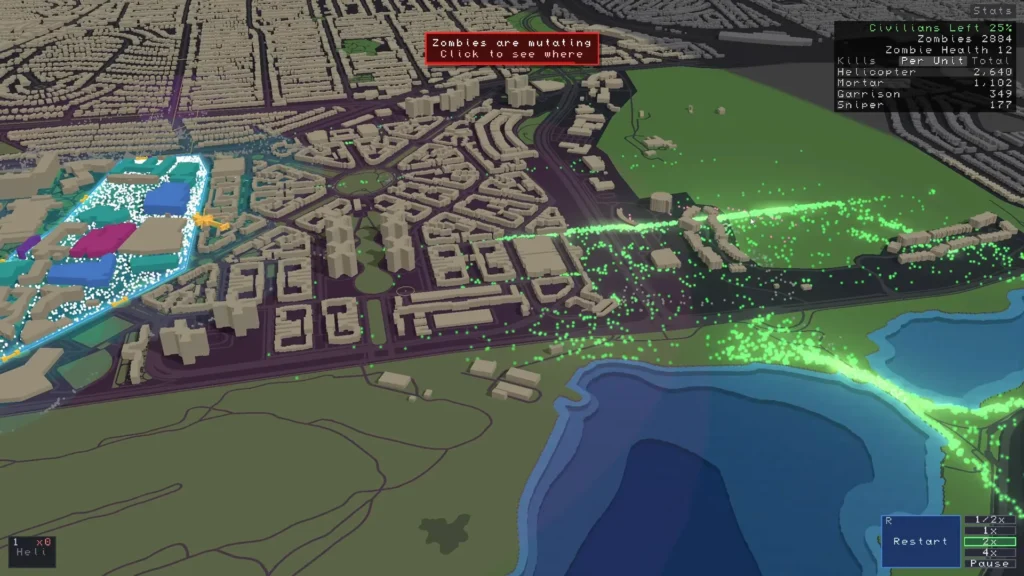
Cruise Missile is ideal here because it lands almost at once. A Helicopter also works, and so does a sniper in range, since snipers target mutated zombies first.
Mutation Types
- Swimmers are hot pink and can cross rivers and the sea. Safe Zone walls extend across water, so Swimmers still have to break a wall to get in.
- Giant zombies are bigger and have much more health.
- Explosive zombies do heavy damage when they reach your walls.
How to Use Bridges, Fire and Choke Points
Water and bridges are your best friends on most maps. Water pushes most of the horde toward bridges, but Swimmers can still cross it and hit your waterfront walls. Keep a few guns on those walls too.
How to Break a Bridge
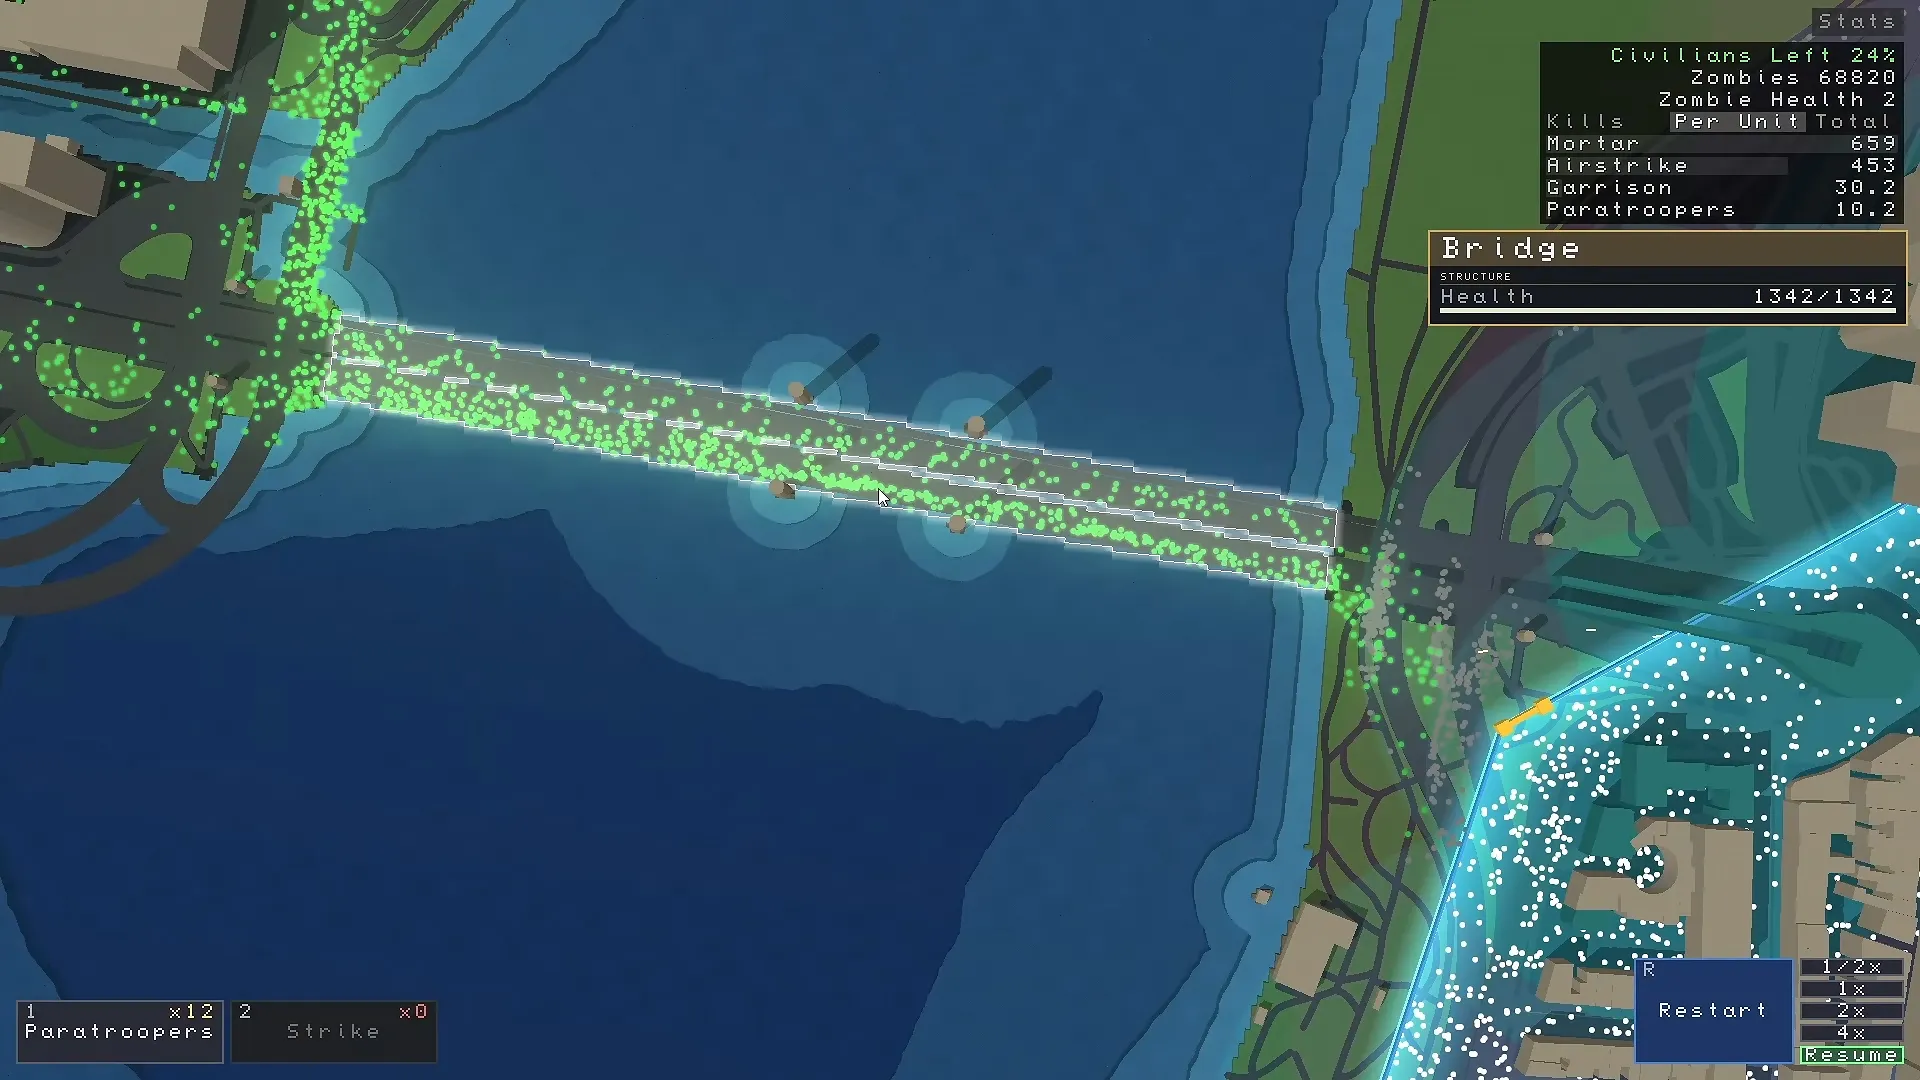
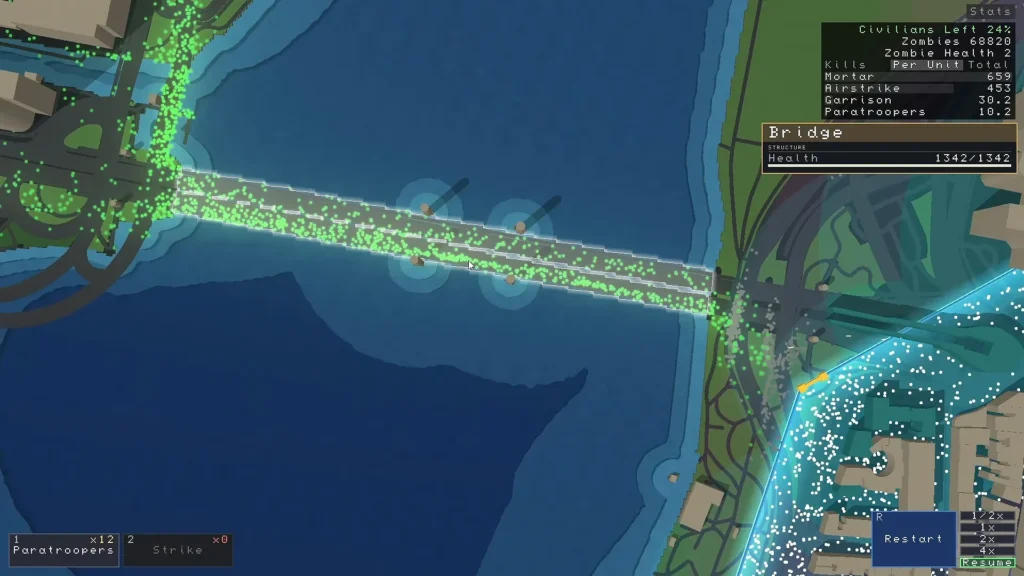
Bridges can be destroyed, but they have a lot of health. One spread-out Air Strike won’t do it. Stack the bombs with a single click and add mortar fire or C4, and the bridge falls. With fewer bridges left, the horde has to cross where your guns already point.
Check the map for small bridges and walkways. One missed crossing can let a horde walk around your whole defense.
Bridges as Kill Zones
A bridge you keep is a natural choke point. Line it with turrets, cover it with snipers set to Nearest First, and drop Paratroopers on it when the horde arrives. Fire on a bridge hits hard, because every zombie has to walk the full length through the flames.
Zombies cut off on an island with no way to reach civilians can stop the level from ending. Send Paratroopers or a Helicopter to clear them.
Why Zombie Spawns Change When You Restart
Zombie spawn points aren’t fixed. Almost any change to your setup moves them, such as a new gate, a moved gate, a new garrison or a different building ability.
That works both for and against you. A plan built around one spawn can fall apart after a small edit. A terrible spawn is just as easy to reroll: change one small thing and restart. Zombies never spawn inside a Safe Zone, but they can spawn right outside its gates.
Launch Issues and Workarounds
Zombies Aren’t Real launched in early access on November 13, 2026, for Windows only. A few problems came with launch. Here is where each one stands.
- Error 0x11C7 on launch: The game isn’t code-signed yet. Update Windows first. If the error stays, you can turn off Smart App Control in Windows Security > App & browser control, but this turns it off for every app on your PC.
- Custom maps in co-op: If a Workshop map won’t load, have both players subscribe to it. This works for some players but not all. A fix is planned for the first update, so only one player will need the map.
- Co-op desync: Some matches desync right after they start.
- Stuck ground units: APCs and Tanks sometimes get stuck in a corner for the rest of the level.
The game is in early access, and version 1.0 is planned for Q1 2027. Numbers in this guide, like costs and building bonuses, may change with updates. A Mac version is also in progress.