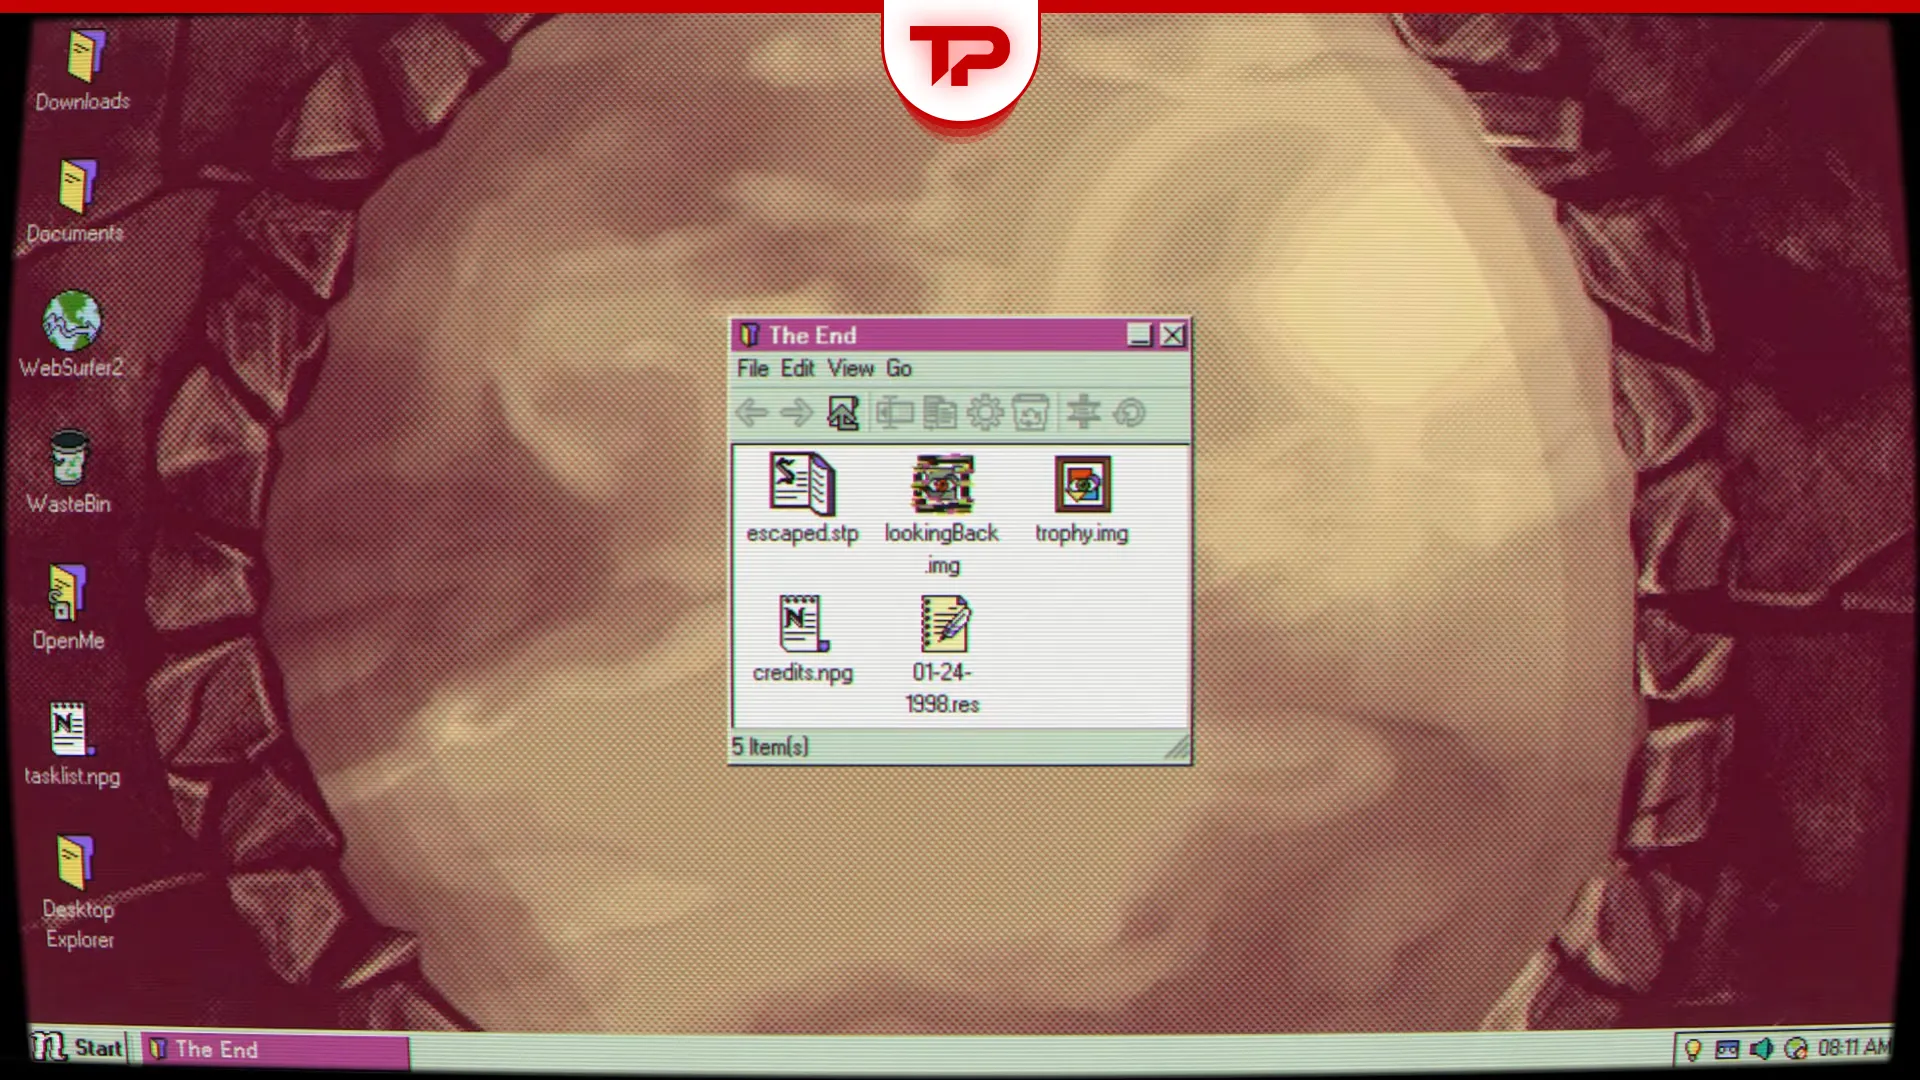


Desktop Explorer throws you into your late uncle’s old PC, and almost every folder hides a password you have to earn. This walkthrough covers Desktop Explorer all puzzles from the first login screen to the final chess puzzle, in the order you’ll actually hit them.
The game splits into four parts, and you play through them in this order: Halibut, then M4x1mus (inside NextRooms), then Admin, then Guppy. A full run takes a little over two hours if you’re not stuck anywhere, though the M4x1mus section alone eats up more than half of that.
Full spoilers below. If you only need one answer, jump to your section and skip the rest.
What we cover:
Part 1: Halibut
You play as Guppy here, working through your late uncle Halibut’s old profile. This part covers the login screen. Then the Cave and the Temple.
Login and OpenMe Password
You start on the login screen with three usernames, but only Halibut is unlocked at first. Log in, open the Chronolog app from the Start Menu and read through the journal entry. Your uncle calls you by a nickname in his letter, and that nickname is the password for the OpenMe file on the desktop.
OpenMe password: guppy
Open OpenMe, then run DE_Installer.exe to install Desktop Explorer itself. Pizarro shows up next with a short tutorial on how puzzles work, including a tip that source code sometimes hides answers. After that, you land on Puzzle 0.
The Cave: Puzzle 0 to Puzzle 10
The Cave teaches you most of the game’s main tricks like resizing windows, checking source code, renaming file extensions, and stacking files on top of each other. Keep every password you find written down somewhere, since a few later puzzles reuse them.
| Puzzle | Name | Answer |
|---|---|---|
| 0 | Prologue | fortuna |
| 1 | Go In | Inanna |
| 2 | Ancient Ruins | ELEPHAS |
| 3 | Narrow Tunnel | SALVE |
| 4 | Crossroads | PORTONUS |
| 5 | Big Door | MMTT |
| 6 | Lights Out | Kassandra |
| 7 | Dark Sanctum | RUBICON |
| 8 | Following the Dark | RUBICON |
| 9 | Altar | Stack the stones on top of each other |
| 10 | Beyond | crocodile, 14, fire, Walleye |
A few of these need extra steps, not just typing a word:
Puzzle 2: Ancient Ruins
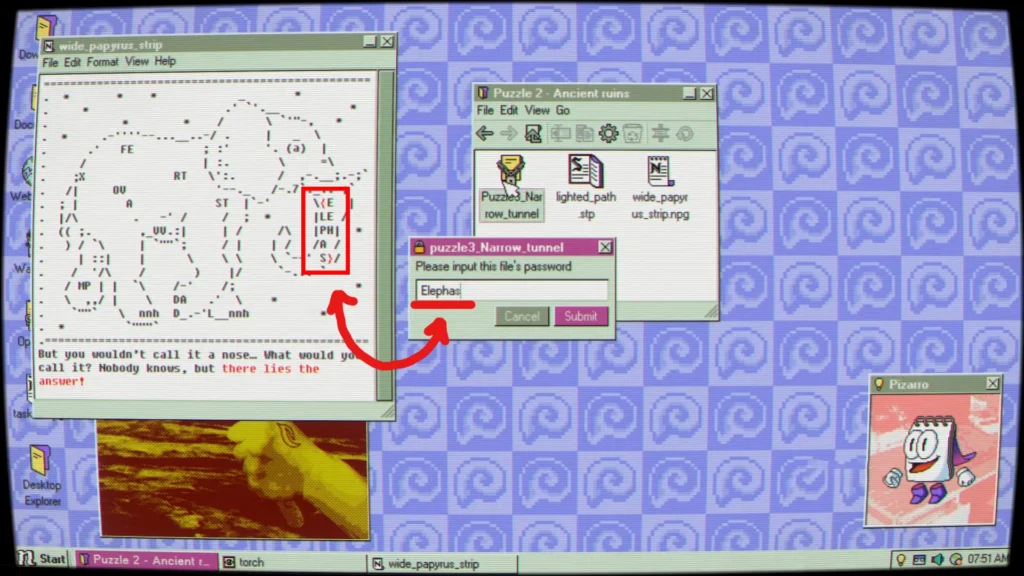
Puzzle 2 hides its password inside a text file. Open it, turn on Word Wrap under Format, then drag the window’s corner until the text forms the shape of an elephant. The trunk points to the answer.
Puzzle 4: Crossroads
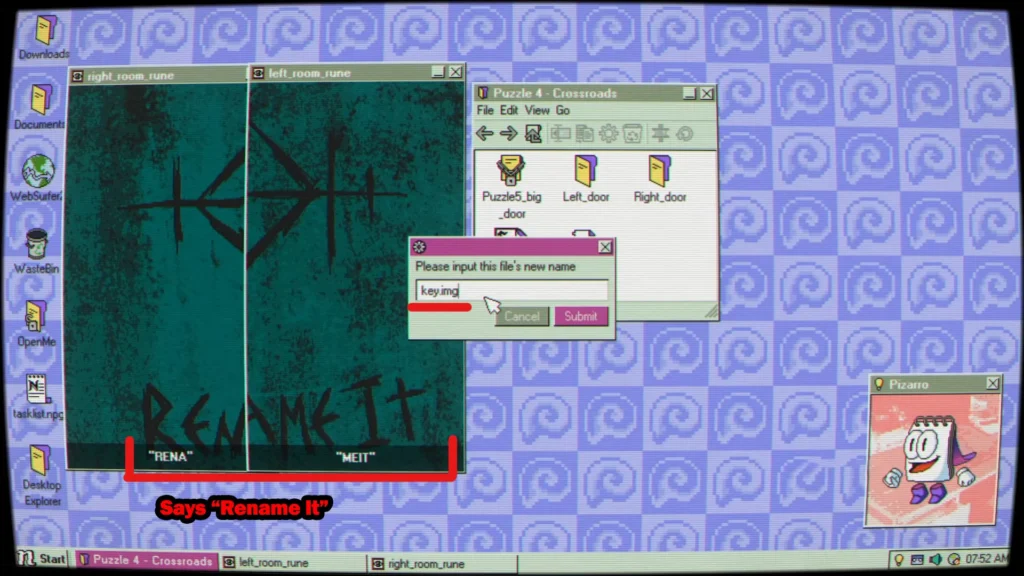
Puzzle 4 has a corrupted file called key.err. Rename its extension to .img and open it to reveal the password.
Puzzle 5: Big Door
Puzzle 5 doesn’t hide its password in the picture at all. Right-click etched_walls.img, open Properties, and read the author field. The story asks who made the writing, not what it says.
Puzzle 9: Altar
Puzzle 9 is the one most people get stuck on, because the Altar folder is hidden. Go back to Puzzle 1, open View and turn on Hidden Files, then open Puzzle9_Altar with RUBICON. Inside, stack the three flat stones on top of each other. flat_stone_S is in Puzzle 6, flat_stone_M is in Puzzle 8, and flat_stone_L is in the Altar itself.
Puzzle 10: Beyond
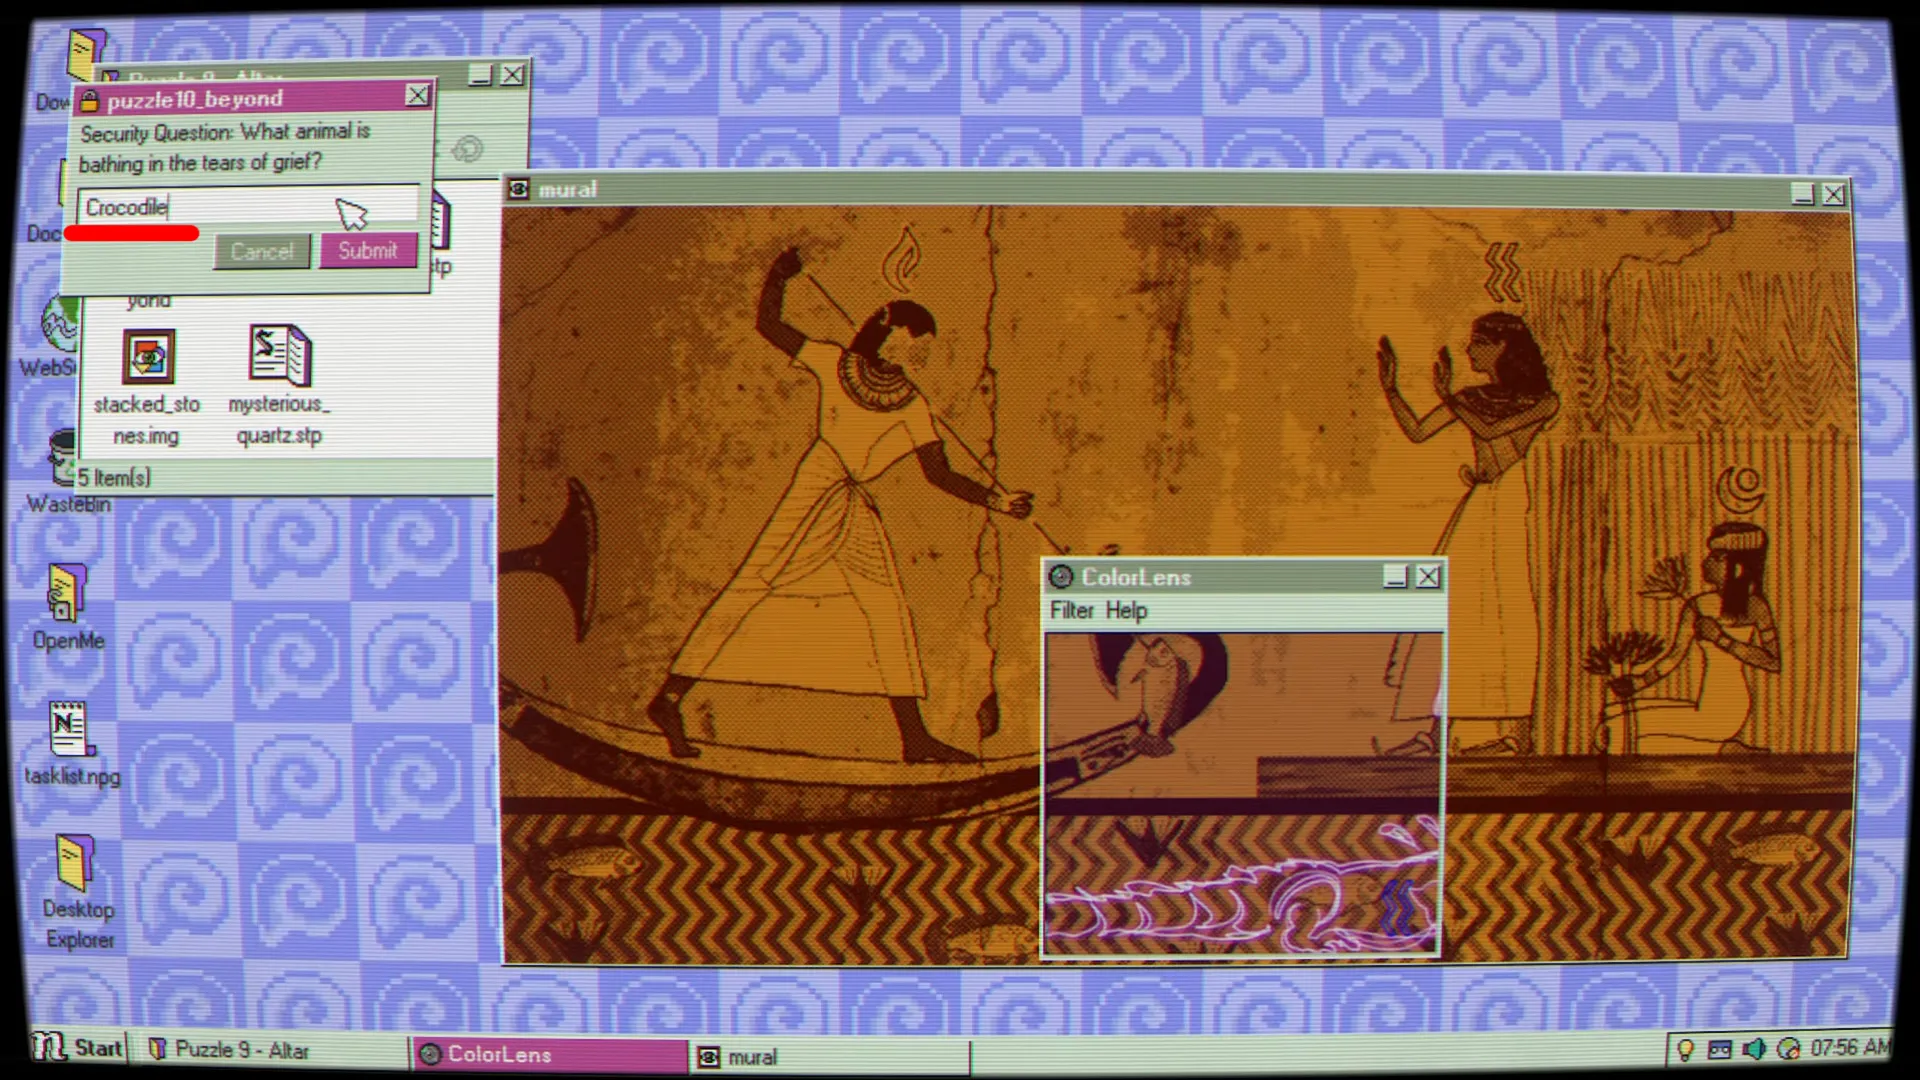
Puzzle 10 is the biggest one in The Cave. Use your lens on the mural in the room, and each color gives you one of the four security answers. Each color on the mural gives you one answer, in this order: crocodile, 14, fire, and Walleye.
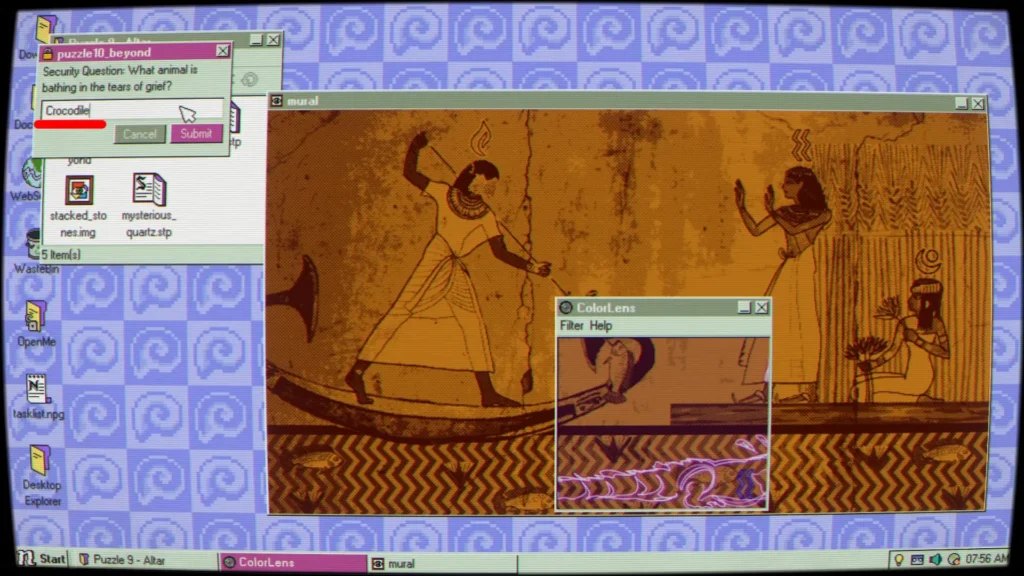
There’s also a hidden achievement here. Instead of typing Walleye, type father, and you’ll unlock This Is Not Your Computer.
The Temple
After The Cave, you reach The Temple. The starting password is Shai. From here, the game splits into three paths, and you can do them in any order. Each path’s chamber password is just the name of that chamber.
Path 1: Anubis
Start password: Anubis
For the Heart and Feather puzzle, compress the Heart file and duplicate it until you have four copies, which should weigh 120 KB total. Then unpack the Feather file until it also weighs 120 KB. A password appears at the bottom of the image once the weights match.
Answer: Ammit
Next comes Locked Jaw. Check the left_wall file for a hint about a password you already used, then open the source code of Following_a_voice. You’ll find the placeholder text ABRACADABRA sitting in a markdown field. Replace it with Inanna, the password from Puzzle 1.
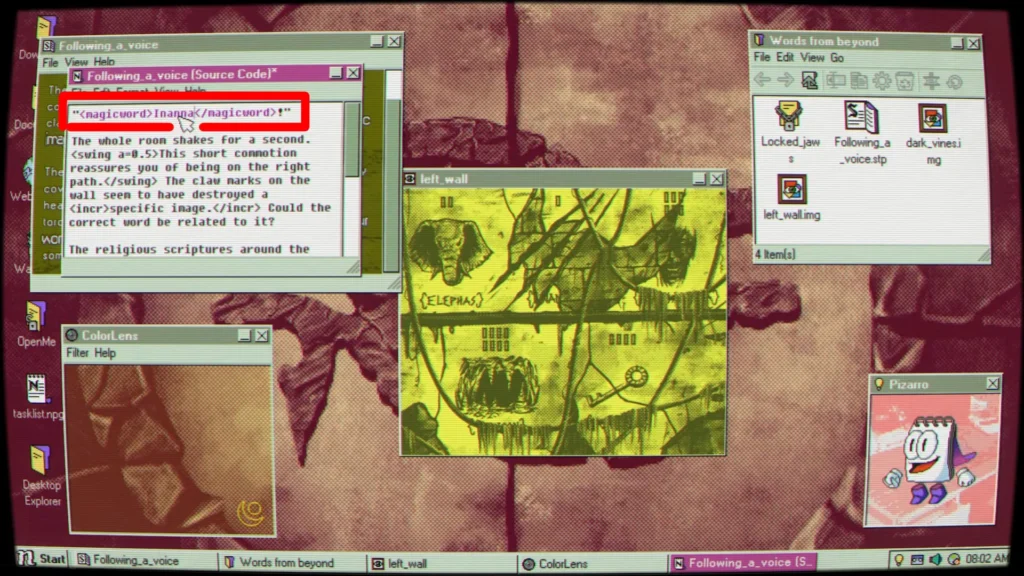
The final part of this path needs all five passwords you’ve collected so far. The numbers you’re given correspond to letters.
Answer: SEKHETAARU
Path 2: Thoth
Start password: Thoth
The Hall of Mirrors is a maze puzzle. Use your color lens to reveal the correct path, then line up the two image fragments to solve it.
Password: 5267
The Hourglass puzzle is one of the trickier ones. You need the archaeologist’s notes, the hourglass itself, your lens, and the clock. The trick is that the clock time multiplied by the hourglass’s value gives you a number. A red face on the clock equals 48, and the clock shows 12 at that point, so 12 times 4 gets you there. Apply the same math to each symbol: red eye is 18, red feather is 35, blue moon is 4, and scepters is 10.
Blue Lockbox password: 67
The Blue Lockbox holds raw_ore.img. Open the NextOS date and time settings and push the year at least ten years ahead, and the ore turns into sapphire.img. Keep it for the Scarab Podium.
Path 3: Ra
Start password: Ra
The folder holds about a hundred near-identical coal error files. Sort by size and the heaviest one is burningCoal36.err. Rename it to .img, then copy it until three coal images exist. Open yourHands.img and check it with the red color lens to reveal the password.
Password: Sahmat
The Tomb Site puzzle needs you to open pillagedTomb.stp in source code view and find the empty tag. Type in the exact phrase WE ARE INCOMPLETE WITHOUT YOU. The epitaph in the tomb points at the About pages of three programs if you want to work it out yourself. Talk to Pizarro afterward, then compress and reopen the “a deadly mistake” file.
Red Lockbox password: MERNEITH
Once all three paths are done, collect the three treasure files and place them over the Scarab Podium image to move on.
Part 2: M4x1mus and NextRooms
This is the longest chunk of the game by far, a little over an hour even if you know where you’re going.
M4x1mus Password Recovery
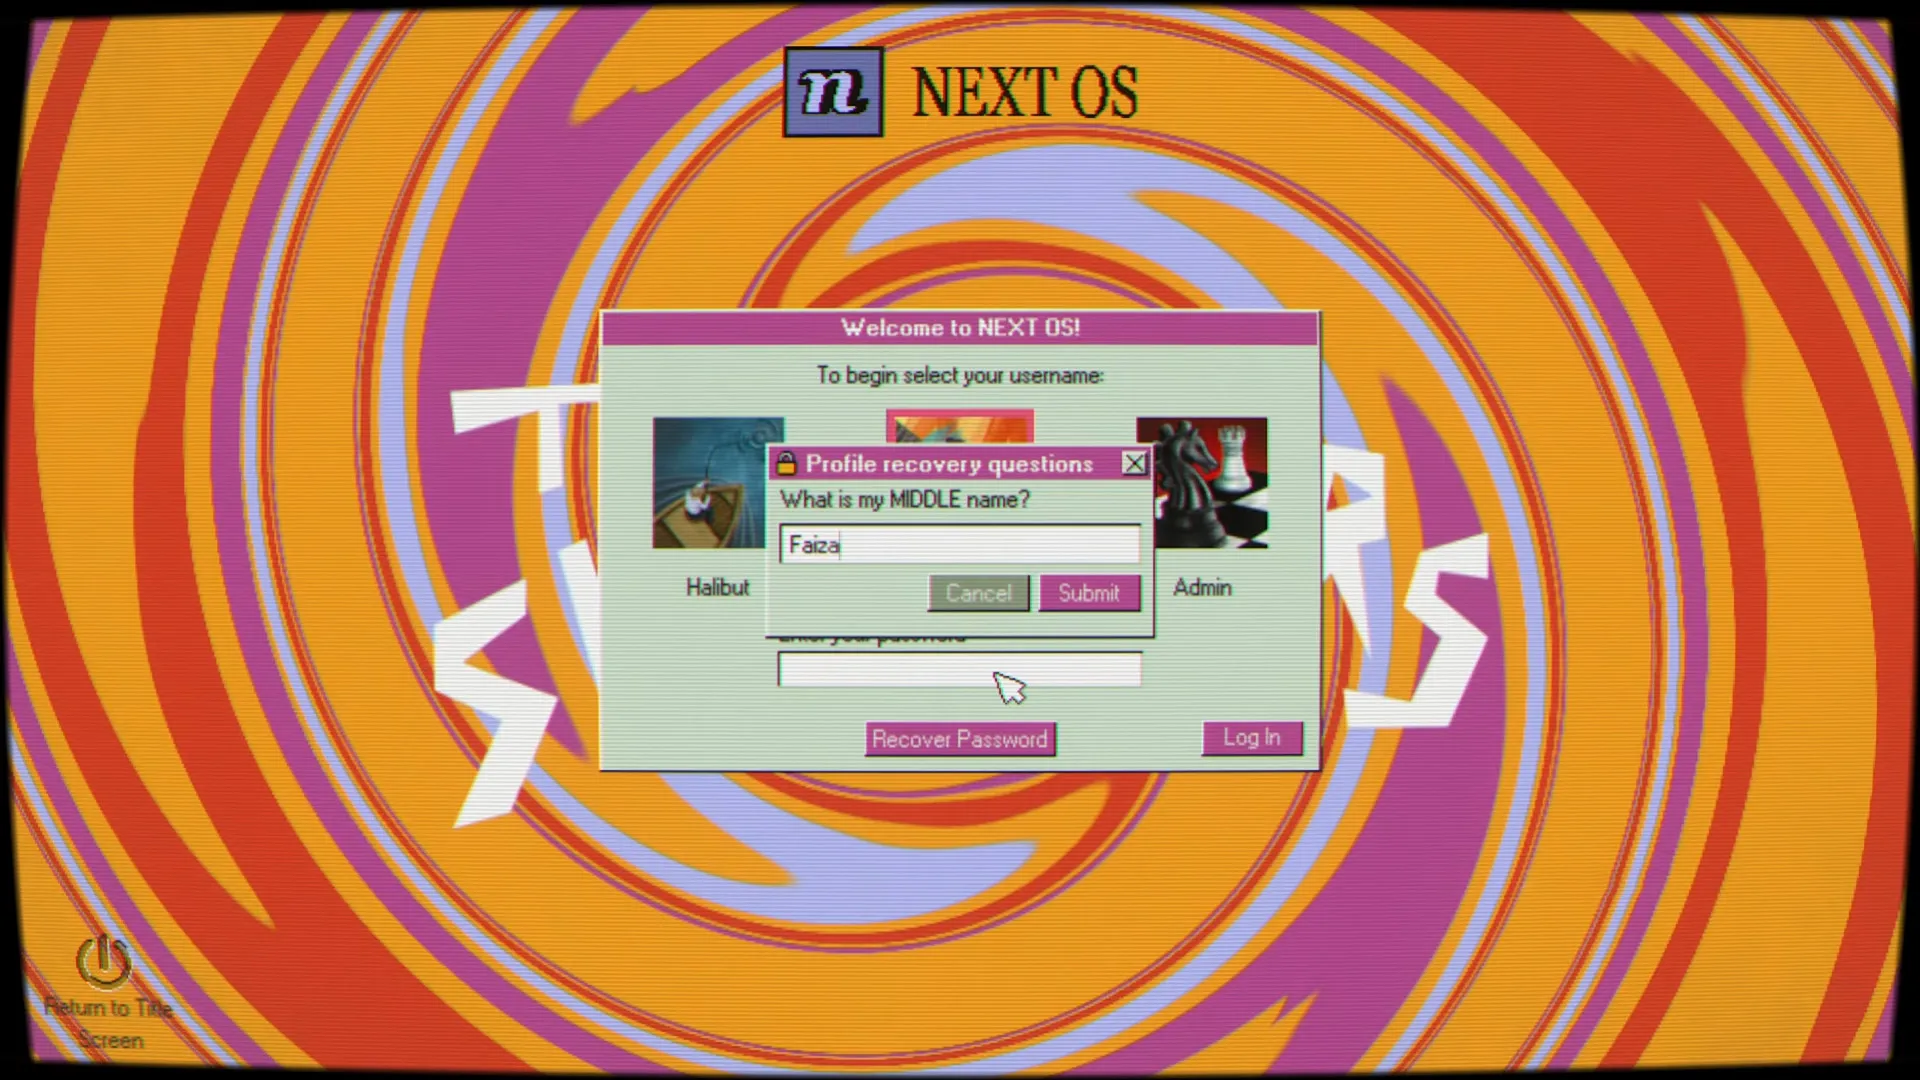
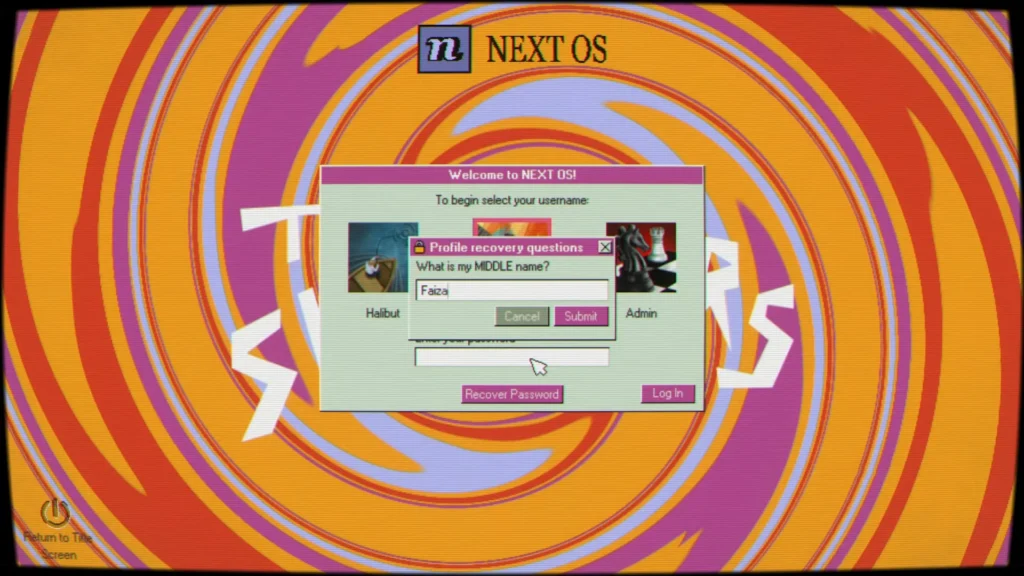
Before you can access M4x1mus’s profile, you need to answer three recovery questions found in Chronolog entries scattered through Part 1.
| Question | Answer |
|---|---|
| Childhood dinosaur toy | Stegosaurus |
| Future school | Cascadia |
| Middle name | Faiza |
The fridgemagnets.com Clue and Login
The in-game internet looks offline, but a specific browser link still works. Type in fridgemagnets.com/posts/m4x1mus/06-07-96. The page hints that the password uses someone’s initials.
Password: POWER
After that, a puzzle tells you not to move. Just leave everything alone and wait for the screensaver to kick in, then swap your screen protector over to the maze pattern to solve it.
Once you’re through, you reach the NextRooms login screen.
Username: The_Max Password: sweaters123
NextRooms Floor 1: Kojami Code and Compass
A nearby computer holds the Kojami Code, which you’ll use later from the main menu.
Kojami Code: North, West, South, East, South, West
There’s also a compass puzzle tied to a clock in the corner of your screen. Line up the directions with the red arrow marking north, then enter the sequence.
Room Codes: RC-CLR7V40 and RC-L1Z4RD5
Note that the compass rotates in every room and the directions are randomized per playthrough, so read the clock again in each room instead of copying a fixed route.
K4M4R3N4 Quiz
Watch the store videos to answer the first three questions. The fourth one asks you to order three movies by emotional progression, going from a happy family to divorce to death.
| Question | Answer |
|---|---|
| Dream in Gouache | TheSweaters |
| Slasher Fest | Zombie |
| Rod and Reel | Red |
| Linkearlier’s After Trilogy | PineappleSummer |
Installation Wizard
You’ll need a fortune ticket. Also you’ll need the rabbit puzzle and a deck of cards to solve this one. Draw the symbols shown inside the rabbit puzzle to get three cards: 6 of diamonds, jack of hearts, and 3 of spades. Rename these as 6D, JH, and 3S to unlock the password.
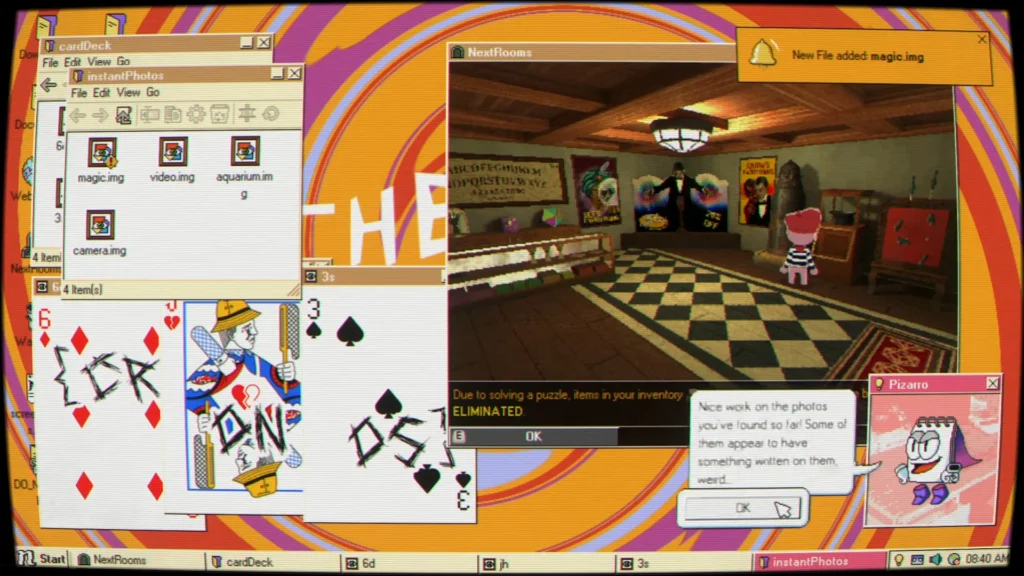
Answer: CRONOS
Pet Store
There’s a lot to interact with here. The cash register password relates to fish and shows up in the Aquarium’s source code. Talk to CJ for the correct order of reptiles, then clean the two terrariums that match his list. If you stay still, the right screensaver loads faster, and the colored fish stripes give you the final number in order once you count them.
Password: 3142
If you clean a terrarium window completely, that also unlocks the Neat Freak achievement.
Wormhole and Paint Store
Count the corners on each spaceship image on the TV display to build a 3×3 number grid. Use the color lens on the 8-ball to figure out what each color adds or subtracts, remembering that the bottom-middle piece is a cube, not a flat image.
Number grid:
8 1 6
3 5 7
4 9 2
Overlay this grid onto the strange painting with symbols to get three passwords, one for each ripped piece of the painting.
Painting passwords: 896, 712, 354
Arcade and Vendor
The Arcade card password sits in the Janitor’s locker on Floor 1.
Locker password: 0321
Play any arcade game to completion for a ticket, then duplicate it and compress the copies into zip files to farm more tickets. Once you’ve got enough, redeem them at the prize counter for items you’ll need later, including the vending machine manual.
For the vending machine itself, check the Trash Can near it for a grid of letters and numbers, then plug those coordinates into the MineSniffer game at the Cabinet Arcade Store. This reveals the exact amount needed. The squares you need in MineSniffer are B4, I7, G3, C8 and J5.
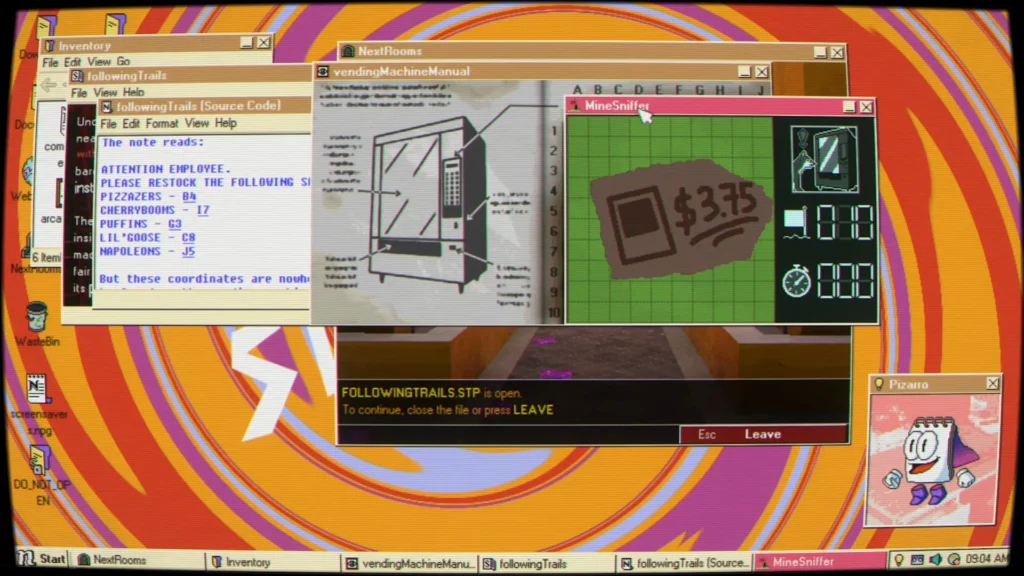
Vending machine amount: $3.75
You start with only $1.00 from a coin picked up earlier, so duplicate that coin file and compress the copies until you reach the exact total.
Secret Room and Photo Studio
Find the wall with the water symbol and use your blue color lens to reveal a hidden door. Inside, each room asks you to match a painting’s eyes and mouth to items on a nearby table using files from your Sticker Pack: bliss, wrath, and grief. The last room needs a mixed combination of grief eyes and bliss mouth.
The nonogram on the Saturno Photo Studio shutter builds a key pointing to the right. One black square stays empty, the fourth from the top and the fourth from the left.
Inside, check the portraits on the wall for the Store Manager’s outfit, then dress the mannequin to match.
Mannequin outfit: Green shirt, blue tie, fedora hat
This unlocks the Dark Room. Inspect the case files and witness statements inside, then dress the mannequin again based on what the witnesses describe.
Crime scene outfit: Blue shirt, green tie, glasses
Once the correct outfit is on, the scene moves on by itself without you touching the camera. Back in your room, arrange your nine collected photos into a 3×3 grid by renaming them in this order:
Camera | Paint | Candies
Aquarium | Crime | Magic
Emotions | Arcade | Video
This triggers the transition into Part 3.
Part 3: Admin
This profile is shorter than the last one, but it leans harder on the Terminal and the Tower.
Terminal Commands
To unlock Desktop Explorer on this profile, open the nOS Terminal and type these two commands in order:
chrono restore
memories/12-09-1995.res
The restored Chronolog entry contains your next password. You can also type Uninstall DesktopExplorer into the terminal to unlock the Clever Girl achievement.
de_analysis Password
Run diagnostics on de_analysis to trigger an encryption puzzle. Check the hidden files inside the Max documents folder for the key.
Password: TAROCCHI
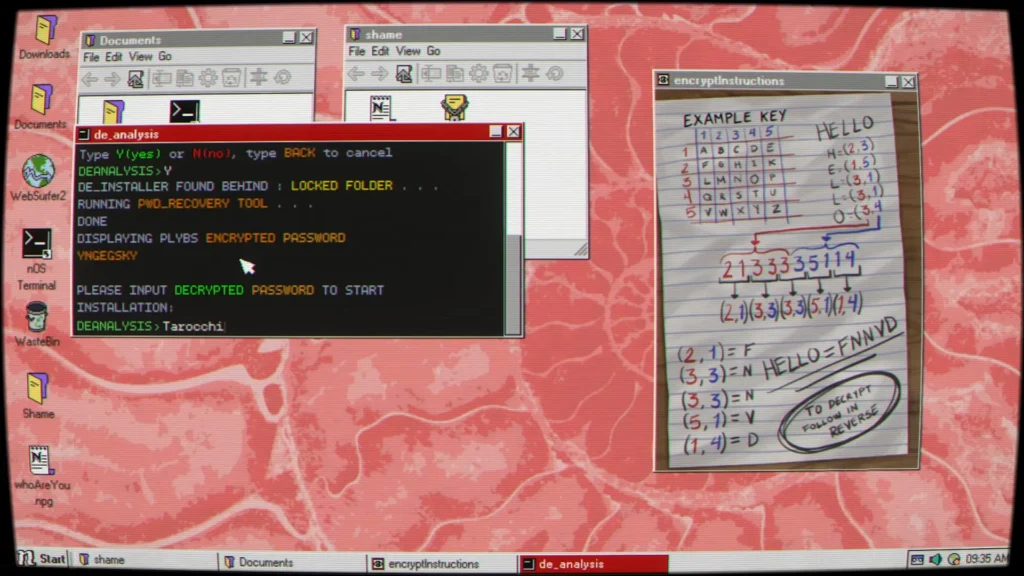
The Admin section also has several readable emails with encoded text, if you want to dig into the lore:
- TEGETICULA: THIRD AND FINAL WARNING
- GOLDEN RATIO: OATH OF SILENCE AND CONSEQUENCES
Both are encrypted with the same method as the de_analysis puzzle, so run them through Max’s encryption key if you want the full text.
Tower: Orb Puzzle and Portrait Puzzle
Study the tablet and the moon at the tower entrance to unlock the door.
The Orb Puzzle references a classic riddle about legs at dawn, noon, and dusk. Once the orb activates, interact with it in this order:
Solution: Look at the right orb, touch the left orb, touch the middle orb.
For the Portrait Puzzle, use your hand item to cover the light. Then type “feel wall” followed by “use lever.”
Part 4: Guppy
This is the final part, and it revisits Halibut’s profile one more time before ending on a chess puzzle.
Memory Lane Directions
Turn the Underwater Ruins file into an image, then stretch the faded instructions until three arrows appear. The rabbit points left, the skull points right, and the frog points down. Match these with the blue, red, and yellow color lenses to get the full direction sequence.
Answer: Left, right, left, below, left, right, below
What Is Left Passwords
Check the background pictures in this section carefully for three separate passwords.
| Clue | Password |
|---|---|
| is slowly | bigCatch |
| fading | dontForget |
| away | anglerTrio |
Chess Puzzle
Before the board will accept anything, inspect the chessboard then step away from it. A pawn lands in Maxine’s inventory, and placing it in front of the mirror in her world transforms it into the piece you’re missing.
Solution: King on B1, knights on B2 and C2, rooks on C1 and A3, pawn on A2
If you duplicate several white pawns during this puzzle, that also unlocks Power to the People.
The Words from Beyond puzzle closes Maxine’s storyline. Open the mural’s source code and change the magic word to Inanna, then head back to Halibut’s recycle bin for one last unlocked item.
Missable Achievements
A few achievements can be permanently missed if you’re not paying attention at the right moment.
| Achievement | How to unlock |
|---|---|
| This Is Not Your Computer | In Puzzle 10, type father instead of Walleye |
| I Am the Law | Dress the mannequin in a guard hat, purple shirt, and blue tie before solving the final mannequin puzzle |
| Neat Freak | Fully clean one terrarium window in the Pet Store |
| Muralist | Paint on the mural in NextRooms Floor 2 |
| Clever Girl | Type Uninstall DesktopExplorer in the nOS Terminal |
| Kojami Code | Enter the Kojami Code from the main menu, not in game |
Desktop Explorer launched on July 17, 2026, and this walkthrough is built from cross-checked community guides and gameplay footage recorded after release. If a future patch changes any puzzle, the passwords above may shift, so treat anything that doesn’t work as a sign the developer changed it, not a typo here.