
Farever Crabgantua is a notorious early- to mid-game boss fight in the game. This massive boss acts as a strict skill check. It will easily wipe out your party if you walk in unprepared. You need to memorize its attack patterns and manage your resources to survive. A Farever Mage is more likely to survive this boss fight. Keep reading to learn why and exactly how to defeat Crabgantua.
What You’ll Read:
Crabgantua Farever Quick Guide
Crabgantua is a massive Creature of the Nepsids. Handlers originally bred and trained it to be a giant warmount. That plan quickly failed when the beast devoured its tamers.
Here are the core stats for this boss and all you need to know about him summarized: Level: 8, Type: Crab, Faction: Manfish.
| Encounter Focus | Quick Strategy |
| Nia’s Fury (Wipe Mechanic) | Deal heavy damage early to force safety platforms to spawn. Wait until 1.5 seconds on the cast bar to hit the water spouts. Mages can just Blink through the wave. |
| Devour (Insta-Kill) | This lunge is fatal. Kite the boss far away from your ranged DPS teammates so they can attack safely. |
| Tidal Slash | Huge frontal swipe. Step out of the way and use the long 4.5-second cast time to heal up or deal free damage. |
| Minion Spawns | Nuke the small crabs immediately. They will body-block you and ruin your escapes. |
| Best Loot to Farm | Book of Mimazan (Rare Water Mage Tome) and Clawdius (1.0% drop accessory for dash and stamina). |
Crabgantua Boss Mechanics & Attack Patterns
Crabgantua has 5 different attack patterns. Fortunately, they are easy to handle. You just need to stay calm and learn them.
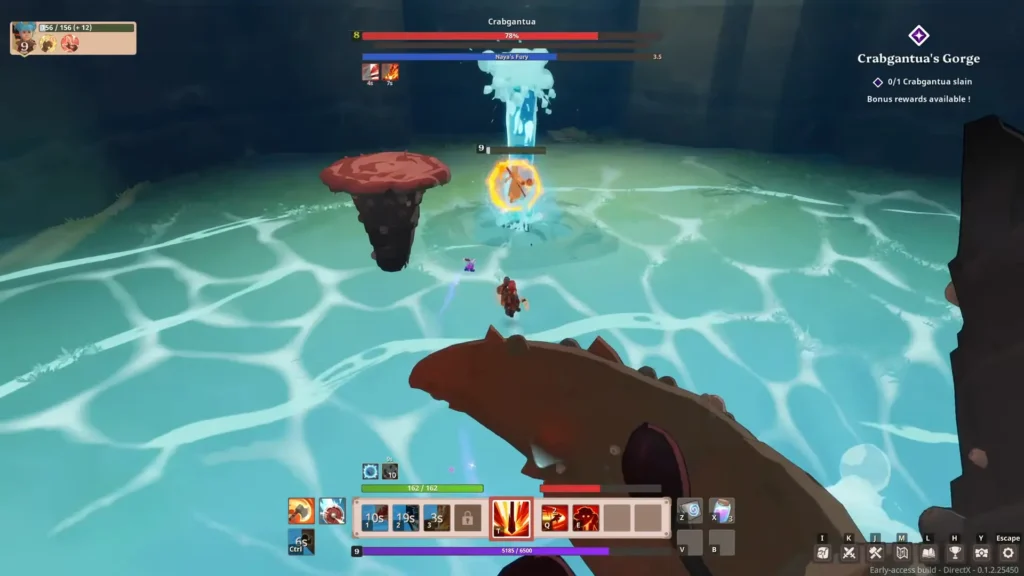
Note: Keep a close eye on the blue charge meter located directly beneath the boss’s health bar. This meter indicates exactly how long you have to react or reposition before an attack lands.
The 5 Primary Attacks
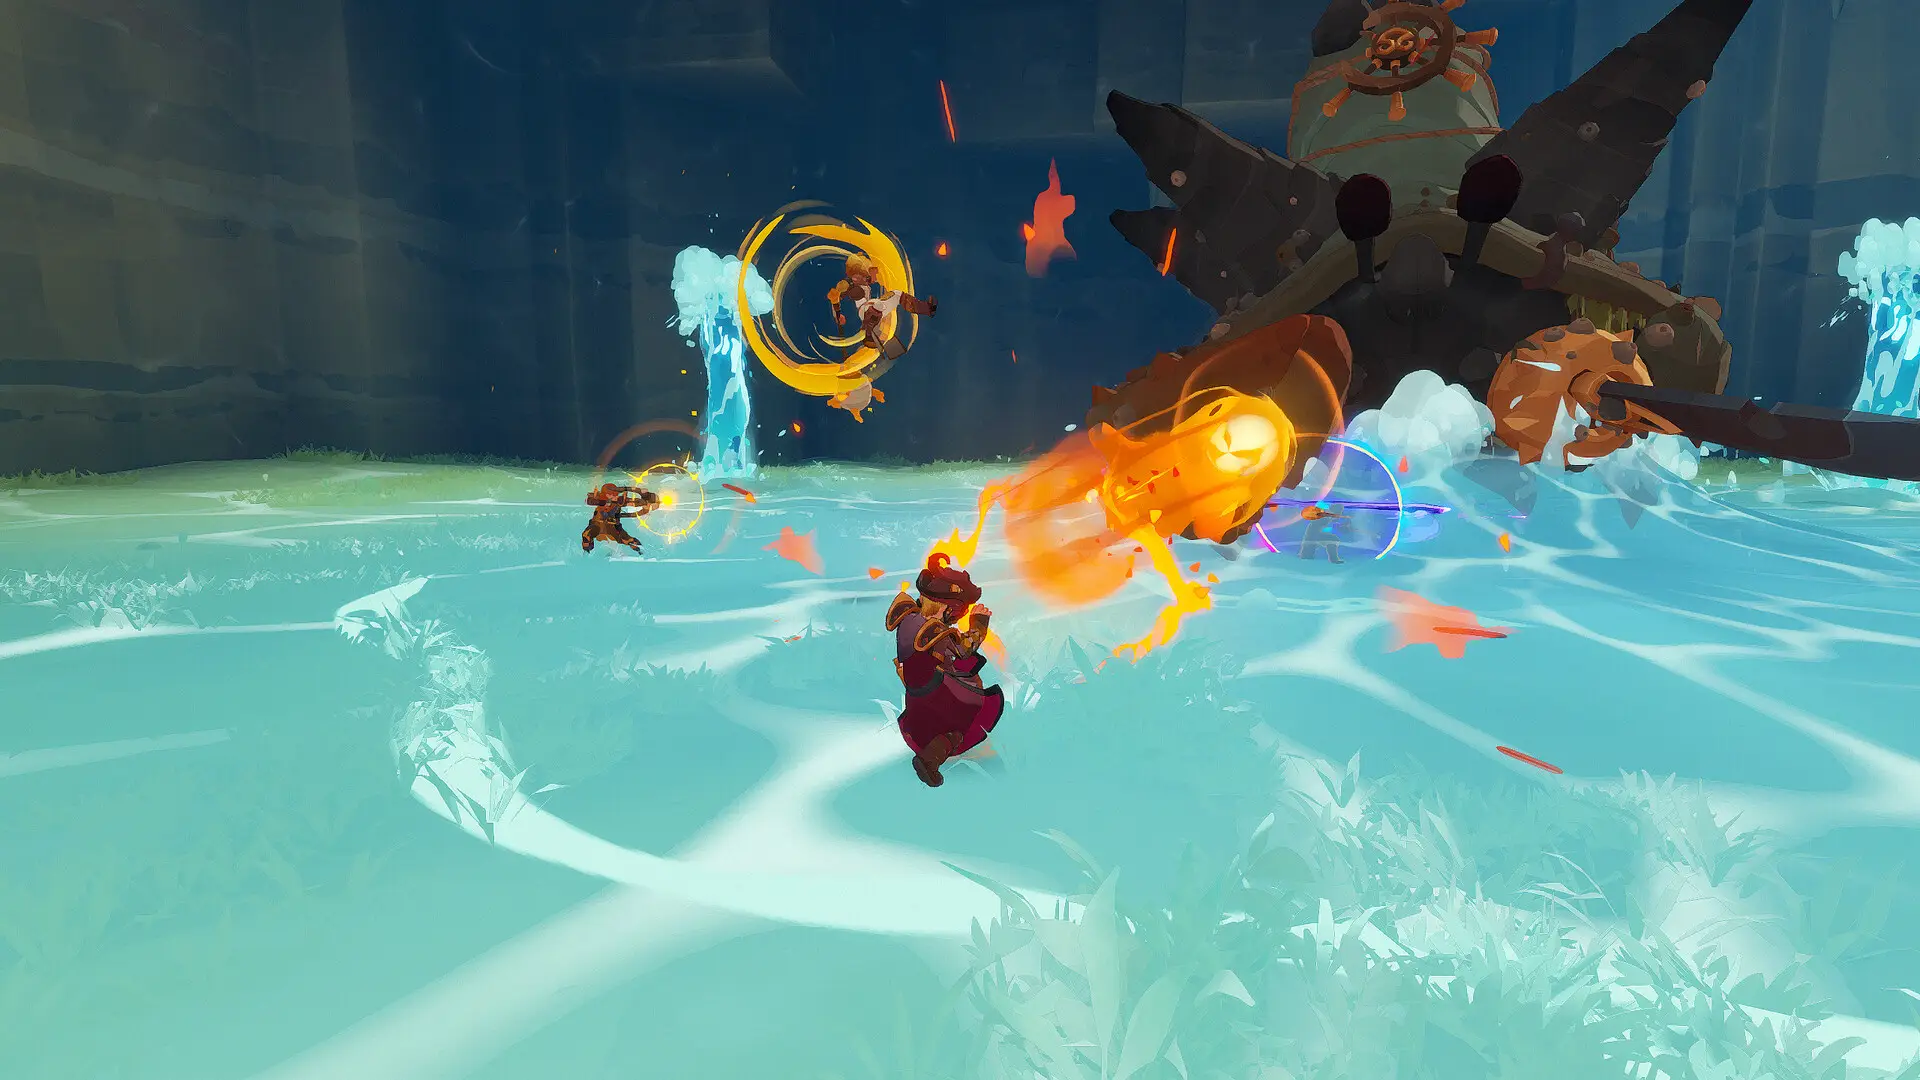
Tidal Slash: This is a swipe attack he does to what is in front of him with a 4.5-second cast time. Step out of range or stay behind the boss to avoid it. You can use this long window to drink potions or deal some heavy damage, as he is stationary.

Devour: Here, he deals a massive melee lunge that instantly kills you. If you pull aggro, run away from your ranged teammates so they can keep shooting safely.

Dash: Crabgantua quickly repositions to the center of the arena. This always signals that Nia’s Fury is coming 10 seconds later.
Nia’s Fury: This is when he floods the arena and wipes your team. It bypasses all shields and standard damage reduction.
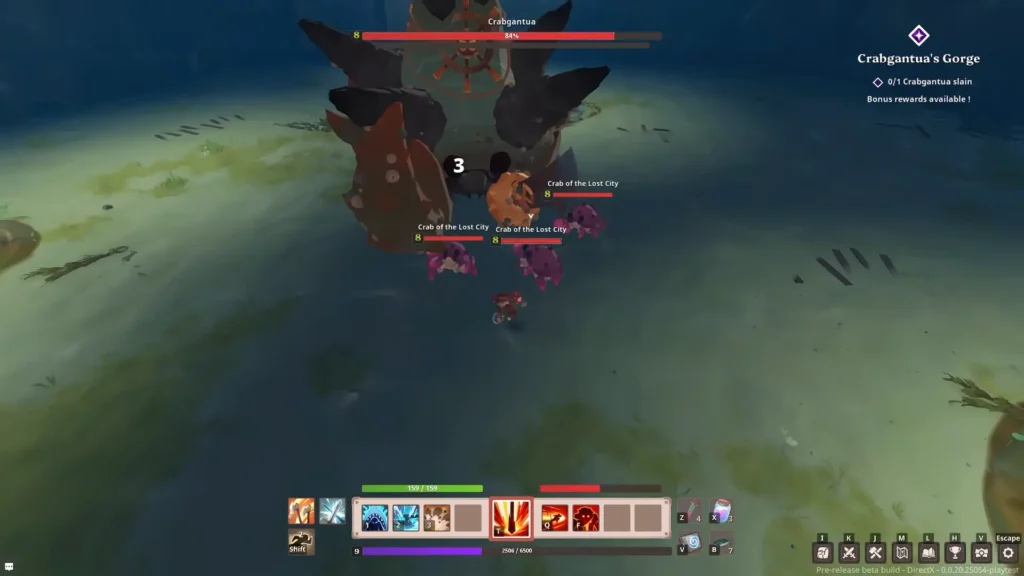
Minion Summon: The boss spawns smaller crabs to crowd the arena. Hit them with crowd control immediately. Do not ignore them. Otherwise, they will body-block you during the Devour phase.
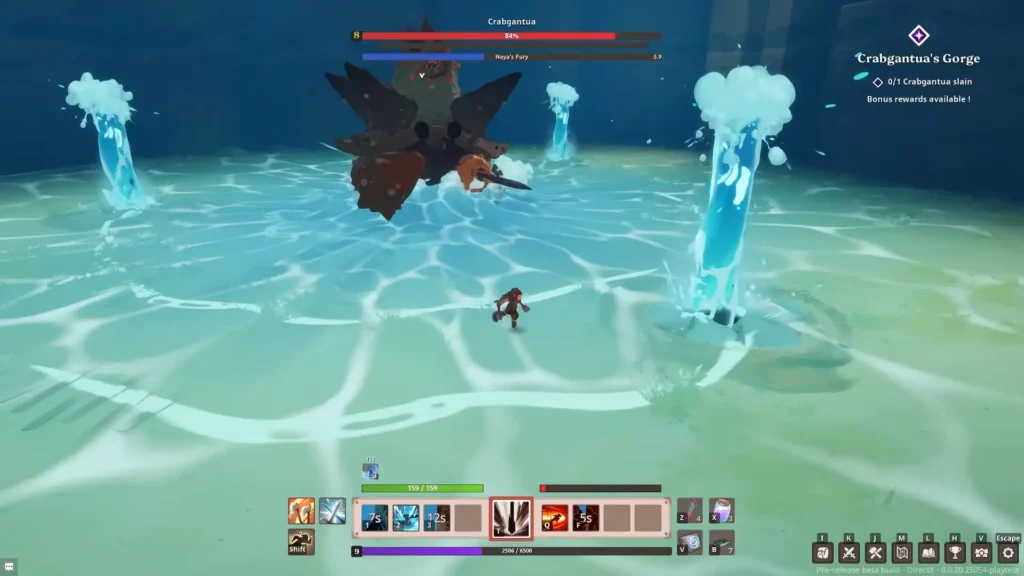
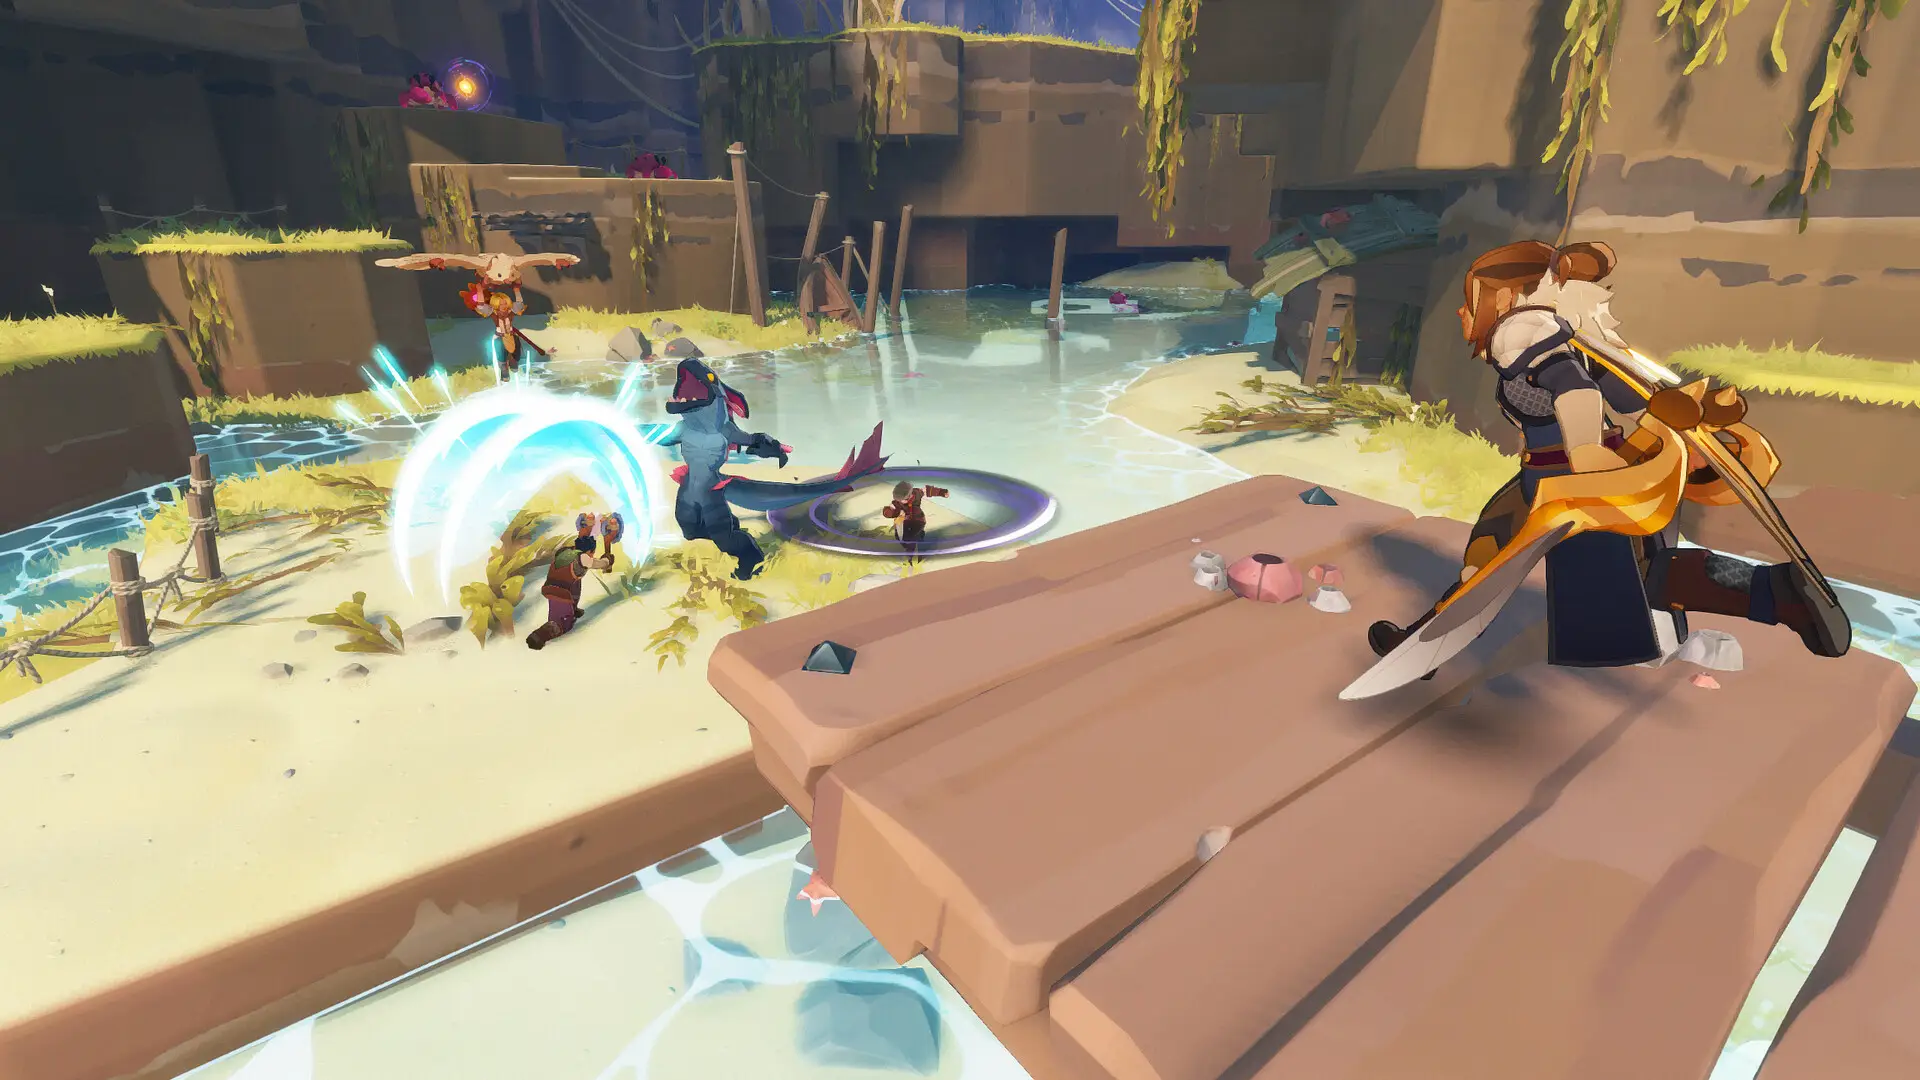
How to Survive the Nia’s Fury
Nia’s Fury is the most dangerous phase of this boss fight. Naya’s Fury happens when he dashes to the center of the arena, and the entire ground begins to flood. You will see a 10-second countdown before a tidal wave takes you over.
To survive, you need to use the water spouts to land on the mushroom-shaped platforms that spring out from the ground/arena or simply fly away until the waves settle. (Like the picture below) But DO NOT jump on the spouts right away. Wait until the timer hits between 1.5 and 2 seconds.
You must deal enough damage before the first wave hits. Wait for the 10-second charge timer. During this window, mushroom-shaped platforms will appear, and you must use water spouts to reach them before the arena floods. If you are a Farever Mage, you can use Blink to dash through the wave. Just time your Blink ability to phase right through the wave.
Read our Farever Weapons guide to equip the best weapon and deal the most damage against this crab.
Crabgantua Farever Class Strategies
Your role in the party completely determines how you fight Crabgantua.
Ranged and Mages
Mages shine in this boss fight because they deal damage from a safe distance. Here’s the best way: Use Fireball and Flamethrower to apply constant burn damage. This is crucial when the boss chases a target during the Devour phase.
Use the long Tidal Slash cast window to recover your Spark or mana. Always keep your defensive shield procced and save your big Area burst spells to clear out minion spawns before they crowd the arena.
Melee and Tanks
Melee fighters need serious patience for this boss. You must disengage completely during the Devour and Nia’s Fury attacks. Most importantly, stay directly behind the boss whenever possible. This positions you perfectly to avoid the Tidal Slash hitbox.
If Crabgantua targets you for Devour, immediately lead it away from your ranged teammates. This lets them take free pot shots safely.
As a Rogue, use Shadowstep to instantly teleport behind the boss during Tidal Slash or to create distance during Devour. And as Warriors, save your Charge ability to quickly dash toward safety spouts or away from the boss’s lunge.
If you want to learn more about classes in Farever, check out my Farever Classes guide.
Farever Crabgantua Loot Table
You didn’t die all those times in vain. Crabgantua drops high-tier Grimoires and equipment. Players hunt this boss specifically for its water-based magic items. I suggest farming this boss until you obtain the Book of Mimazan. It provides unique offensive power and utility.
Here is the complete loot table:
| Item Name | Type | Utility | Drop Rate |
| Book of Mimazan | Grimoire / Tome | Water Magic, High Intellect | Rare |
| Clawdius | Weapons | Extra Dash Distance, Stamina Regen | 1.0% |
| Crustacean Plate | Heavy Armor | Physical Defense, Water Resistance | Common |
| Crabgantua’s Kneecap | Shield | Water Magic | 1.0% |
| Meropsian Crab | Mount | Sell Price: 1,000 | 1.0% |
| Poetrident | Trinket/Accessory | Sell Price: 30 | Rare |
Essential Combat Tips for Defeating Crabgantua in Farever
Now that you know the patterns, it’s all about the execution. Follow these core strategies to make sure you’re the one walking away with the loot:
- Watch the Blue Meter: Don’t just watch the boss; keep a close eye on the blue charge meter located directly beneath Crabgantua’s health bar. This visual cue tells you exactly how much time you have to react before an attack lands.
- Survival Over DPS: It is tempting to stay in and deal damage, but your DPS is zero if you’re dead. Prioritize your positioning and survival over maximizing your damage numbers.
- Cooldown Management: Save your mobility skills like Blink, Shadowstep or Charge specifically for the Devour and Nia’s Fury phases. Using them too early can leave you trapped during an instant-kill mechanic.
- Don’t Get Greedy: Avoid overcommitting to attacks during instant-kill windows, even if the boss is down to its last bit of health. One mistake here will result in a total party wipe.
- Visual Telegraphs: Beyond the UI, watch the arena itself. Charge attacks are often marked on the ground, giving you a clear indicator of where not to stand.
- Add Management: Use your crowd-control skills the second the minions spawn. If you let them crowd the arena, they will body-block your escape routes during the more dangerous phases.
I think you are ready to defeat this big boss. Is there anything else I forgot to mention about Farever Crabgantua? Let me know in the comments below.
FAQ
What are the most important stats to fight Crabgantua?
You need Movement Speed and Stamina Recovery. Your DPS stats are useless if you fail to reach a spout or outrun the boss in time.
Can I block Nia’s Fury with a shield?
No. You cannot survive this environmental instant-kill attack with traditional damage reduction or shields. Survival requires an invulnerability frame or the platform mechanic.
Should I kill the minions summoned by Crabgantua?
Always kill them. These adds might have low health, but they easily body-block you and trap you in the insta-kill range during the Devour phase. Clear them with AoE attacks immediately.


